

You are probably searching for a way to password protect a WordPress site. There are multiple ways to add password protection to your WordPress site. You can password protect the entire WordPress site, wp-admin, pages, posts, categories, and even WooCommerce products.
The best thing is that you only need one Password Protected plugin to fully password protect your WordPress site. Isn’t that amazing?
In this WordPress password protection tutorial, we will show you three unique methods to password protect a WordPress site.
Ready? Let’s get started!
What is the Difference Between Private and Password Protected WordPress?
Private WordPress content is visible only to logged-in users with appropriate permissions, such as blog Editors and Administrators. This means that regular visitors, including search engines, cannot view the content unless they have the necessary credentials.
You might need to make your content private if it contains sensitive information, such as draft posts, internal documents, or pages under maintenance.
On the other hand, password protected WordPress content requires a password for access. With this method, you can share the password with anyone you wish, allowing them to view your content without creating an account.
Website owners use password protection to provide temporary access or to share confidential information with a select group of people.
3 Easy Ways to Password Protect WordPress Site
Now, you understand the difference between a password protected WordPress site and a private one. So, if you want to implement WordPress password protection on your site, check out the following three methods.
Firstly, Install the Password Protected Plugin
To password protect your WordPress site, you’ll need to install and activate the Password Protected plugin. Here’s how you can do it:
- To add a plugin, go to the WordPress dashboard and go to Plugins → Add New Plugin.
- Search for ‘Password Protected’ and locate ‘Password Protected – Ultimate Plugin to Password Protect…’ in the search results.
- Click on “Install Now” and then ‘Activate’ to activate the plugin.
NOTE: Certain features like password protection for WordPress posts, pages, and categories require Password Protected Pro. If you want to update to the Pro version, follow these steps:
- Go to the plugin’s settings and visit the ‘Get Pro’ tab.
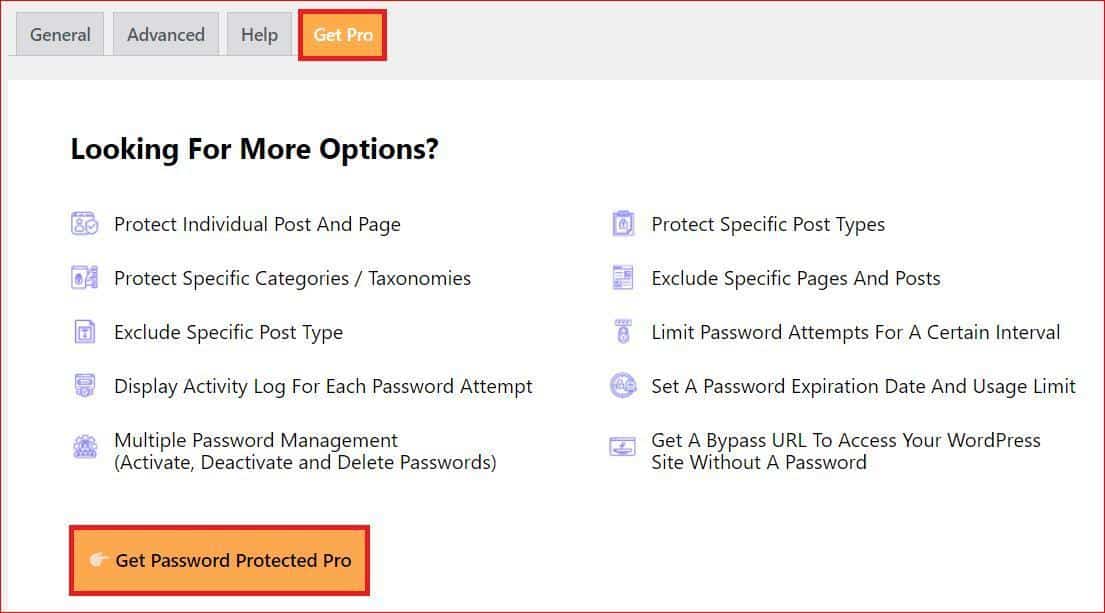
- To view the pricing, select ‘Get Password Protected Pro.’
- Choose a subscription plan that fits your requirements and complete the order.
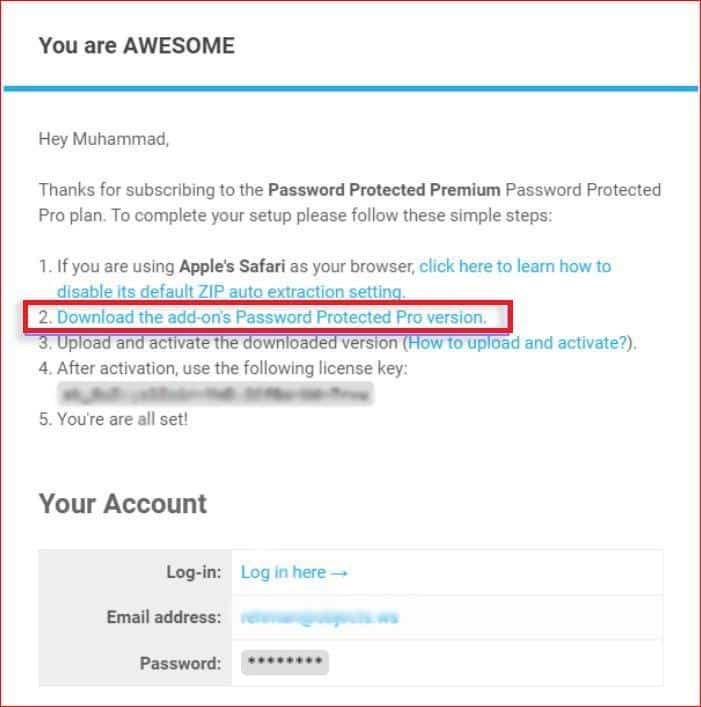
After purchase, the Password Protected Pro zip file will be emailed to you along with your exclusive license key.
Now, follow these steps to install the Password Protected Pro:
- Go back to the WordPress dashboard and go to Plugins → Add New Plugin → Upload Plugin.
- Upload the ‘Password-Protected-pro.zip’ file you received via email.
- To install the Password Protected Pro version, click on ‘Install Now’.
- Once installed, click on ‘Activate Plugin’ to enable the Pro features.
- During activation, you’ll be prompted to provide your license key. Input it for activation.
Congratulations! You’ve now activated the Password Protected Pro, which offers advanced features for WordPress password protection.
Method #1: Password Protect Entire WordPress Site
If you want to restrict access to only members or subscribers, it might be a good idea to password protect your entire WordPress site. A password-protected website ensures that only visitors with the password can access its contents.
To add password protection for your entire WordPress site, follow the steps below:
- Go to the Password Protected plugin located in the right-hand side menu of your WordPress dashboard.
- Access the General tab and activate password protection by toggling the button.
- Customize the ‘Protected Permissions’ to your preferences, ensuring the level of access you desire.

- Set a new password and specify the duration of activation.
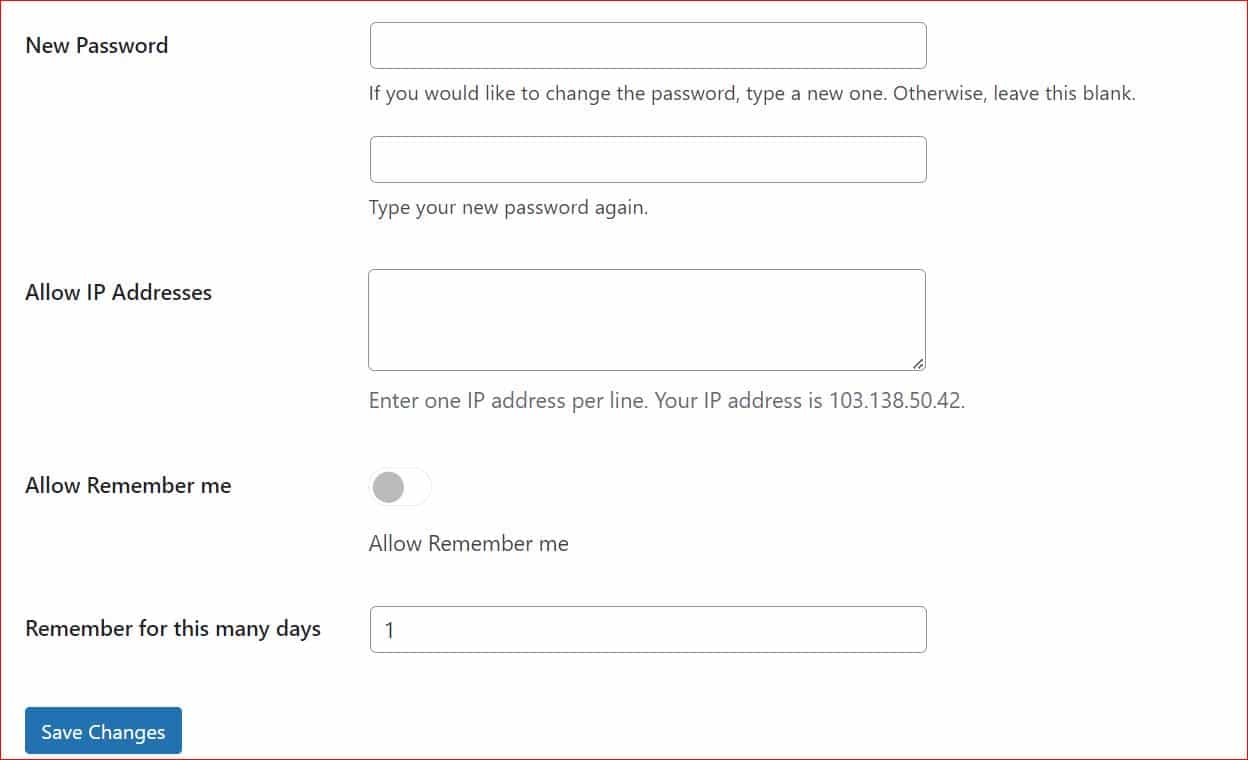
- Lastly, save your changes to apply the password protection settings.
From now on, visitors to your website will see a password-protected screen, which only users with the password can access.
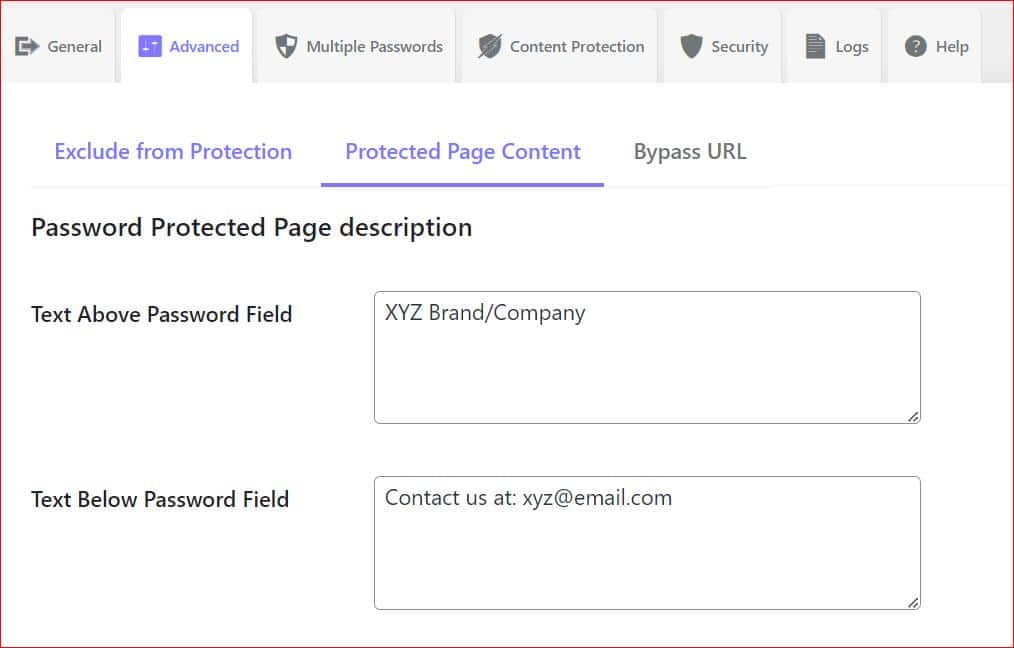
NOTE: For additional features like displaying custom messages on the password-protected screen, consider upgrading to Password Protected Pro. You can set up your message by navigating to the ‘Protected Page Content’ sub-tab under the Advanced tab in the plugin settings.
Also, if you want to password protect your WordPress WP-Admin page, click ‘Security’ and select ‘WP Admin Protection.’ Enable the admin protection and then choose your password and save changes.
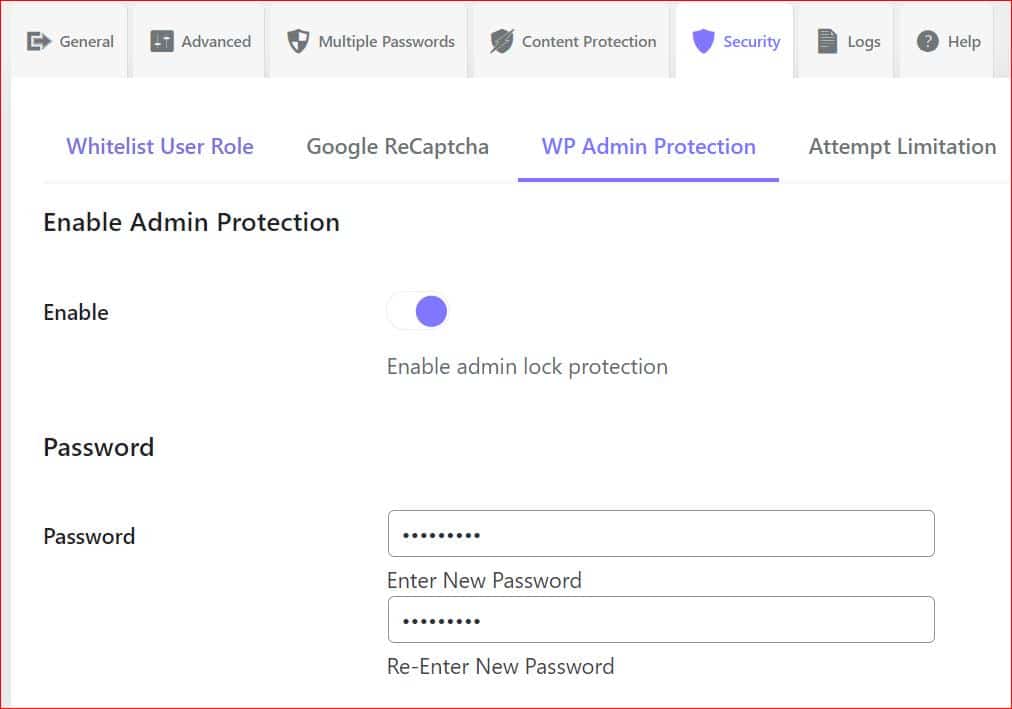
There you have it! You have now successfully password protected your WordPress login page.
Check out the next method if you want to know how to WordPress password protect page, post or a category.
Method #2: Password Protect WordPress Page/Post
If you want to offer an exclusive experience for your website visitors, you can add password protection for WordPress pages, posts, categories, and even password protect a WooCommerce shop page.
Follow these steps to configure password protection for any WordPress post type:
- Access the WordPress dashboard, then select the ‘Password Protected’ option from the right-hand menu.
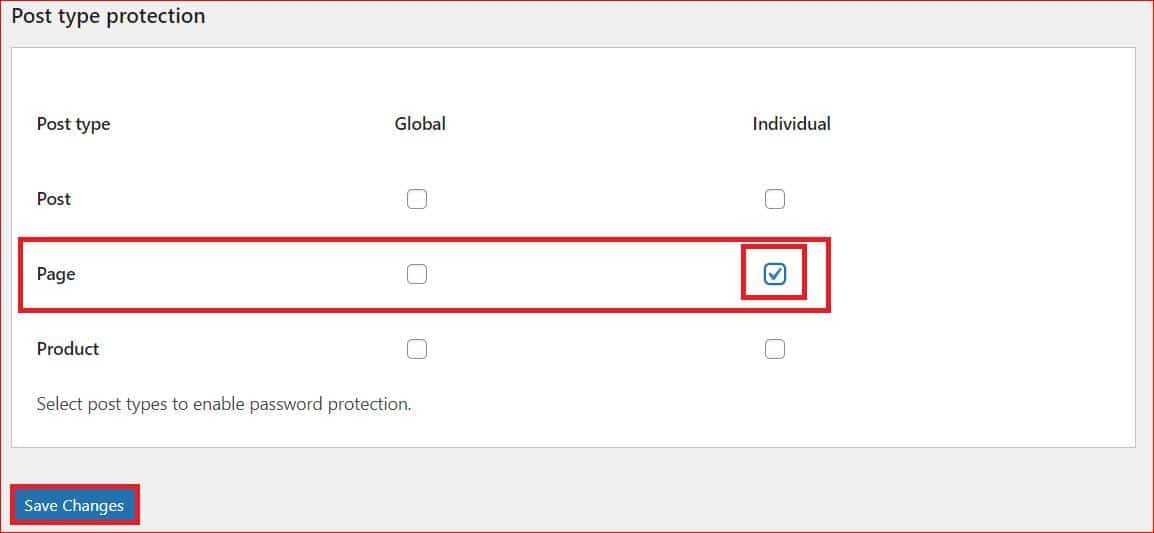
- Within the plugin’s settings, select the ‘Post Type Protection.’
- Checkmark the individual page protection option for the desired post types or categories, then click the ‘Save Changes’ button.
NOTE: The ‘Global’ column allows you to password-protect all pages.
Next, follow these steps to set a password for a WordPress page:
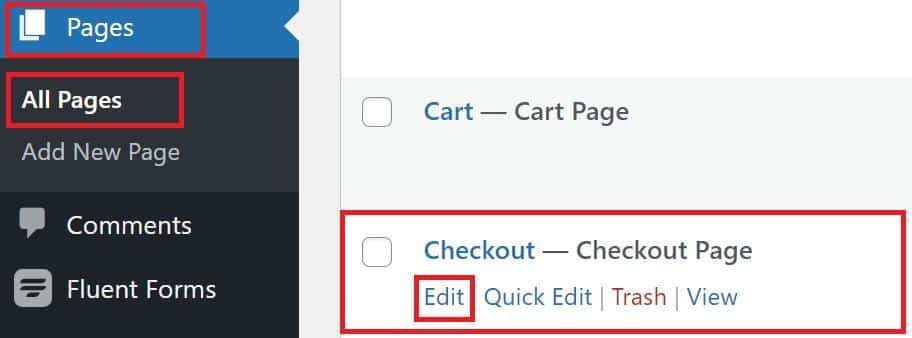
- To access the All Pages page, return to the WordPress dashboard and go to Pages → All Pages.
- Hover over the page you want to protect and click ‘Edit.’
- Click ‘Enable Password Protection’ at the bottom of the page, and then click ‘Save Changes.’

- After saving changes, configure the password for your page as follows:
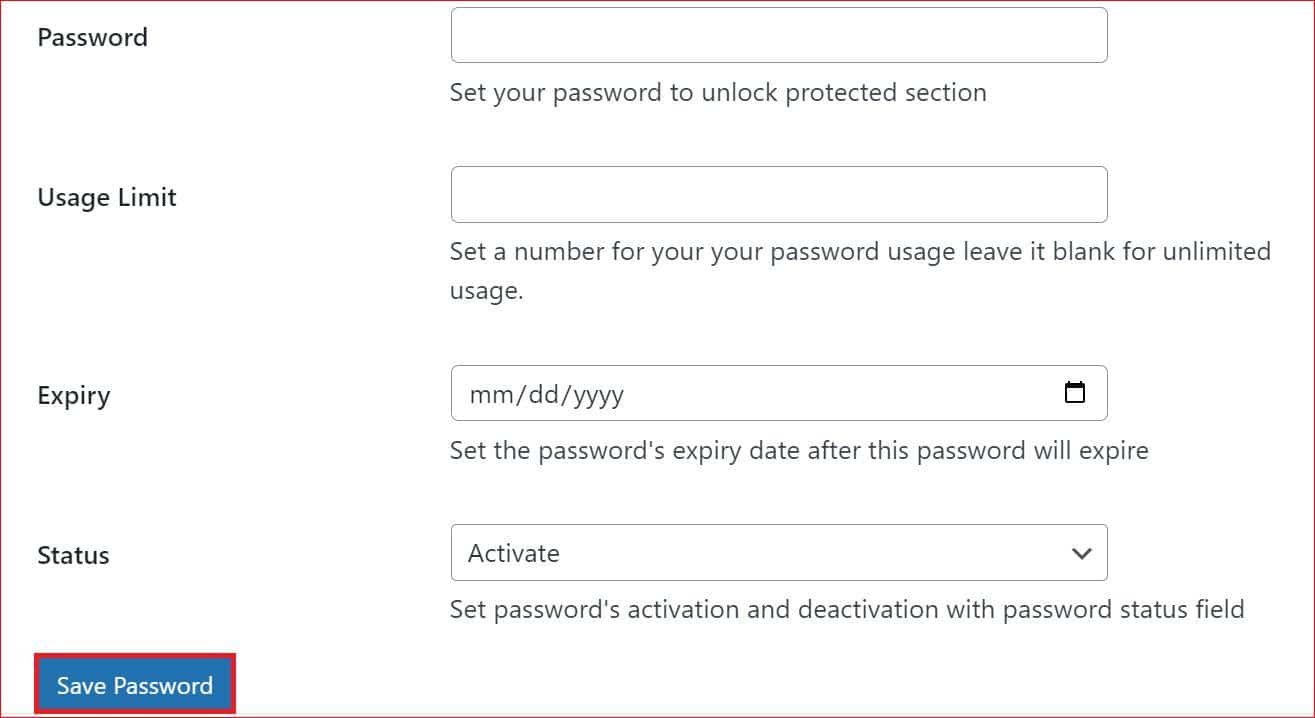
- Password: Choose an 8-digit password for optimal protection.
- Usage Limit: Limit the number of times a password can be used before expiring.
- Expiry: Set the expiration date.
- Status: For now, keep it ‘Activate.’
- Finally, select the ‘Save Password’ button to apply the password protection.
By following these steps, you can easily password protect WordPress pages, posts, WooCommerce product listings, any custom post type, etc.
Method #3: Password Protect WordPress Categories
To password protect WordPress categories, follow these simple steps:
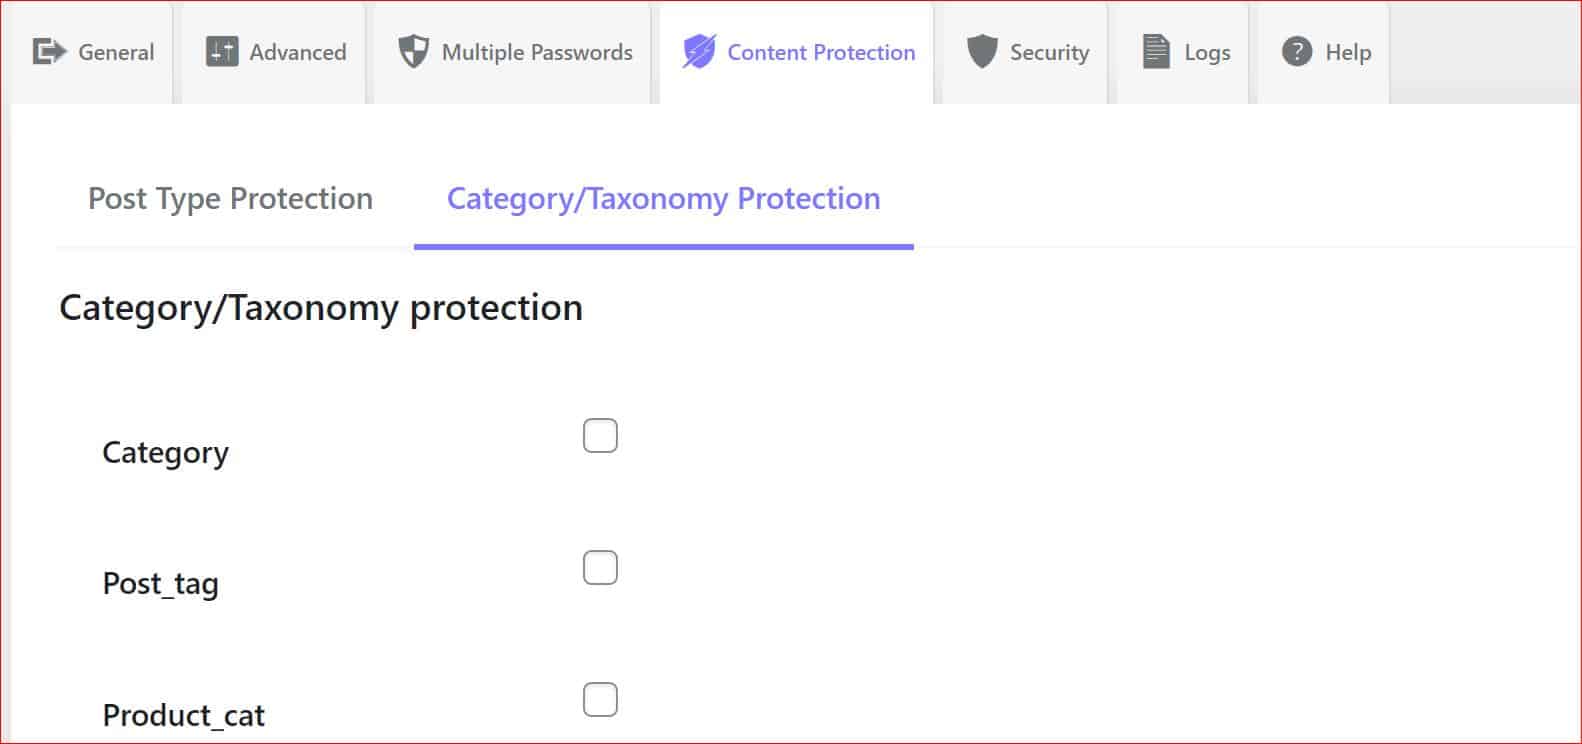
- Navigate to the ‘Category/Taxonomy Protection’ sub-tab under Content Protection.
- Select the category you would like to password protect, and you can also choose to protect ‘Post_tag’ if necessary.
Now, apply password protection to the selected category in the same manner we have shown you for WordPress pages and posts.
NOTE: Consider using our login designer plugin to customize the appearance of your password-protected screen for a consistent and branded user experience.
Implement Limit Login Attempts to Protect Against Brute Force Attacks
Once you’ve implemented the password protection for your WordPress site, don’t forget to set the limit for login attempts. The best part is that you can enable this right from the Password Protected plugin.
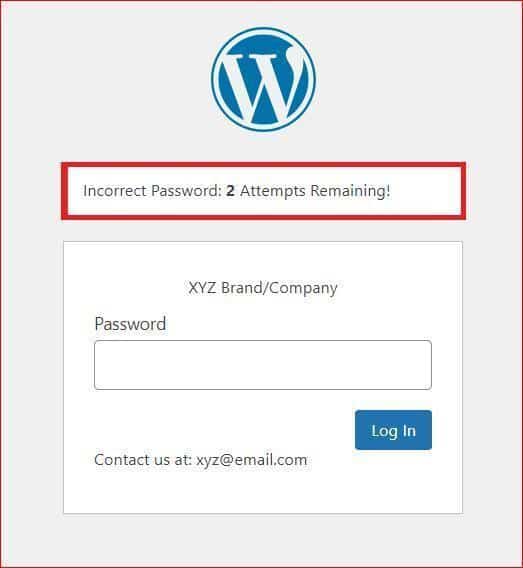
By setting a limit on login attempts, you effectively protect your site from any potential WordPress brute force attack.
To Sum It Up
With the Password Protected plugin, you can securely password protect WordPress site. Whether you’re managing memberships, offering exclusive WooCommerce products, or want to password protect the entire WordPress site, the methods outlined in this WordPress password protection tutorial make it easy to restrict access.
To enhance your site’s security and unlock advanced features, consider installing and activating the Password Protected Pro plugin. With a range of options at your disposal, you can choose the method that is most appropriate to apply content locking in WordPress.
If you encounter any challenges along the way, don’t hesitate to reach out for assistance. We’re here to support you on your journey to secure and successful WordPress site management.
Stay safe, stay protected!
Frequently Asked Questions
How do I make my WordPress site private?
To make your WordPress site private, install the Password Protected plugin and activate password protection for your entire site or specific pages/posts/categories.
How can I protect my website with a password?
You can protect your website with a password by using the Password Protected plugin to implement password protection for your site, pages, posts, categories, and even WooCommerce products.
How do I password protect an entire WordPress site?
To password protect an entire WordPress site, use the Password Protected plugin to enable password protection and set a password for your site. This ensures that only users with the password can access any part of your site.
How do I hide my WordPress site with a password?
You can hide your WordPress site with a password by activating password protection for your entire site using the Password Protected plugin. This restricts access to your site, ensuring that only users with the password can view its contents.
How do I protect my WordPress login?
To protect your WordPress login page, install and activate the Password Protected Pro. Go to the Security tab and click the ‘WP Admin Protection’ subtab. Just enable it and set your desired password, and voila! You have successfully password protected your WordPress login page.