
WordPress is a secure platform, but it is not immune to hackers and bots who try to guess your WordPress credentials by trying various combinations of username and password. This type of attack is prevalent and can easily compromise your site’s security, performance, and user experience.
Fortunately, you can effectively counter this issue by leveraging a powerful limit login attempts plugin like Password Protected, which makes implementing limiting login attempts as easy as pouring water in a glass.
In this article, we will show you why limiting login attempts is important and how you can do it with the Password Protected plugin in 3 easy steps. Also, we will share some pro tips on how to keep your WordPress website safe and secure.
Ready? Let’s dive in!
Why Is It Important to Limit Login Attempts in WordPress?
Before we show you how to limit login attempts in WordPress, let’s explain what a brute force attack is. It is a technique that tries to crack your login information by using trial and error.
The most common form of brute force attack is password guessing. Hackers use automated programs to try different combinations of usernames and passwords until they find the right one.
By default, the Password Protected plugin does not limit the number of times a user can enter a password, which makes it vulnerable to brute-force attacks.
However, you can protect your site from brute force attacks by limiting the number of unsuccessful login attempts per user for a specific period of time. For example, you could block a user for a while after five wrong WordPress failed login attempts.
Now that you know the importance of limiting login attempts in WordPress, let’s move on to how to limit login attempts in WordPress.
How to Limit Login Attempts On WordPress To Protect Content in 3 Easy Steps
As mentioned above, you will need the Password Protected plugin to make your entire website content private and implement limited login attempts.
Follow the below three easy steps to limit login attempts on WordPress using the Password Protected plugin:
Step#1: Install The Password Protected Plugin
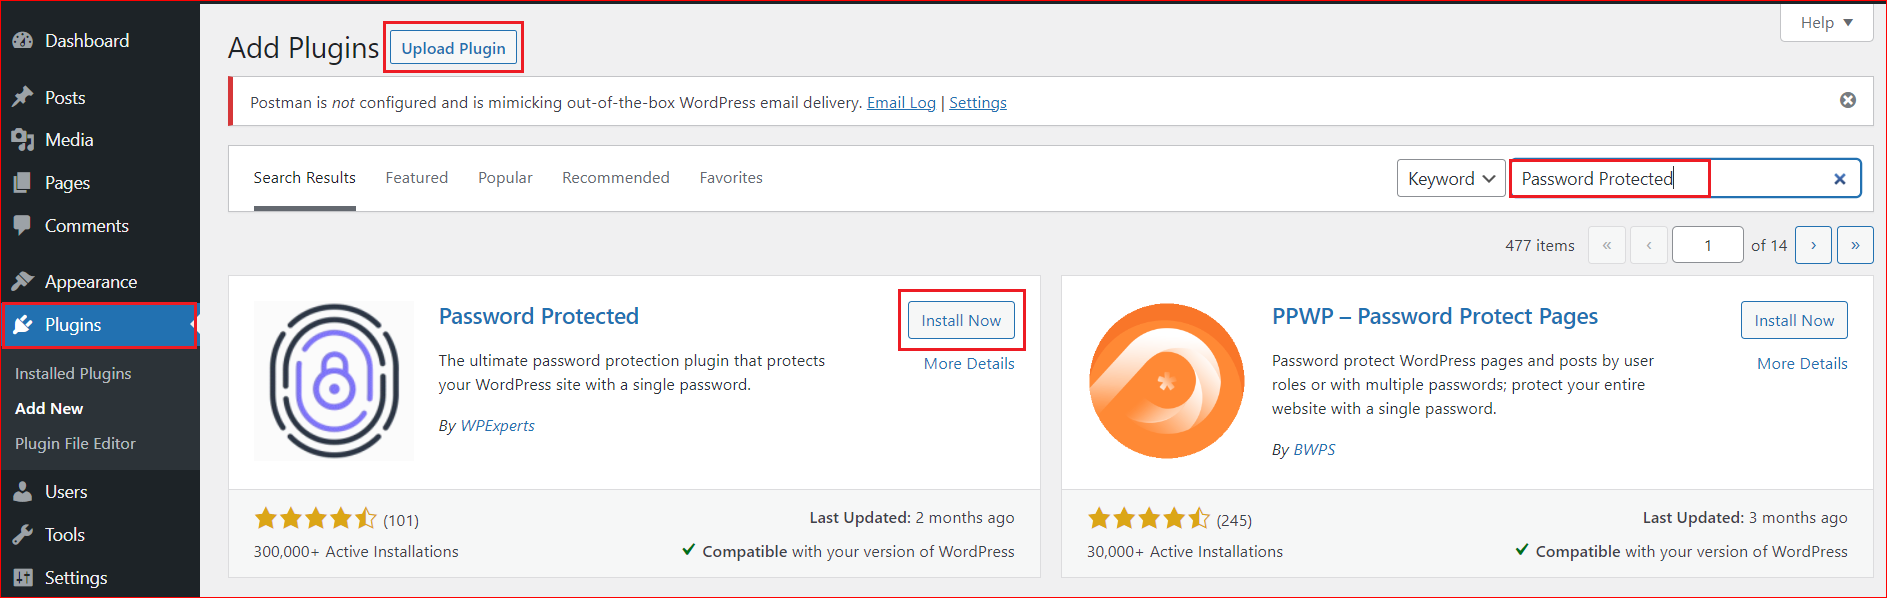
To install the plugin, go to the WordPress dashboard and select Plugins. Search “Password Protected,” then install and activate the Password Protected plugin by WPExperts.
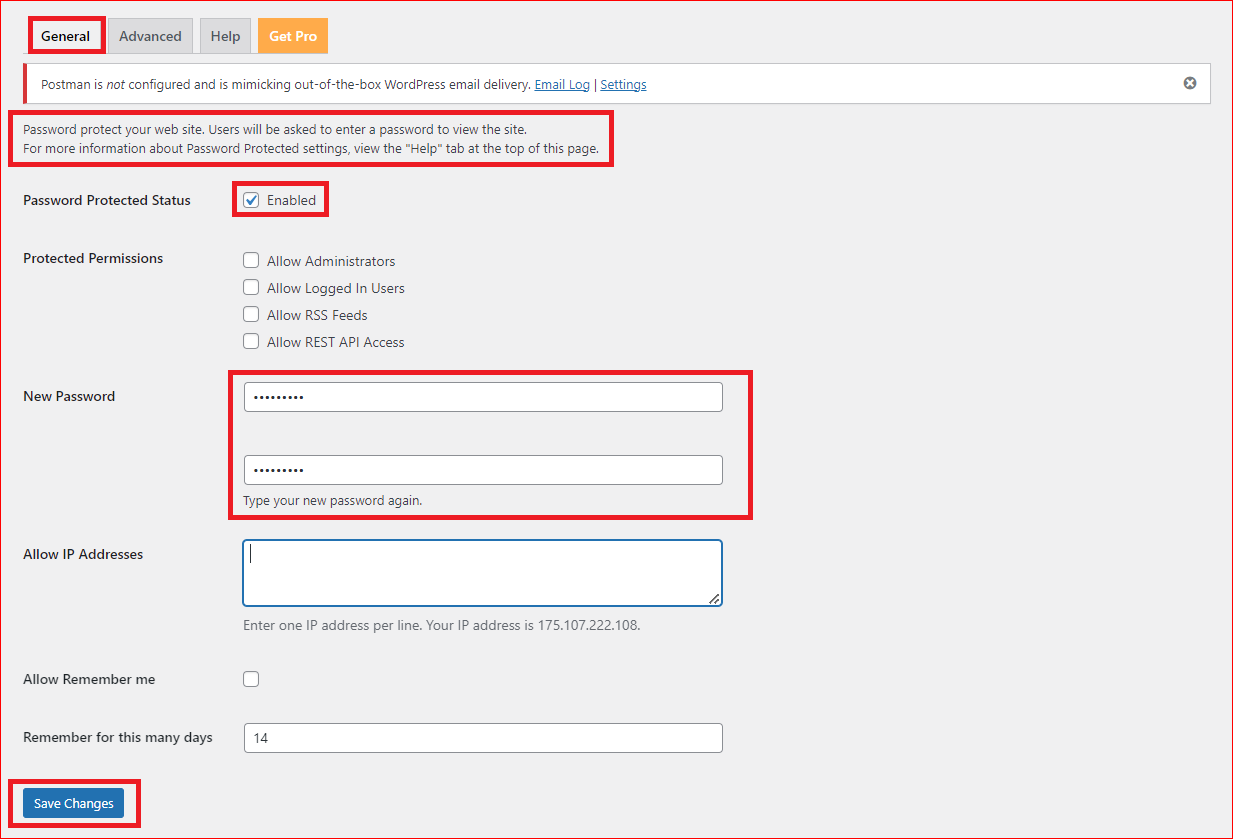
After activation, you’ll see the below screen. To utilize this plugin, simply checkmark the “Password Protected Status’ option to enable it. Also, enter the new password and hit the “Save Changes” button.
Your entire website content is protected and private, although it is still prone to brute force attacks. But worry not! With the Password Protected premium limiting login feature, you can easily prevent it.
To activate this feature, you need to get the Pro Version by following the process below.
Step#2: Activate The Password Protected Premium Features
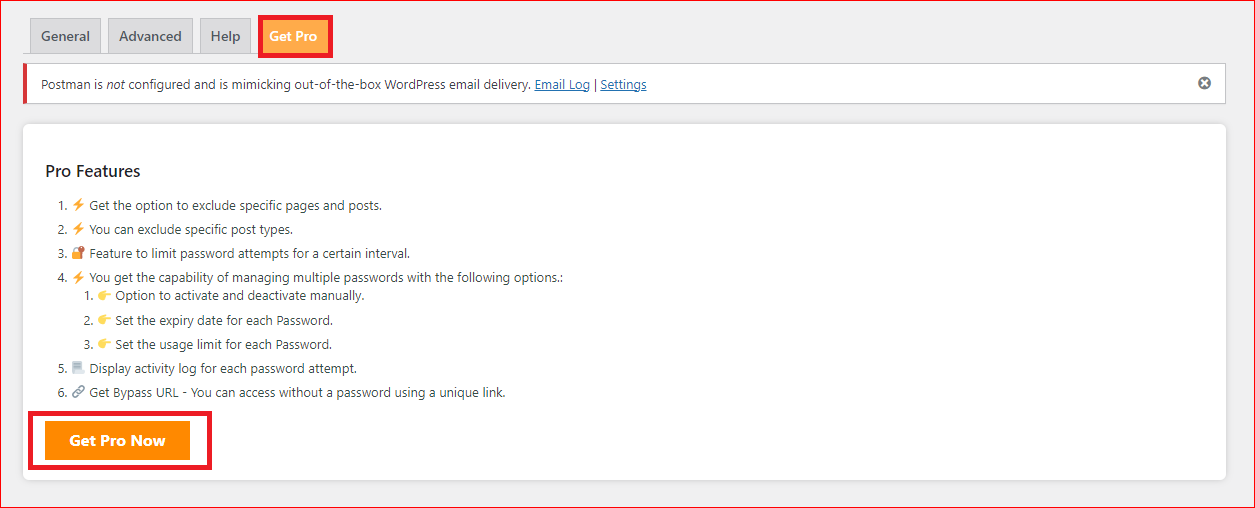
With pro features, you can limit login attempts, manage multiple passwords, set expiry dates, and much more.
To activate them, go to the “Get Pro” tab and then click on the “Get Pro Now” button at the bottom.
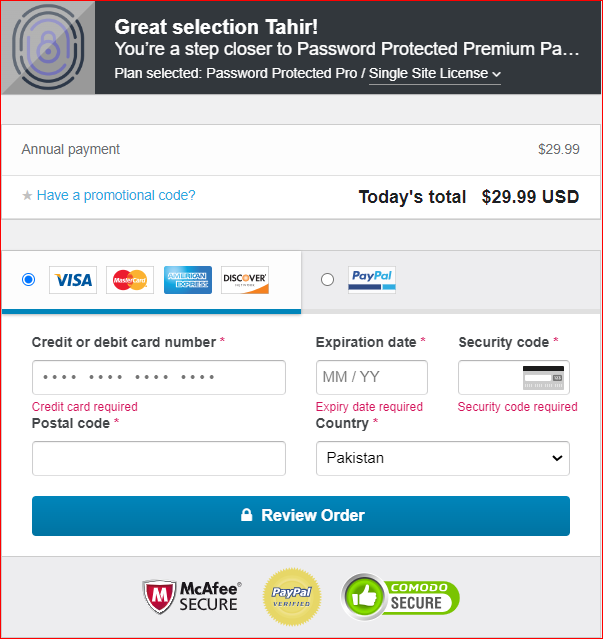
On the subsequent screen, you’ll have to provide the payment details along with your email address.
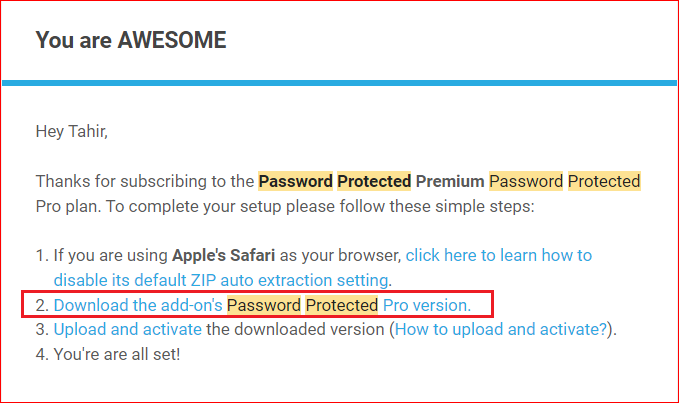
Once your payment is confirmed by the payment processor, which usually happens in a minute or two, you’ll receive an email with the download link and your account details, including your very own Licence Key.
Click on “Download the add-on” to download the “Password-Protected-Pro-latest” zip file. Store it in a safe place for later use.
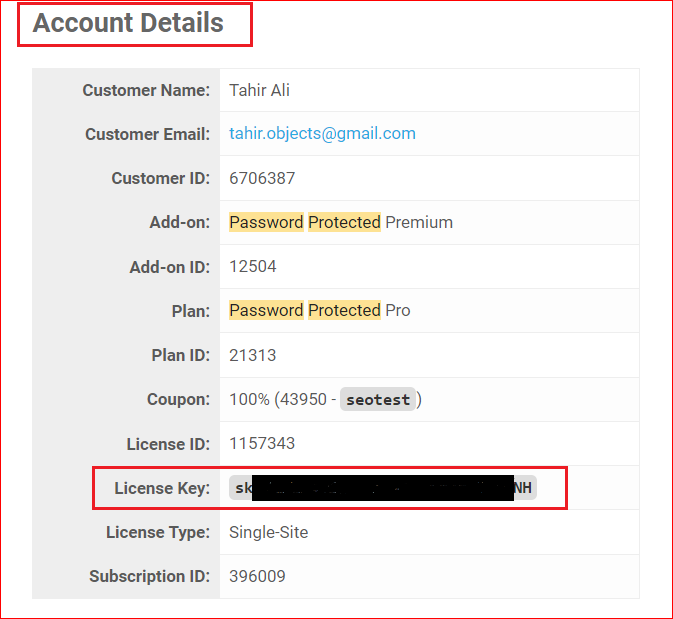
Also, keep your License key private and secure, as you’ll need it to activate the pro features.
Now, go to the WordPress dashboard and navigate to Plugins → Add New → Upload Plugin → Choose file.
Upload the “Password-Protected-Pro-latest” zip file and press the “Install Now” and “Activate Plugin” buttons in consecutive order.

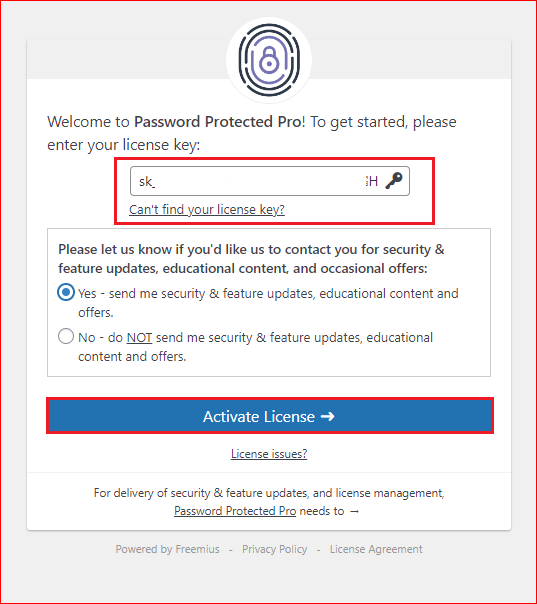
On the next screen, you’ll need to provide the License key which you’ve got in your welcome email. Enter the license key and click on the “Activate License” button.
Upon license activation, you’ll see the “General Tab.” Make sure that the “Password Protected Status” is checked in the “General Tab.” If yes, then you can proceed to configure the limit login attempt.
Step#3: Configure Limit Login Attempts
On the same screen, navigate to the “Advanced” tab next to the “General” tab. Find the “Limit Password Attempts” section and configure the followings settings:
- No of Attempts: It indicates how often users can attempt their password without getting locked out.
- Lockdown Time In Minutes: You can specify the time you want to prevent a user from trying again. The time is defined in minutes.
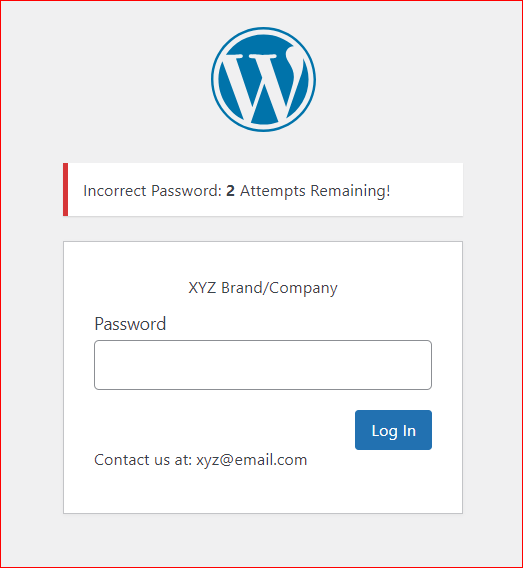
- Password Protected Page Description: In this section, you can provide any information you want to communicate to the user, i.e., your brand or company name, email address, etc.
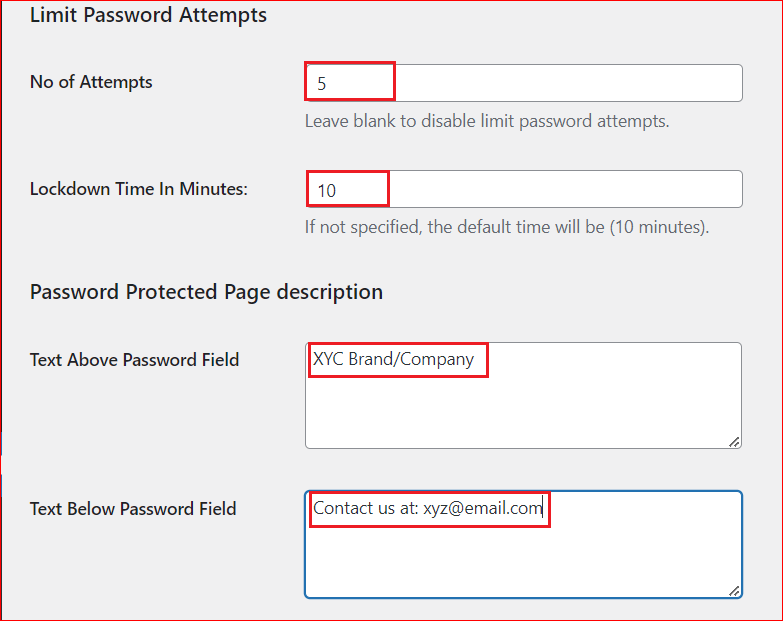
Once done. Simply click on the “Save Changes” button at the bottom of the screen.
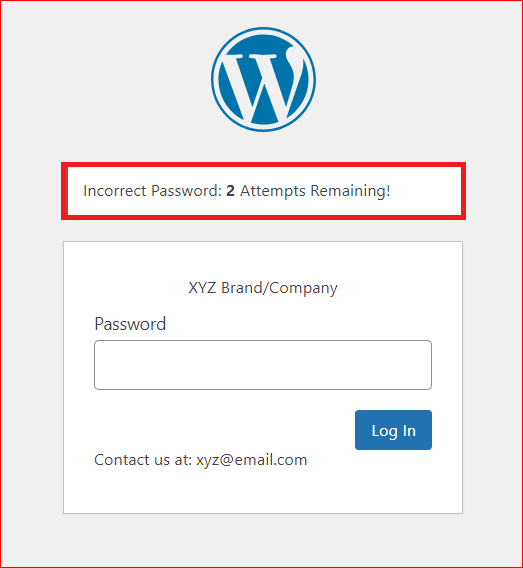
After the successful configuration, users need to enter the password whenever they want to access the content. On every WordPress failed login attempt, the password-protected page will show the remaining attempts at the top of the page.
That’s it for the configuration of Password Protected limit login attempts in WordPress. To further enhance the security of your WordPress website, it is advisable to read the following section.
Pro Tips on How to Keep Your WordPress Website Safe and Secure
Limiting login attempts on WordPress is a great way to protect your site from brute-force attacks, but it is not enough. You should also follow some additional tips and best practices to enhance your site security, such as:
- Use strong passwords: A strong password is one that is long, complex, and unique. It should contain a combination of uppercase and lowercase letters, numbers, and symbols. It should also be different from your other passwords and not easy to guess. You can use a password manager tool to generate and store strong passwords for your site.
- Update WordPress and plugins regularly: WordPress and plugins are constantly updated with new features, bug fixes, and security patches. You should always keep them updated to the latest version to avoid any vulnerabilities or compatibility issues. You can enable automatic updates or update them manually from your dashboard.
- Enable SSL encryption: SSL encryption is a technology that secures the connection between your site and visitors’ browsers. It prevents hackers from intercepting or modifying the data exchanged between them. You can enable SSL encryption by installing an SSL certificate on your site.
- Back up your website data: Keeping a copy of your website data can save you from losing your content or settings in case of a disaster. Back up your site regularly and store the backup files in a safe location. You can use any reputable plugin of your choice to automate and manage your backups.
Important Note: It is impossible to guarantee 100% security of a website because hackers are constantly finding new ways to circumvent security measures. That’s why it is imperative to always keep your website security in check and up to date.
Closing Remarks
When you want to make your website content private, implementing the limit login attempts feature must be your top priority, as it protects your website from unauthorized access and brute force attacks.
By using the Password Protected plugin, you can easily implement this security feature and enhance your website’s performance and user experience. Remember to follow additional best practices, such as using strong passwords, regular updates, SSL encryption, and backups, to strengthen your website’s security further.
We hope you found this article helpful and informative. If you have any questions or feedback, please feel free to reach out, and if you liked this article, please share it with your friends and colleagues.
Frequently Asked Questions
Should I restrict or limit login attempts in WordPress?
Yes, it is highly recommended to restrict or limit login attempts in WordPress. Doing so helps protect your website from brute force attacks, unauthorized access attempts and keeps your website content private as long as you want.
Why do I need to limit login attempts in WordPress?
You need to limit login attempts in WordPress because WordPress, by default, allows unlimited login attempts from any IP address or username. By setting up the limiting login attempts feature, you can prevent hackers and bots from continuously guessing username and password combinations, reducing the risk of unauthorized access and potential damage to your site.
How do I keep my WordPress site content private?
To keep your WordPress site content private, you can utilize plugins like “Password Protected.” This plugin allows you to password-protect your entire website with a single password, ensuring that only authorized users can access the content.