Want to protect your WordPress password protected pages from brute force and other harmful cyberattacks?
Cybercriminals employ rapid, automated processes to breach protected areas. These attacks work by repeatedly guessing passwords until the correct combination is found. According to Verizon’s 2021 report, 95% of the monitored organizations received around 637 to 3.3 billion brute-forcing attempts.
This malicious activity can easily compromise your private data and can also harm your site’s performance. To effectively protect your password protected WordPress content, you must implement necessary specific security measures.
This article explores what a brute force attack is, its types, two easy steps to protect WordPress password protected pages, and best practices for optimal security.
Ready? Let’s jump right in.
What is a Brute Force Attack?
A brute force attack is a simple but persistent hacking method. It tries every single key on a massive keyring until it cracks a password. Many call it an old-school technique, which is false, because there was a 12% increase in such attacks in 2024, according to Security Magazine.
Hackers use powerful programs to run thousands of guesses per second. The goal is to gain unauthorized entry into a protected area, such as your WordPress admin panel or a password protected page. This attack relies on sheer volume and speed.
These attacks are effective against any authentication method, including passwords, login PINs, and encryption keys. They are especially effective if you or your users have set a simple, common password. Unfortunately, with today’s technology, a weak password can be cracked in minutes.
Not to mention, these password-guessing attacks are not limited to common passwords, as hackers are continually evolving their strategies in response to advancements in cybersecurity, allowing them to crack even the most difficult passwords, which are a combination of words and letters.
Types of Brute Force Attacks
There are many types of brute force attacks, with attackers constantly refining their methods. Understanding these varieties helps you choose the proper defense.
- Simple Brute Force: This is the basic form where the attacker systematically cycles through all possible passwords. They start with the shortest and simplest combinations and keep trying until they find the match.
- Dictionary Attacks: Instead of trying every character, hackers use a long list (or “dictionary“) of commonly used words, phrases, and leaked passwords. They might also add numbers or symbols to these words to guess the password faster.
- Hybrid Brute Force: This method combines a dictionary attack with a simple attack. The hacker takes dictionary words and then adds various numbers and symbols to them. For instance, trying “password123,” “password@,” or “summer2024.”
- Reverse Brute Force: Instead of trying many passwords against one username, the attacker starts with one common password. They then try that single password against thousands of usernames to see which accounts share that weak credential.
- Credential Stuffing: This uses stolen username and password pairs from a data breach on one site. Attackers assume users reuse passwords and then “stuff” these known credentials into the login forms of other websites to gain access. The success rate is lower, around 0.1-2%, but the massive scale of attacks and the low cost to execute them make credential stuffing easy to execute..
- Leet (1337) Attacks: This is when bots use similar-looking numbers or symbols to crack passwords. For example, they might substitute the number ‘1’ for the letter ‘l’ or the symbol ‘@’ for the letter ‘a’ This technique helps attackers bypass simple password filters that require a combination of characters.
2 Easy Steps to Protect WordPress Password Protected Pages From Brute Force Attacks
Your WordPress password-protected pages are a constant target for brute force attacks. Yet, unfortunately, WordPress itself does not offer sufficient functionality to prevent or stop these attacks effectively. This allows bots to keep guessing a password until they succeed.
For optimal security, a dedicated security plugin is necessary.
For that, we have Password Protected, the best plugin for password protection and additional security.
The plugin adds essential features that significantly strengthen your defense against brute force attacks. While WordPress relies on you to choose a strong password, a plugin can automatically enforce rules to block malicious attempts. This extra layer of protection is vital for securing your restricted pages and your entire site.
Let’s jump right into the process.
Step 1: Install and Activate Password Protected (Free + Pro)
Limit Login Attempts is a feature that protects against brute force attacks. It is exclusive to the Password Protected premium. To maximize security and get the most out of the plugin, consider upgrading to the premium plan now!
However, before that, you must also install the free version, as the plugin cannot work without it. Follow the steps below to activate and install the free and premium versions of the plugin.
- Log in to your admin dashboard.
- Navigate to Plugins ⇒ Add Plugin.
- Search for “Password Protected” using the search plugin bar.
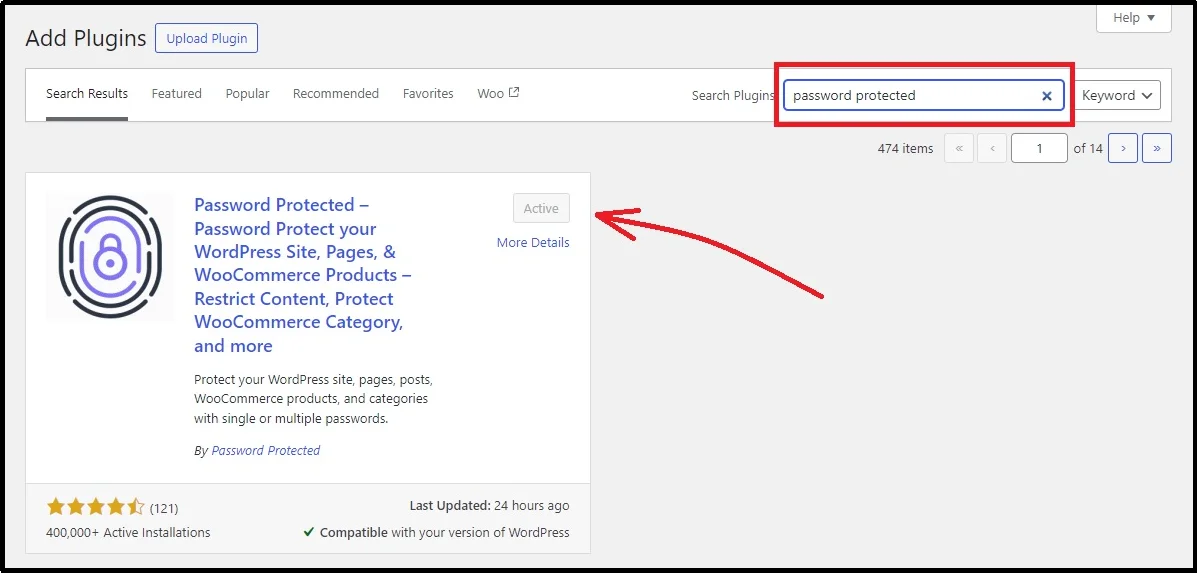
- Click Install now and wait until the Install button turns into “Activate.”
- Once installed successfully, activate the plugin, and now you can use the core features of the plugin.
- As discussed, to get the most out of the plugin, please visit the official website and purchase a plan of your choice.
- After successful payment, you will receive a welcome email with a unique license key and a zip file for the premium plugin.
- Install the zip file on your device and preserve the license key for later use.
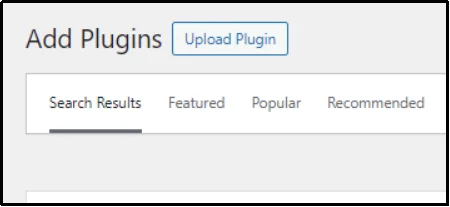
- Return to your admin dashboard and navigate to “Plugins” and click the “Upload Plugin” button at the top left corner.
- Doing so will reveal this box, click the Choose File button, and browse to where you saved the zip file.
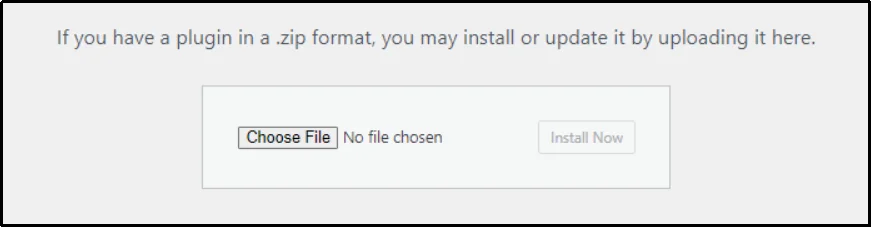
- Click Install Now.
- Once the installation is successful, you can activate the plugin using the unique license key from the welcome email.
If you carefully followed all steps, congratulations! You can now use Password Protected without constraints.
This takes us to the next step.
Step 2: Enable Attempt Limitation
Before we jump into the settings, let’s look at how it helps against the threat that we are actively discussing.
Earlier, we learned that a brute force attack is like a robot trying to open a safe. Instead of carefully picking the lock, it tries every possible code combination until it finds the right one.
If your password is short or straightforward, these bots can crack it in minutes or even seconds. A successful attack allows hackers to access your private files, documents, or other sensitive information. In fact, while studying weak passwords, NordVPN found that easier passwords, such as ‘password’, ‘123456’, and other similar and predictable passwords, can be guessed or cracked in less than a second.
The Limit Login Attempts feature is our primary defense against brute force attacks. It works by restricting the number of failed password attempts a user can make within a set timeframe. This is also called an “account lockout policy” or “rate limiting.”
When you enable this feature:
- You set a maximum number of guesses. For example, you can set it to 5 attempts. Locking the attacker after five tries defeats the purpose of password-guessing attacks.
- The system tracks failed tries. If someone (or a bot) enters the wrong password five times, the system immediately locks them out for a period you define.
- The bot is stopped in its tracks. This lockout stops the automated bot from rapidly trying countless combinations, making the brute-force attack completely useless.
With your premium plugin installed and activated, enabling this critical security layer is simple. Just follow the steps below:
- Log in to your WordPress dashboard and navigate to Password Protected’s settings.
- Navigate to Security ⇒ Attempt Limitation.
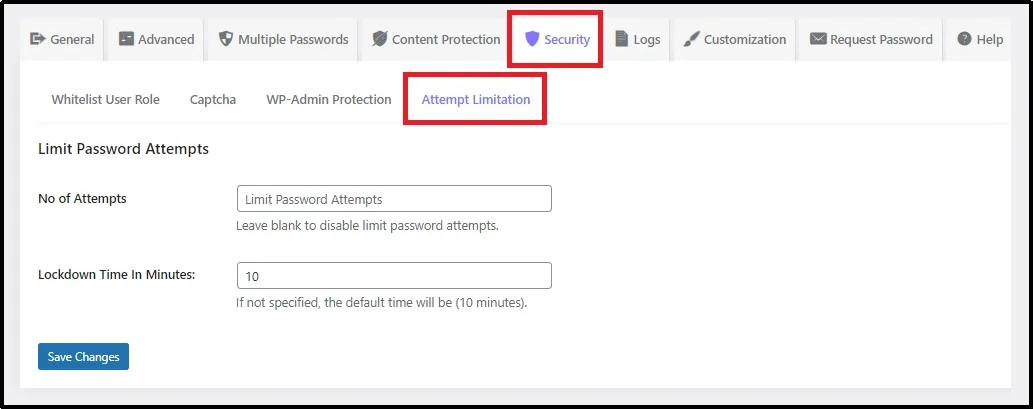
- You will see two options: the “Number of Attempts” and the “Lockdown Time in Minutes.”
- No. of Attempts: Short for number of attempts, you can specify the number after which the user will be blocked. For example, inputting “3” will allow the users to try an incorrect password three times before being locked out.
- Lockdown Time In Minutes: Here, you can specify the duration, in minutes, for which the user will be locked after a set number of incorrect attempts. For example, if you write “10,” the user will be locked for 10 minutes before being able to try three more times.
Although it’s completely normal to mistype passwords a few times, it’s unlikely one will do so 4-5 or more times. Hence, it’s better to keep the number of attempts up to 3-5. This limit allows for making mistakes, and is insufficient for a successful brute force attack that takes thousands, if not millions, of attempts.
- Finally, save progress using the Save Changes button.
That’s it! Your password-protected pages now have a strong line of defense against automated attacks.
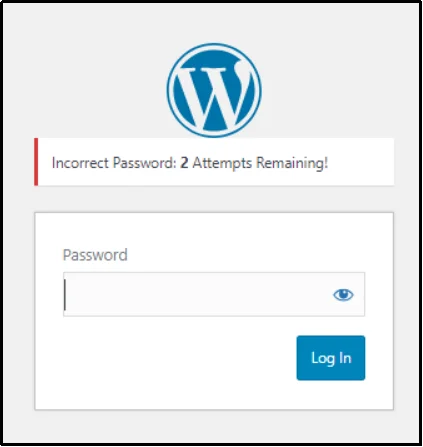
Here’s how the attempt screen looks:
Once you exceed the set attempts, you will be locked out for a specified duration. Since we put it to one, the user would be allowed another set of attempts after one minute.
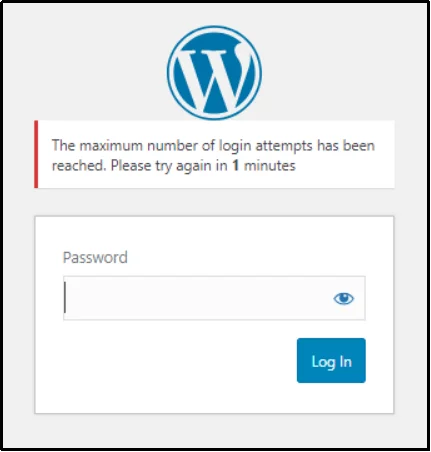
The standard password screen works, but as you noticed, it can feel bland and disconnected from your main website. Consistency is key for a professional experience, and that’s where Password Protected’s powerful Customization feature comes in!
This feature enables you to style a password-protected page to match your brand’s visual identity. You can ensure the protected page blends in perfectly, maintaining a professional and trustworthy appearance for your visitors.
Customizing the password screen is straightforward, allowing you to have full control over key design elements. You can easily adjust the background color or upload a background image to make a strong visual impact.
Additionally, you have full flexibility over the text, including the heading font, text color, and overall typography. By making these simple changes, you transition the page from basic to fully branded, maintaining a seamless user experience across every part of your WordPress site.
Learn more about the customization feature in this article: How to Customize WordPress Password Protected Screen [Step-by-Step]
Best Practices For Securing Your WordPress From Brute Force
Beyond limiting login attempts—which is highly effective—you should follow several other best practices to create multiple layers of security. These steps make it much harder for automated bots and attackers to guess your credentials or find vulnerabilities. Such as:
- Use Strong and Unique Passwords and Usernames. Never use “admin” as a username, as attackers target it first. Use a password manager to create and store complex passwords that include a mix of uppercase and lowercase letters, numbers, and symbols. A strong password should be at least 10–12 characters long.
- Enable Two-Factor Authentication (2FA). This requires a second verification code from your phone or an app, in addition to the password, blocking unauthorized access even if the password is stolen or guessed.
- Keep Everything Updated. Always run the latest versions of your WordPress core, themes, and plugins. Updates often include critical security patches for known vulnerabilities that attackers try to exploit.
- Change the Default Login URL. The default login page (/wp-admin or /wp-login.php) is a well-known target. Changing it to a custom, hard-to-guess URL can hide it from automated attacks.
- Use a Web Application Firewall (WAF). A WAF filters out malicious traffic and bad bots before they even reach your website’s server. This significantly reduces server load caused by brute force attempts.
- Implement CAPTCHA. Adding a CAPTCHA or other bot prevention challenges to the login page helps distinguish between human users and automated bots attempting to guess credentials. Using Password Protected, you can choose from reCAPTCHA, hCAPTCHA, or Turnstile from Cloudflare.
- Disable XML-RPC. This is an old WordPress feature often targeted for brute force attacks. If you don’t use it, you should disable it for better security.
- Regularly Back Up Your Website. Even with the best defenses, a complete and recent backup is your ultimate safeguard. It lets you quickly restore your site to a secure, pre-attack state if a breach occurs.
What’s More in Password Protected Pro?
As discussed earlier, here’s what Password Protected further offers.
While the free version offers powerful site-wide protection, Password Protected Pro unlocks a suite of features for detailed control, advanced security, and better user management. Here’s what to expect:
- Partial Content Protection: Lock specific sections (like text, images, or downloads) within a page or post using a shortcode, while keeping a public preview available.
- Multiple Password Management: Create and manage unlimited passwords for a single post, page, category, or custom post type to give unique access to different users.
- Bypass Links: Generate unique, one-click URLs that allow users to access content without entering a password. These links can be set to expire by time or usage.
- User Role Whitelisting: Allow specific user roles (like Administrators or Editors) to bypass the password prompt automatically.
- Password Request: Add a ‘Request Password’ button to your password-protected pages. You can manage the password requests from the back-end, allowing you to accept or reject requests.
- Activity Monitoring: The Password Activity Report provides detailed logs to monitor all access attempts, ensuring you always know who is attempting to view your protected content.
- And much more!
Want to explore the complete feature set and pricing? Check out the full Password Protected Pro features list!
If the features list excites you, get Password Protected today and make your WordPress safe and secure.
Frequently Asked Questions
What is the simplest way to protect against brute force password attacks?
The simplest and most effective way to protect against brute force password attacks is by using a feature called Limit Login Attempts. The feature restricts the number of failed login attempts a user (or bot) can make within a specific time period. Once the limit is reached, the IP address is typically blocked for a set duration, which makes it nearly impossible for hackers to cycle through enough password combinations to succeed.
What password requirement will have the highest impact in preventing brute force attacks?
The single password requirement with the highest impact in preventing brute force attacks is length. While mixing character types (complexity) helps, making a password longer exponentially increases the number of combinations an attacker must check. Security experts recommend a minimum length of 12 to 14 characters because this massive increase in potential combinations—known as entropy—makes the time required to crack the password with brute force methods impractical, especially when combined with features, such as attempt limitation.
Does CAPTCHA stop brute force?
Yes, CAPTCHA is highly effective at stopping the automated bots that perform the vast majority of brute force attacks. It works by presenting a simple challenge that is easy for humans to solve but difficult for machines to bypass. Using Password Protected, you can choose from a variety of options, including reCAPTCHA, hCAPTCHA, or Turnstile.
How long should a password be to prevent brute force?
To prevent a brute force attack, the recommended minimum password length is 12 to 14 characters, although 16 or more is even better; security agencies like CISA recommend at least 16 characters.