


WordPress lets you password-protect individual pages and posts, but its built-in feature uses one shared password for each item. This can become difficult to manage when several people need access to the same content.
Password Protected Pro lets you assign multiple passwords to protected WordPress pages and posts. You can configure separate usage limits and expiration dates, then deactivate individual passwords when someone no longer needs access.
One page. Multiple passwords. Easier access management.
In this guide, you’ll learn how to enable individual page or post protection, add multiple passwords, and manage access from your WordPress dashboard.
Can You Add Multiple Passwords to One WordPress Page?
Yes. You can use Password Protected Pro to assign multiple passwords to a single protected WordPress page or post. WordPress’s built-in password protection doesn’t provide this feature, so you’ll need a plugin that supports multiple passwords.
Imagine you’re sharing a private project page with three clients. Instead of giving everyone the same password, you can create a separate password for each client. When a project ends, you can deactivate the relevant password without changing the credentials used by other clients.
Why Use Multiple Passwords on a Single WordPress Page?
Multiple passwords give you more control over who can access your protected content. You can manage each password separately instead of sharing one credential with everyone.
Here are three common use cases.
1. Share Project Pages With Different Clients
Agencies, freelancers, and web developers often share private project pages with clients. Each client may need access to the same page without sharing a password with other clients.
You can assign a separate password to each client. When a project ends, deactivate or delete the relevant password without changing the others.
2. Manage Access for Teams and Contractors
Businesses often share internal documents, project updates, and training resources with employees and contractors.
You can create separate passwords for people who need access to the same protected page. When a contractor finishes a project, you can deactivate their password without disrupting other people’s access.
3. Provide Temporary Access to Private Resources
Sometimes, visitors need access only for a limited period or a specific number of uses.
For example, a designer might need access to a project page for one week. A client might need access until a project ends.
Password Protected Pro lets you configure password expiration dates and usage limits to match these needs.
Step-by-Step Tutorial to Add Multiple Passwords to a WordPress Page or Post
Follow these steps to configure multiple passwords for a protected page or post.
Before you start: Multiple Password Management is a Pro feature. Check the current pricing page to choose a plan that includes it.
Step 1: Install and Activate Password Protected Pro
First, install the free Password Protected plugin and activate Password Protected Pro.
Follow these steps:
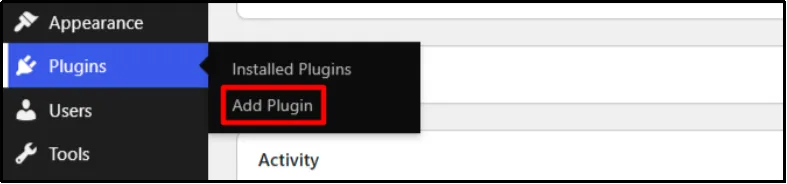
- Log in to your WordPress admin dashboard. Navigate to Plugins → Add Plugin.
- Search for Password Protected.
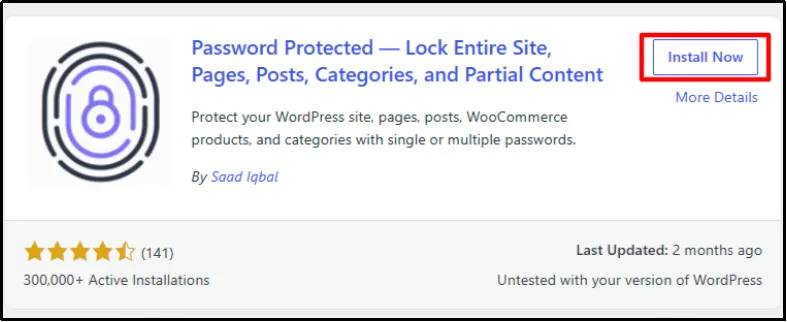
- Click Install Now, then Activate.
- Visit the Password Protected pricing page and purchase a plan that includes Multiple Password Management.
- Download the Pro plugin ZIP file from your account or purchase email.
- Return to Plugins → Add Plugin → Upload Plugin. Click on Choose File.

- Upload the ZIP file and click Install Now.

- Activate the Pro plugin.
- Enter your license key and click on Activate License.
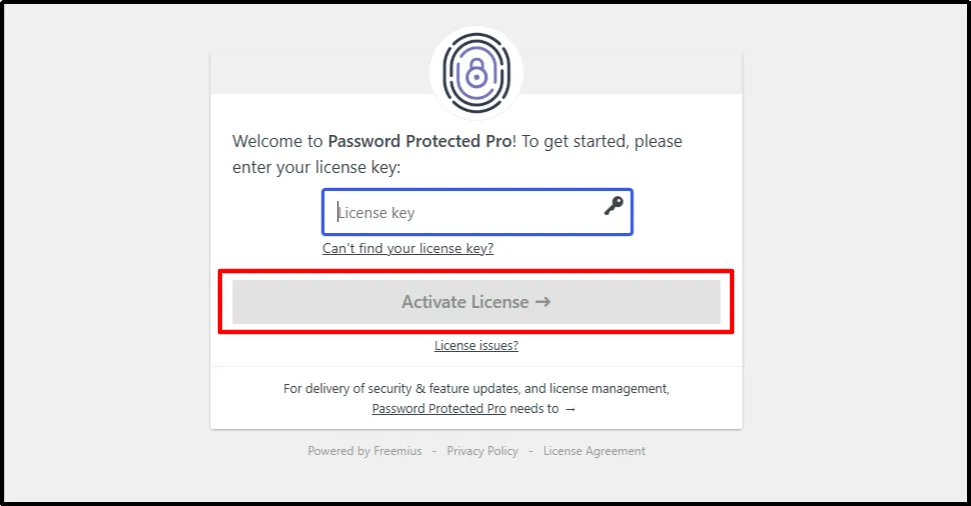
Once both versions are active, you can configure individual pages or post protection.
Step 2: Enable Individual Page or Post Protection
Before adding passwords, enable individual protection for the type of content you want to protect.
For a page, follow these steps:
- Open your WordPress dashboard.
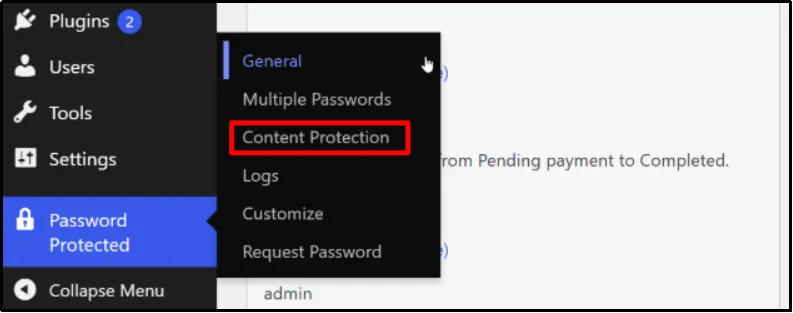
- Navigate to Password Protected → Content Protection.
- Open the Post Type Protection tab.
- Find the setting for individual page protection.
- Check the Individual option under Pages.
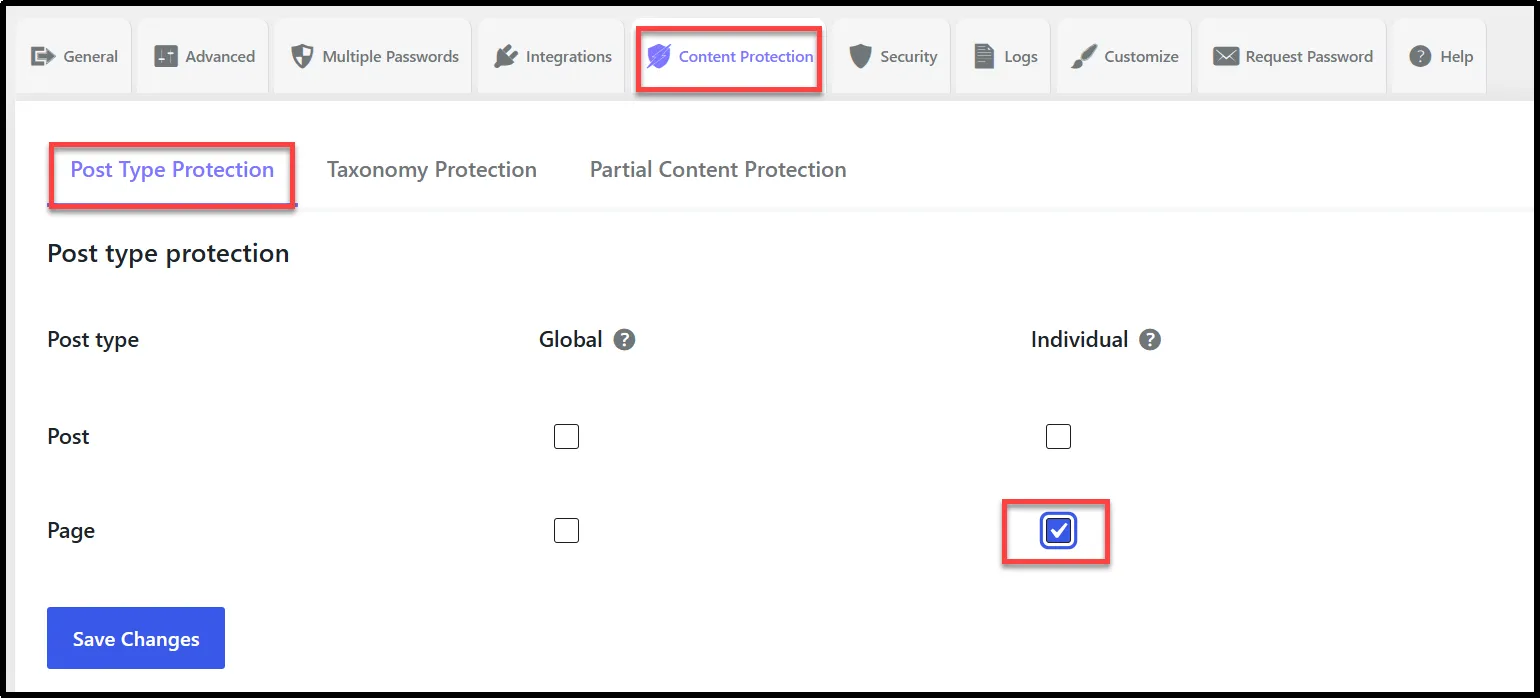
- Click Save Changes.
If you want to protect a post instead, enable the corresponding Individual option under Posts.
These settings enable the individual protection controls. You still need to enable password protection on the specific page or post.
For detailed instructions, see our guides to protecting individual WordPress pages and protecting individual WordPress posts.
Step 3: Open the Page or Post You Want to Protect
Now choose the content that should accept multiple passwords.
For a page:
- Navigate to Pages → All Pages.
- Find the page you want to protect.
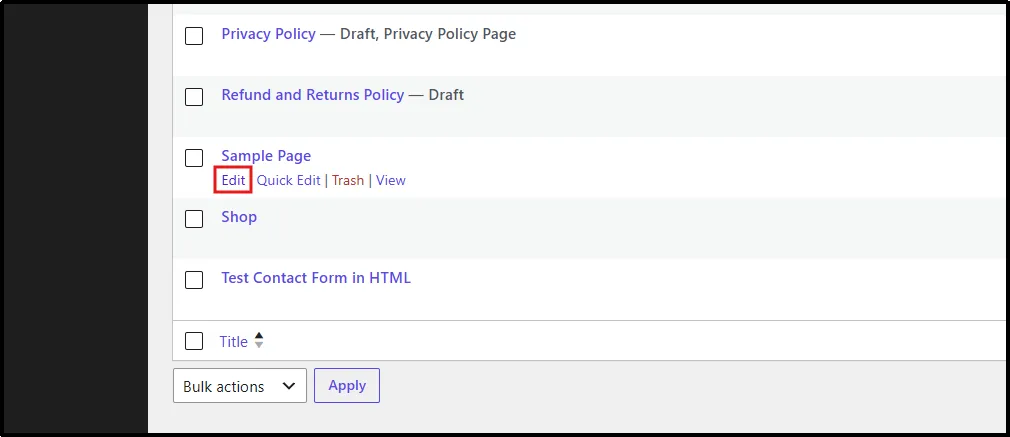
- Click Edit.
- Scroll to the Password Protected section.
For a post, go to Posts → All Posts, open the relevant post, and locate the same section.
- Check Enable Password Protection and click Save Changes to enable protection for the selected content.
The password settings should now appear.
Step 4: Add the First Password
In the Password Protected section, configure the first password for your page or post.
You’ll find settings for the following:
- Password: Enter the credential visitors must provide to unlock the content.
- Usage Limit: Set how many times visitors can use the password.
- Expiry: Choose the date the password stops working.
- Status: Choose whether the password remains active or becomes inactive, using the options available in your version.
- Enable Bypass URL: If the option is available, you can create an alternative link that grants access without requiring the visitor to enter a password. Treat these links as credentials and share them only with intended recipients.
For example, you could create a password for a client and set its expiration date to the end of the project.
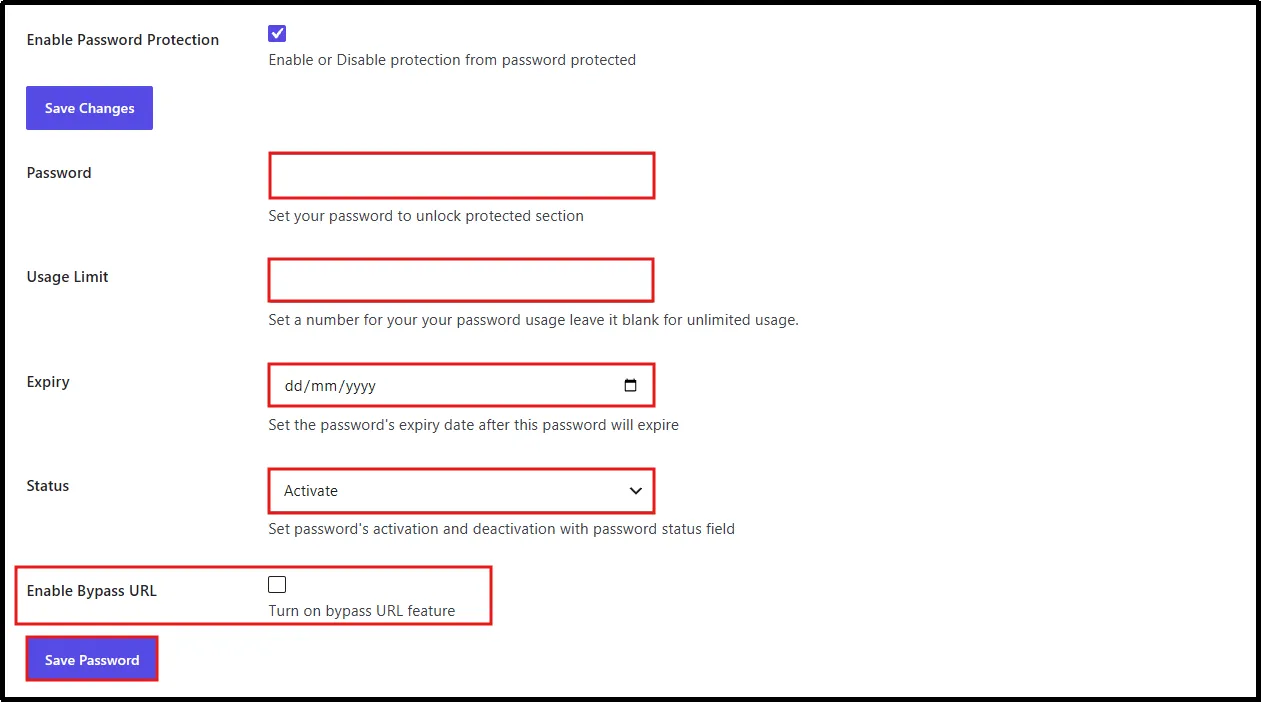
Once you’ve configured the fields, click Save Password.
Step 5: Add More Passwords to the Same Page or Post
After saving the first password, use the password controls in the same protected-content section to add another one.
- Enter a different password.
- Configure its usage limit, expiration date, and status.
- Click Save Password.
- Repeat the process for each additional password you need.
After you save a password, the interface may reset the input fields so you can add another credential. Check the saved password entries to confirm that the plugin retained each one.
For example, you could create one password for a client, another for a contractor, and a third for an internal reviewer. Each credential can have its own usage and expiration settings.

You don’t need to duplicate the page or post. The passwords apply to the same protected content.
Step 6: Test Each Password
Before sharing the page, test the passwords to confirm that the configuration works as expected.
- Open the protected page in a private or incognito browser window.
- Enter the first password and confirm that it unlocks the content.
- Repeat the test with another active password.
- Check the configured usage limits and expiration dates.
- Deactivate one password and verify that it no longer grants access.
- Test the remaining active passwords to confirm that they still work.
And don’t skip this check. A quick test can reveal configuration problems before you share the page with clients or other visitors.
If a visitor’s password expires, they may need a way to request access again.
To prevent this inconvenience, you can enable the Request Password feature, which adds a button on the password protected screen that, upon being pressed, sends a request to the admin.
Visitors enter their email address and verify it. You can then review the request in your WordPress dashboard and approve or reject it.
Multiple Passwords vs. Password Protecting Multiple Pages
Adding multiple passwords to one page differs from protecting several pages at once.
If you want one page to accept different passwords, enable individual protection and configure multiple credentials for that page or post.
If you want to protect several pages, posts, or other content types, choose a protection method that matches your needs. Password Protected Pro supports individual, site-wide, global, and other protection options, depending on the configuration and plan.
The plugin also uses a hierarchy when multiple protection levels apply to the same content. Visitors who have already passed a higher-level protection screen may not need to enter a separate password for an individual page or post.
Choose individual protection when you want to manage access to specific content. Use site-wide protection when you want to restrict access across your website.
Manage Multiple WordPress Passwords Without Duplicating Content
WordPress’s built-in password protection works for simple use cases, but it doesn’t offer the flexibility you need when different people require separate credentials for the same content.
Password Protected Pro lets you manage multiple passwords for protected pages and posts. You can configure usage limits and expiration dates, then deactivate individual passwords when access is no longer needed.
Whether you’re sharing project updates with clients, distributing private resources, or granting temporary access to contractors, multiple passwords can help you manage access without creating separate copies of the same page.
Ready to add multiple passwords to your WordPress page or post? Explore Password Protected Pro and choose a plan that includes Multiple Password Management.
Frequently Asked Questions
Can a single WordPress page have multiple passwords?
Yes. Password Protected Pro supports multiple passwords for protected pages and posts. You can manage separate credentials for the same content.
Can I give each client a different password for the same page?
Yes. You can create separate passwords for different clients while keeping the content on one page. You can also manage each password individually.
Can I set an expiration date for each password?
Yes. Password Protected Pro supports password expiration settings. Configure the expiration date when creating or editing a password.
Can I limit how many times a password works?
Yes. You can configure a usage limit for a password to restrict how many times visitors can access the protected content using that credential. Leaving the field blank allows unlimited uses.
Does WordPress support multiple passwords by default?
No. WordPress’s built-in password protection provides one shared password for each password-protected page or post. You’ll need a plugin such as Password Protected Pro to manage multiple credentials for the same content.
Do I need a separate page for every password?
No. You can assign multiple passwords to the same protected page or post. This lets different people use separate credentials without duplicating the content.
