Cyberattacks targeting WordPress sites continue to rise in 2026. Because WordPress powers over 43% of the web and relies heavily on third-party themes and plugins, it’s a frequent target for attackers.
Recent security reports show that XSS (cross-site scripting) and code injection attacks now account for more than 40% of all web application vulnerabilities. A properly configured Content Security Policy (CSP) is one of the most effective defenses against these threats
Hence, a strong and secure Content Security Policy (CSP) is a necessity.
In this guide, you’ll learn how to configure CSP headers in WordPress—both via plugin and server-level methods, and how CSP integrates with modern security header best practices to create a hardened site.
What is CSP in WordPress and How Does it Work?
A Content Security Policy (CSP) is typically delivered as an HTTP response header. In simple terms, it’s a line of text your server sends before your page loads. Alternatively, you can embed CSP via a <meta> tag in your HTML <head>, though the header method is preferred for broader browser support and security reliability.
It instructs the browser to trust scripts, styles, and images from these specific pages and block everything else. It exists on your server, and the browser reads it and acts accordingly.
How browsers enforce CSP?
When you implement a CSP header in WordPress, the browser checks every resource (scripts, styles, images, etc.) against your policy rules before loading it. If a script attempts to load from a domain not explicitly allowed in your policy, the browser blocks it immediately. This client-side enforcement is what makes CSP so effective at preventing XSS attacks in WordPress, stopping malicious code before it can execute.
You can also run WordPress CSP report only mode. In this mode, the browser just logs what would have been blocked. This is how you safely test a policy before turning it on for real.
There are two outcomes for any resource: allowed or blocked. That’s it.
Why Does CSP Matter for WordPress Security?
A proper WordPress content security policy protects against major attacks:
Cross-site scripting (XSS):
Cross-site scripting (XSS) is the most common. An attacker injects a malicious script into your site through a comment field, a contact form, or a vulnerable plugin.
Data injection:
An attacker forces your site to load content from an external source, such as fake login forms, redirects, or hidden iframes.
Clickjacking:
Another website loads your site inside a hidden iframe and tricks your visitors into clicking things they did not mean to click.
This is why many developers consider CSP a must-have layer that adds security headers in WordPress.
What you Must Know Before Enabling CSP
Before you configure CSP in WordPress, you must understand that WordPress is dynamic. Themes and plugins load scripts from multiple sources.
That’s why every WordPress CSP header setup must be custom-built. This is also where WordPress default-src self setup becomes important for baseline security configuration.
When configuring Content Security Policy (CSP) in WordPress, you will work with several key directives.
Below are the most important ones you should understand:
- default-src sets the fallback policy for all resource types not explicitly defined elsewhere. It’s commonly set to ‘self’ to allow resources only from your site’s exact origin.
⚠️ Note: ‘self’ does not include subdomains (e.g., cdn.yoursite.com) or different ports. To allow subdomains, explicitly add them: ‘self’ https://*.yoursite.com.
- script-src controls which domains can serve JavaScript files to your site. While many WordPress themes and plugins require ‘unsafe-inline’ or ‘unsafe-eval’ to function, be aware: these values significantly weaken your CSP’s security. Whenever possible, work with plugin developers to adopt nonce-based or hash-based script loading instead. Use ‘unsafe-inline’ only as a temporary fallback during testing.
- style-src defines allowed CSS sources and commonly includes ‘self’ and ‘unsafe-inline’ because WordPress themes frequently use inline styles.
- img-src controls image sources and typically allows ‘self’, data:, and https: to support local images, base64 images, and secure external images.
- font-src specifies allowed font sources and usually includes ‘self’ plus external providers like https://fonts.gstatic.com for Google Fonts.
- connect-src controls network requests made by JavaScript, such as AJAX or API calls, and must allow WordPress REST API and admin dashboard endpoints.
- frame-src defines which external sites can be embedded in iframes, such as YouTube, Google Maps, or reCAPTCHA services.
- media-src controls where audio and video content can be loaded from and is typically set to ‘self’ unless external media platforms are used.
- object-src restricts legacy plugins like Flash and is best set to ‘none’ for improved security.
Proper configuration is key when learning how to whitelist domains in CSP WordPress.
How to Set Up Content Security Policy (CSP) in WordPress
There are two ways to set up Content Security Policy: with a plugin or on the server side (manually). Follow the steps below to correctly set up Content Security Policy (CSP) on your WordPress site.
Add CSP in WordPress with a Plugin (Beginners)
If you want the easiest method for how to add a CSP header in WordPress, use a plugin. This is the most common content security policy WordPress plugin approach for beginners.
Step 1: Install Headers Security Advanced Plugin
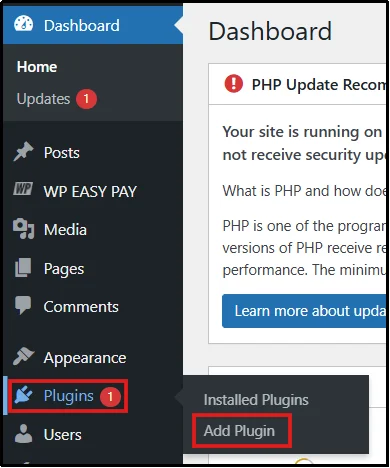
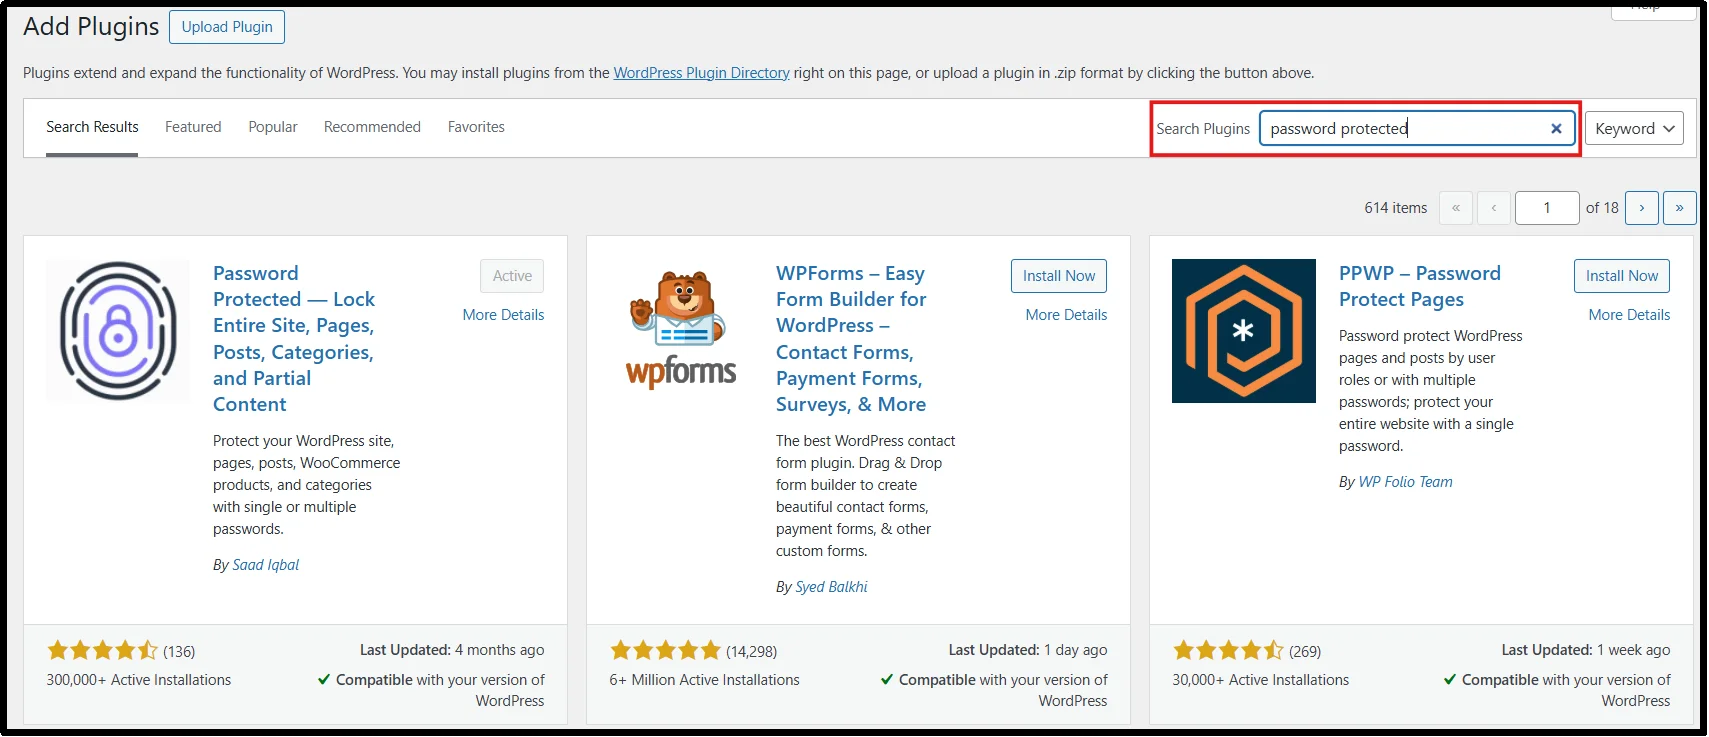
In your WordPress dashboard, go to Plugins → Add Plugin.
Search for “Headers Security Advanced & HSTS WP” in the plugin search bar on the right side of the screen.
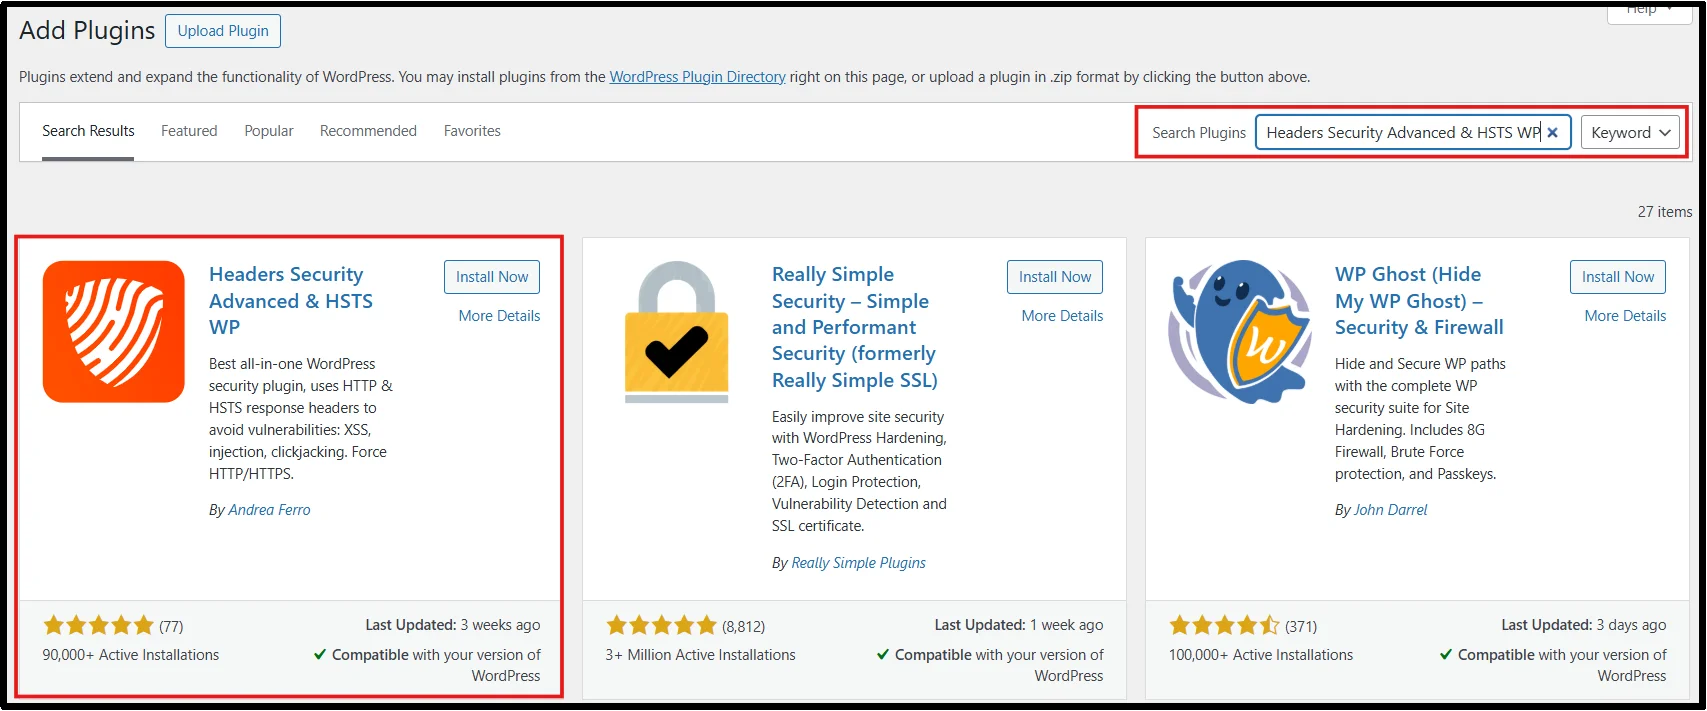
Click Install Now, then in a few seconds, Activate.
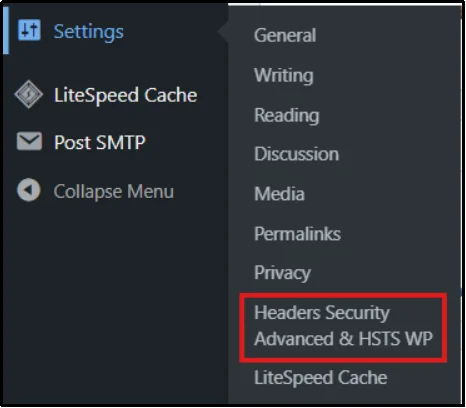
You will find the plugin in Settings → Headers Security Advanced & HSTS WP.
Step 2: Add your Content Security Policy
- Now go to Settings → Headers Security Advanced & HSTS WP.
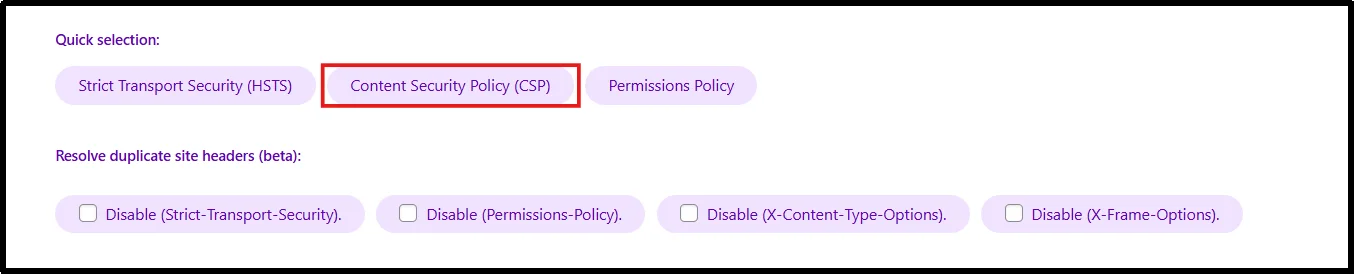
- Scroll down the page or click the “Content Security Policy (CSP)” button to jump directly to the CSP header configuration section.
- Add your Content Security Policy here, or paste the starter template provided below.
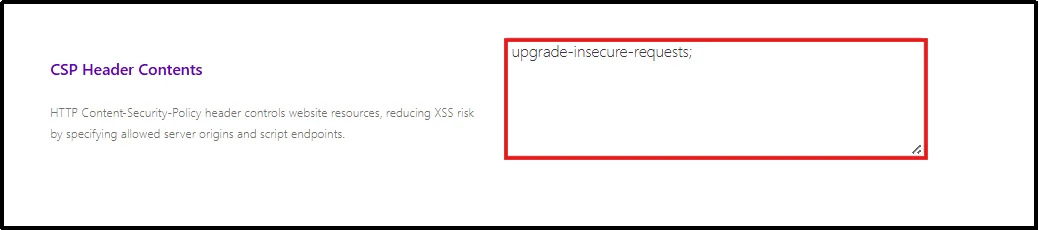
- Standard template: default-src ‘self’; script-src ‘self’; style-src ‘self’ ‘unsafe-inline’; img-src ‘self’ data:; font-src ‘self’; connect-src ‘self’;
- Typical WordPress setup with Google Fonts and Google Analytics: default-src ‘self’; script-src ‘self’ https://www.google-analytics.com https://www.googletagmanager.com; style-src ‘self’ ‘unsafe-inline’ https://fonts.googleapis.com; font-src ‘self’ https://fonts.gstatic.com data:; img-src ‘self’ data:; connect-src ‘self’;
- WordPress with YouTube embeds: default-src ‘self’; script-src ‘self’; style-src ‘self’ ‘unsafe-inline’; img-src ‘self’ data: https://i.ytimg.com; frame-src https://www.youtube.com https://www.youtube-nocookie.com;
- If you are using CSP in report-only mode (recommended), add a Report URI to collect violation reports. You can use a third-party service or configure your own endpoint to log these reports.
- Click Save Changes.
Congratulations. You have successfully added CSP through a plugin.
Note: After enabling report-only mode, browse your website and monitor CSP violation reports using tools like Chrome DevTools. Review any console warnings and continue refining your policy until your critical pages no longer trigger important violations.
Add CSP in WordPress at Server Level (Advanced)
For full control of Content-Security-Policy header WordPress htaccess, use server configuration.
Step 1: Access Your Website Files
You can access your site files in two ways:
◦ Using cPanel / hPanel
- Log in to your hosting account (cPanel, hPanel, or similar).
- Go to File Manager.
- Navigate to your website’s root directory (usually public_html).
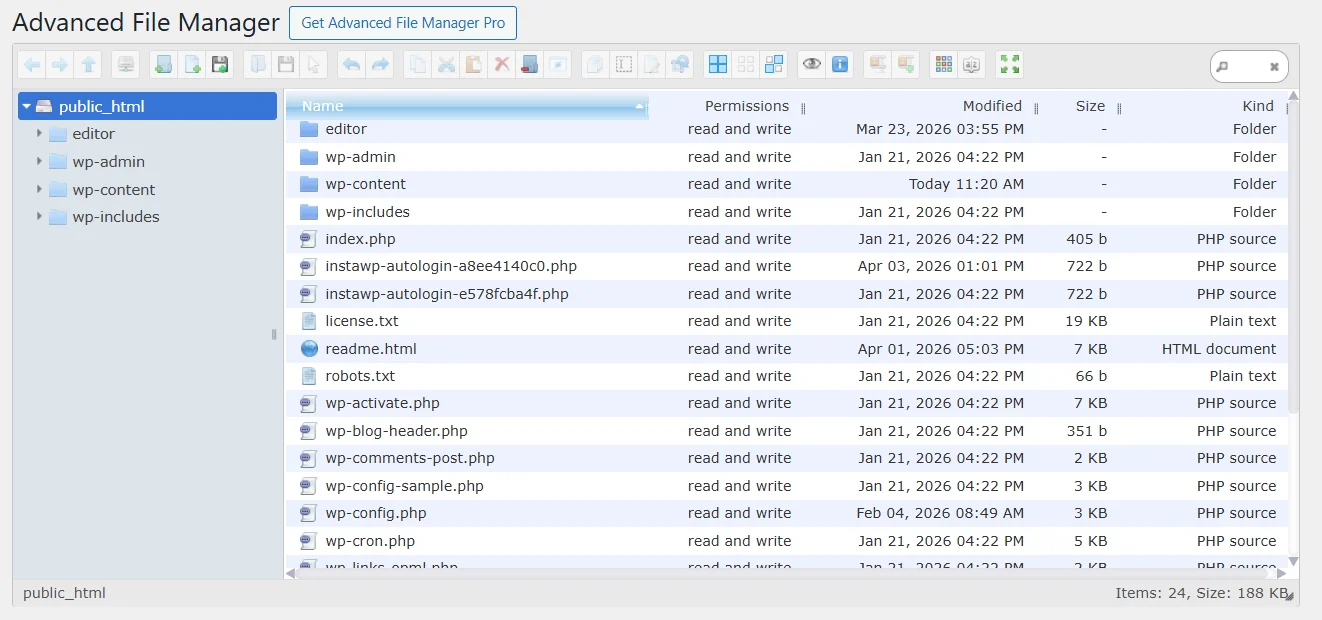
- Using the Advanced File Manager Plugin on WordPress
- Install and Activate Advanced File Manager.
Need help? Refer to the official guide on installing Advanced File Manager.
- Click on File Manager from your WordPress dashboard.
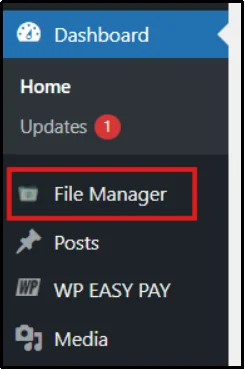
- It will open the site’s root directory (public_html).
Step 2: Locate the Correct File
- Depending on your server type:
- For Apache servers, locate the .htaccess file
- For Nginx servers, locate your server configuration file (nginx.conf)
- If the .htaccess file is not visible, make sure hidden files are enabled.
Step 3: Add the CSP Header
“For Apache servers (.htaccess file):
⚠️ Prerequisite: Ensure the mod_headers module is enabled on your server.
Open your .htaccess file (located in your site’s root directory) and add:
<IfModule mod_headers.c>
Header set Content-Security-Policy “default-src ‘self’;”
</IfModule>
For Nginx
- Add this inside your server block:
add_header Content-Security-Policy “default-src ‘self’;”;
- Save the file and upload it if needed.
Nice work! Your CSP is now active at the server level.
Step 4: Test Your Configuration
- Visit your website and check if everything loads correctly.
- Open Chrome DevTools (F12) → Console and look for any CSP errors or blocked resources.

- If needed, switch to report-only mode first to safely test your policy before enforcing it.
How CSP Affects Password-Protected Pages
⚠️ Important: When using the Password Protected plugin alongside CSP, your policy doesn’t automatically whitelist the plugin’s lock screen assets. The browser applies your CSP rules to the password protected page just like any other page, blocking scripts, styles, or iframes that aren’t explicitly allowed. This can result in a broken or unresponsive login screen if your policy is too restrictive.
👉 Learn how you can password-protect a WordPress post.
Your content is protected, but visitors cannot get in.
What breaks: Plugins inject CSS and JavaScript directly into the HTML. CSP blocks both by default. If your lock screen uses reCAPTCHA, hCaptcha, or Cloudflare Turnstile, those load scripts from external domains, also blocked. The page just stops working correctly.
How to Fix it: Open DevTools (F12), go to the Console tab, and load a protected page. Every CSP violation appears as a red warning there. Each one tells you exactly what was blocked and which directive to update. Add it to your CSP header.
Common Directives to Add When Using Password-Protected:
- Google reCAPTCHA – add https://www.google.com and https://www.gstatic.com to script-src and frame-src
- hCaptcha – add https://hcaptcha.com and https://assets.hcaptcha.com to script-src and frame-src
- Cloudflare Turnstile – add https://challenges.cloudflare.com to script-src and frame-src
How to Resolve Common CSP Problems
After you enable a CSP, something will break. That means it is working. Read the console error, find the blocked resource, and add it to the right directive.
- Inline scripts blocked – You can fix it by using a nonce (most secure), a hash for static scripts, or ‘unsafe-inline’ as a last resort. This is often referred to as WordPress CSP nonce example usage.
- Plugin JavaScript stops working – Copy the domain from the console error and add it to the script-src directive. Remember to always use the exact domain.
- Page builder styles break – Most page builders require ‘unsafe-inline’ in style-src to work properly.
- Google Fonts not loading – You need to allow both Google Fonts domains. Add https://fonts.googleapis.com to style-src and https://fonts.gstatic.com to font-src.
- WooCommerce checkout breaks – Add the required domains (e.g., Stripe, PayPal) to script-src, frame-src, and connect-src.
- Site goes blank or wp-admin breaks – Remove the CSP line from .htaccess, clear the cache, and switch back to report-only mode to safely fix issues.
Best CSP Practices for WordPress Security
To properly Set Up Content Security Policy in WordPress, follow these:
- Check your console after every plugin install or update. New plugins load new resources. What worked yesterday can break today.
- Run report-only alongside enforcement. The enforcement header protects your site, whereas the report-only header catches new violations before they cause problems.
- Be specific with domains. Using https: as a wildcard in script-src allows any script from anywhere. Add exact domains.
- Document your policy with comments. Leave a note above each entry so you remember why it is there.
- Never copy a CSP from another site. Every WordPress install loads different resources. Build yours from your own violation reports.
- Use CSP as one layer, not your only layer. CSP stops malicious scripts from running. Pair it with Password Protected to have stronger access control over your content.
Protect WordPress Against Modern Cyber Threats
Content Security Policy is one of the most effective ways to mitigate modern web attacks in WordPress. However, it is not a “set and forget” configuration. Because WordPress relies heavily on themes, plugins, and third-party scripts, your CSP will need continuous testing and adjustments to avoid breaking essential features.
The best approach is to start in report-only mode, carefully monitor violations, and gradually enforce your policy once your site is stable. When combined with Password Protected, CSP becomes a powerful layer in your overall WordPress strategy.
👉 Protect your WordPress content with Password Protected while enforcing CSP to block modern web attacks.
FAQs
Will enabling CSP slow down my WordPress site?
No, CSP does not slow down WordPress when configured correctly. It is enforced by the browser and has minimal performance impact.
Can CSP break Elementor or WooCommerce?
Yes, CSP can break page builders or WooCommerce features if required scripts or styles are blocked. You can fix this by properly configuring your CSP directives to allow necessary resources.
Should I use nonce or hash in WordPress CSP?
Yes, whenever possible. Nonces are preferred because they are dynamic and more secure, while hashes are better for fixed scripts. Both are more secure than using ‘unsafe-inline’.
Is CSP enough for WordPress security?
No, CSP is not a complete security solution. It helps protect against attacks like XSS, data injection, and clickjacking, but it should be used alongside other security measures such as firewalls and secure plugins.