Managing content visibility in WordPress is crucial for site control, whether you’re running a personal blog, a membership site, or a business portal. By default, WordPress provides several built-in visibility settings that determine who can view a post or page.
These settings provide a quick way to restrict or grant access without requiring additional plugins or custom code. Understanding these options helps you protect sensitive content and maintain a professional user experience.
This article examines the built-in visibility settings in WordPress, including their functions, when to utilize them, and how they enhance your content strategy.
Let’s jump in.
Understanding Built-in WordPress Visibility Options
WordPress offers three primary visibility settings for posts and pages: Published, Private, and Password Protected. Each serves a specific purpose and can be configured from the editor screen without any technical steps.
Let’s understand each WordPress visibility option one-by-one.
- Published: This is the default setting. Content marked as public is visible to everyone, including search engines and bots. Use it for blog posts, landing pages, or any material meant for public access.
- Private: Private content is visible only to logged-in users with editor or administrator roles. It won’t appear in search results or navigation menus for regular visitors. This setting is useful for internal notes, draft collaborations, or admin-only updates.
- Password Protected: This option allows you to set a password for specific content. Anyone with the password can view the post or page, even without logging in. It’s ideal for sharing selective information with clients, partners, or a closed group.
These WordPress visibility settings are accessible from the sidebar panel in the Gutenberg Editor. You can change them at any time without affecting the rest of your site.
Search Engine Visibility
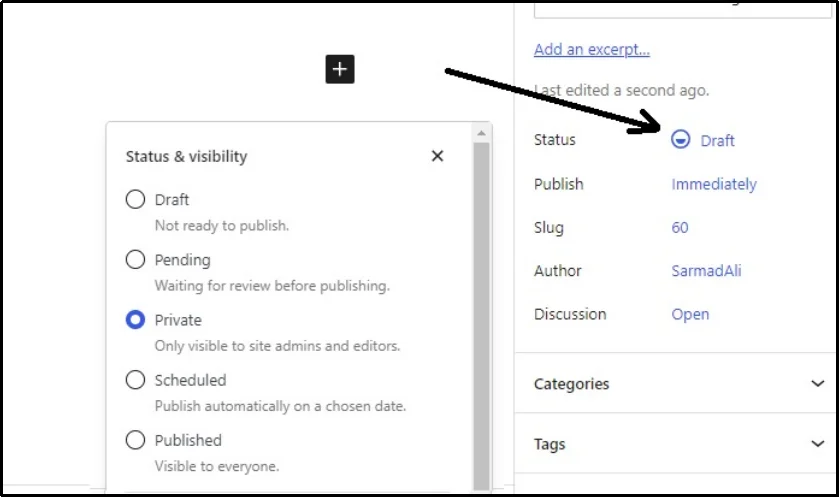
WordPress also offers exciting built-in features for enhancing the search engine visibility of individual posts or the entire site. We previously discussed that changing your status to Private prevents search engines from crawling that specific page.
You can do so by navigating to the post you want to keep Private, clicking “Status,” which will reveal all the options, and then selecting “Private.”
For the entire website, navigate to your WordPress settings ⇒ Reading ⇒ Scroll down until you find Search engine visibility, check the “Discourage search engines from indexing this site” box, and click Save Changes to save progress.
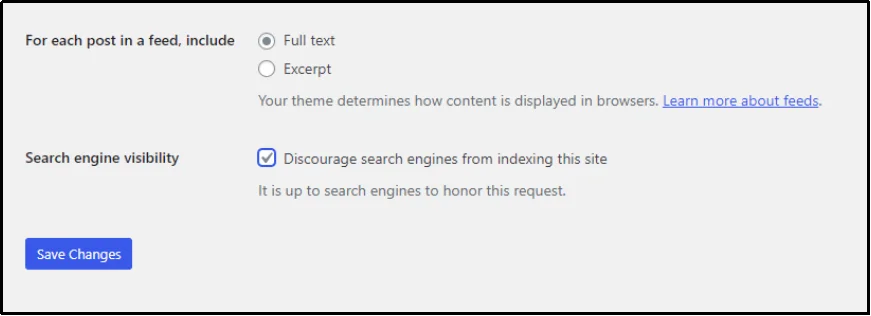
That should restrict search engines from crawling or indexing your site.
Alternatively, you can also modify crawlability settings via the robots.txt file; the following section outlines the steps to do so.
Change Search Engine Visibility Via Robots.txt File
A robots.txt file is a plain text file located in the root directory of your website. It gives instructions to search engine crawlers about which pages or directories they are allowed to access and index. While it doesn’t guarantee enforcement—crawlers can sometimes ignore it—it is widely respected by major search engines.
To prevent crawlers from accessing certain content, you can manually edit your robots.txt file.
Here are a few examples:
To block all crawlers from your entire site:
User-agent: *
Disallow: /
To block all crawlers from a specific directory, such as a private folder:
User-agent: *
Disallow: /private-folder/
To block a specific post:
User-agent: *
Disallow: /your-post-slug/
You can create or edit this file using an FTP client, a file manager in your hosting panel, or through SEO plugins like Yoast or Rank Math that offer built-in interfaces for managing it.
However, it’s imperative to understand that robots.txt only controls crawler access. It doesn’t make the content private or hidden from users who have the direct URL. In fact, every other method shared above has certain limitations.
Why Default WordPress Visibility Options Have Constraints
WordPress includes basic visibility options, allowing you to control who can view individual pieces of content. However, these built-in options come with several limitations, especially when managing access at scale.
Below is the breakdown of limitations of the WordPress visibility built-in features:
Password Protected
The Password Protected feature only works at the level of individual posts or pages. There is no native way to protect entire categories, post tags, product tags, or custom taxonomies.
For instance, if you want to create a members-only section under a specific category, you would need to open each post manually and assign it a password. This process becomes tedious and impractical as the number of posts increases.
Moreover, WordPress does not automatically apply the same password across multiple posts. Each protected post prompts the visitor to enter a password separately, even if the content belongs to the same category.
Private
The Private visibility status has its own constraints. It only allows access to logged-in users with an editor or administrator role. This is useful for internal notes or drafts, but offers no flexibility for public-facing restrictions.
You cannot grant access to subscribers, customers, or specific users without modifying user roles. This makes it unsuitable for scenarios where you want to selectively share content with clients or collaborators who should not have backend privileges.
To address this gap, we will next explore a more effective approach in the next section.
Also Read: How to Restrict Content in WordPress [3 Unique Ways]
A Better Alternative: Password-Protected Plugin
To overcome the limitations of WordPress’s built-in visibility settings, the Password Protected plugin offers a more practical solution. Instead of protecting content one post at a time, this plugin allows you to secure the entire site or specific sections with a single password.
Once activated, the plugin places a password gate over your entire front end. Visitors must enter the password to view any part of the site, unless you choose to allow exceptions for specific pages, categories, or IP addresses.
Unlike the default visibility tools, this plugin does not rely on user roles or force you to repeat the same process across dozens of posts.
What makes this method especially useful is its simplicity. It requires no coding and works well with all popular themes and plugins. Within minutes, you can enforce a unified security layer without restructuring your content or modifying user permissions.
Protect Post and Pages With Password Protected
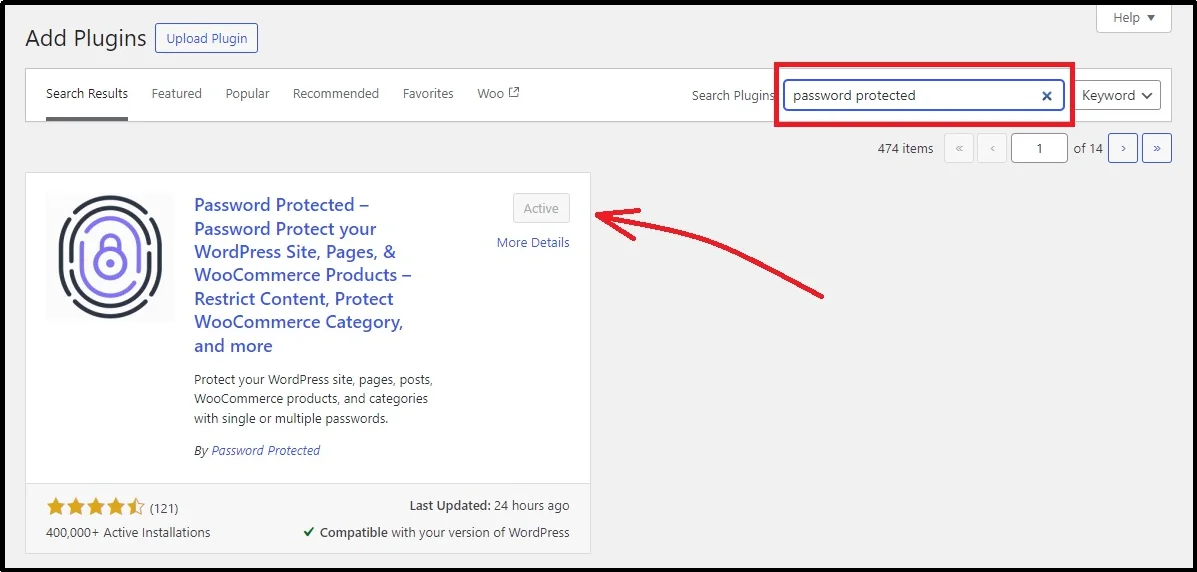
Install Password Protected plugin and begin the security!
Just navigate to WordPress ⇒ Plugin ⇒ Add Plugin ⇒ Search for “Password Protected” using the search plugins bar ⇒ Install and Activate.
Note: Some of the features discussed ahead are available in Password Protected premium only. Please check out the plans here and do not hesitate to get in touch with our support for any questions or help with downloading or configuration.
As discussed, you can password protect an entire site. You can do so by navigating to the plugin’s settings and enabling the password protected checkmark. Once checked, enter the password and tweak the settings to your preferences.
Alternatively, as discussed earlier, you can also protect individual posts, pages, taxonomies, etc.
For that, after navigating to the plugin’s settings, just switch to the Content Protection tab.
Here, you will see specific checkboxes in each row for Posts and Pages.
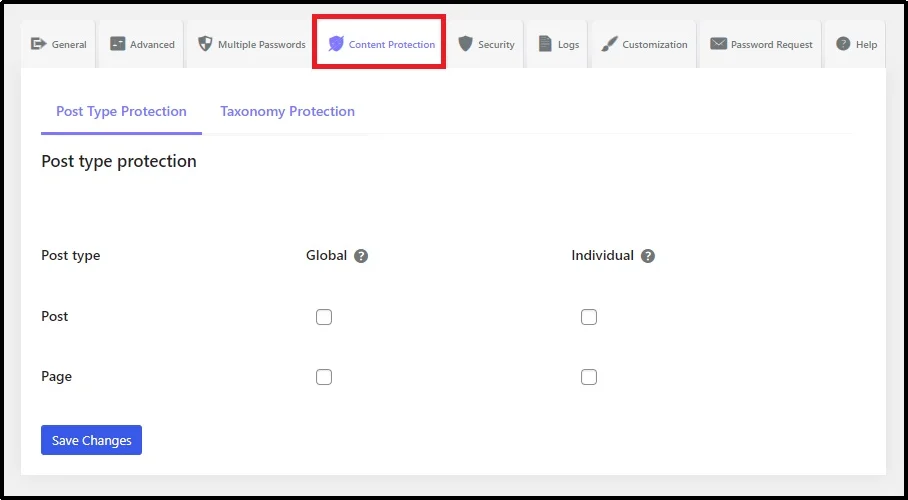
Just check the box in the Global column in the Post row and you have enabled password protection collectively for all the posts on the blog. Otherwise, check the box in the Individual column and that should add an additional password option at the end of the screen underneath the post that you want to protect individually.
Just go to the Post you wish to protect and click Edit.
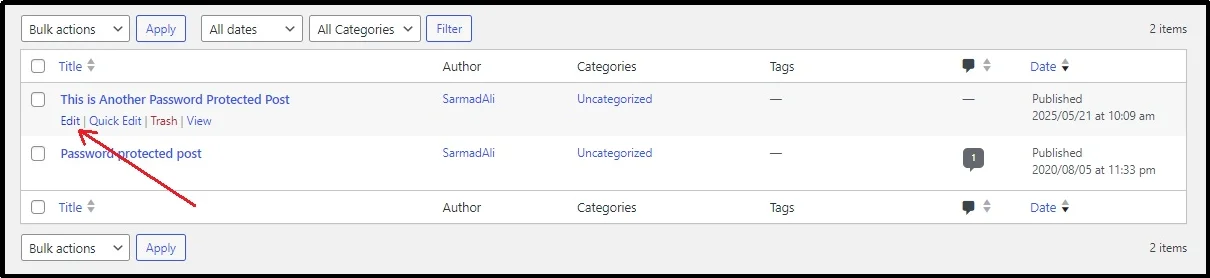
Scroll down until you find specific options from the Password Protected plugin.
Similarly for Pages, you can protect them individually or globally by checking the column in the respective columns.
Earlier, we also discussed placing passwords over taxonomies. You can reach that specific setting by switching to the Category/Taxonomy Protection subtab on the same Content Protection tab.
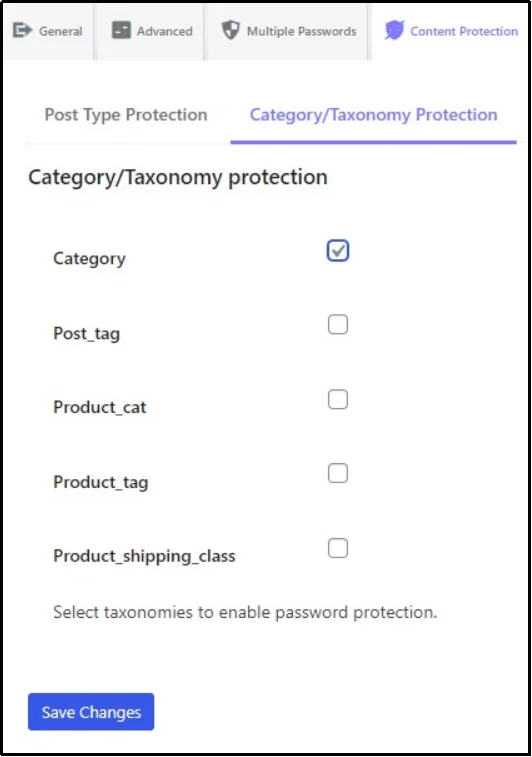
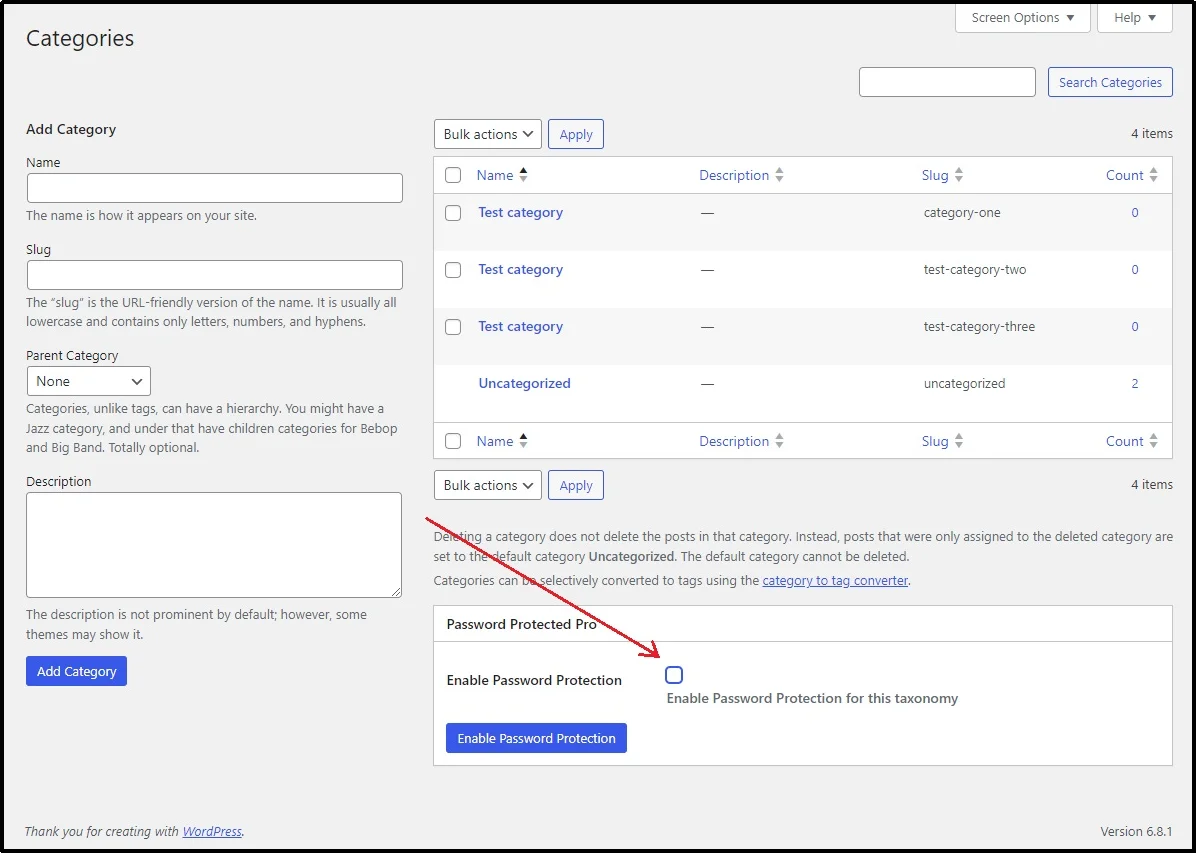
As seen in the image above, after checking the check box next to Category, you can navigate to all categories of your WordPress and protect each of them by enabling the Password Protection and setting a password in the subsequent customization screen that appears after checking this box.
However, here’s a catch…
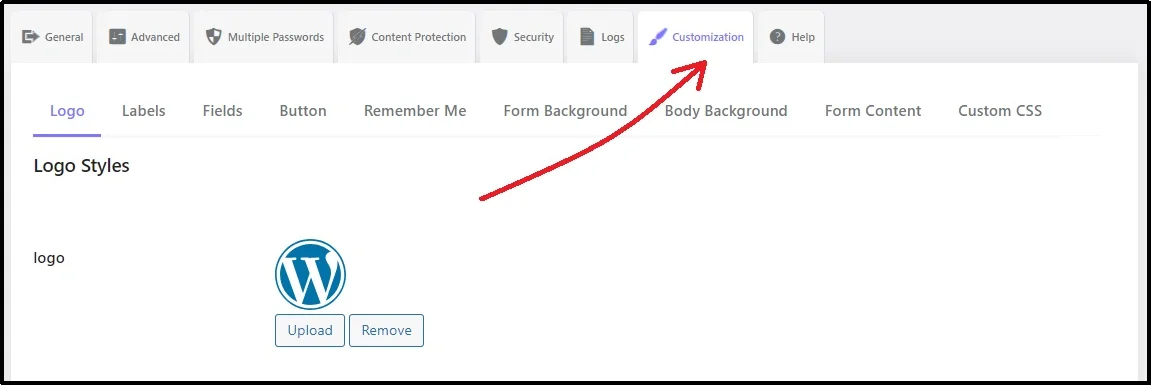
The password protected screen looks blunt and mundane. Good thing that Password Protected now supports complete customization!
Just go to the Customization tab and make it appear the way you want.
Password Protected is easy, convenient, and secure!
To learn more about Customization and how you can use it, this article can help!
How to Style a Password-Protected Page in WordPress [Step-by-Step]
Final Words
Managing content visibility in WordPress begins with understanding its built-in options. For basic use cases, the default Public, Private, and Password Protected settings offer enough control to publish or restrict content on an individual level. However, these tools fall short when broader access control is required.
If your content strategy involves protecting entire categories, grouping private materials, or securing client-specific sections, relying solely on WordPress’s native features is inefficient and time-consuming.
In such a case, the Password Protected plugin stands out and offers much better efficiency and convenience by providing the flexibility to manage individual posts, pages, or taxonomies with minimal effort.
Whether you are protecting internal resources or delivering gated content to a select audience, Password Protected equips you with necessary features you need to offer optimal customer experience. Try Password Protected today!