Want to protect different categories with different passwords?
We are thrilled to announce Password Protected v1.5.0, which gives you more control with multiple new features for password protection.
Keep reading to learn more about everything you need to know about this update. At the end, we will also show you how to unlock these features.
Ready? Let’s dive right in.
What’s New in Password Protected v1.5.0?
Our innovative team works tirelessly to provide our valuable users with a premium experience on our plugin. Therefore, we are here with two amazing features to make your experience even better with Password Protected. Version 1.5.0 comes with two features:
- Category-specific password protection.
- Bulk protection.
Let’s learn more about each feature…
Feature #1: Category-specific password protection
With great excitement, we want to announce our new feature that enables users to password-protect specific categories with unique passwords.
Previously, our plugin only allowed users to password-protect all or individual categories with one single password. Although this strategy was practical, we had long envisioned that our users would be able to password-protect individual categories with specific passwords. And this update is here to make it possible.
This feature allows users to manage access to different categories. You can now set a unique password for each category, giving you better control over content access.
Why is this feature essential?
Having separate passwords for each category opens up a range of possibilities, especially if you manage a website with diverse content. Here’s how this feature can help you:
- Managing access. If you run a membership-based site, you can now assign different passwords for users with different plans. This allows you to offer exclusive content at different levels without mixing up user access.
- Better organization and management. Instead of one password for all categories, you can now control who should and should not be able to access specific categories, making content restriction much more effective and user-friendly.
- Secure multiple product lines. For WooCommerce stores, this feature enables you to lock specific product categories individually, helping you create products only for specific customers.
- Proper segmentation. If you are in an educational business and provide online courses, you can now restrict lessons by category, ensuring only students with the correct password can access specific modules. For instance, you may want to create specific lessons for students from a particular discipline.
How to use category-specific password protection?
To enjoy the flexibility of this feature, you must upgrade to Password Protected Pro.
Firstly, go to Password Protected settings from your admin dashboard and switch to the Content Protection tab >> Taxonomy Protection subtab.
Check the checkbox against Category.
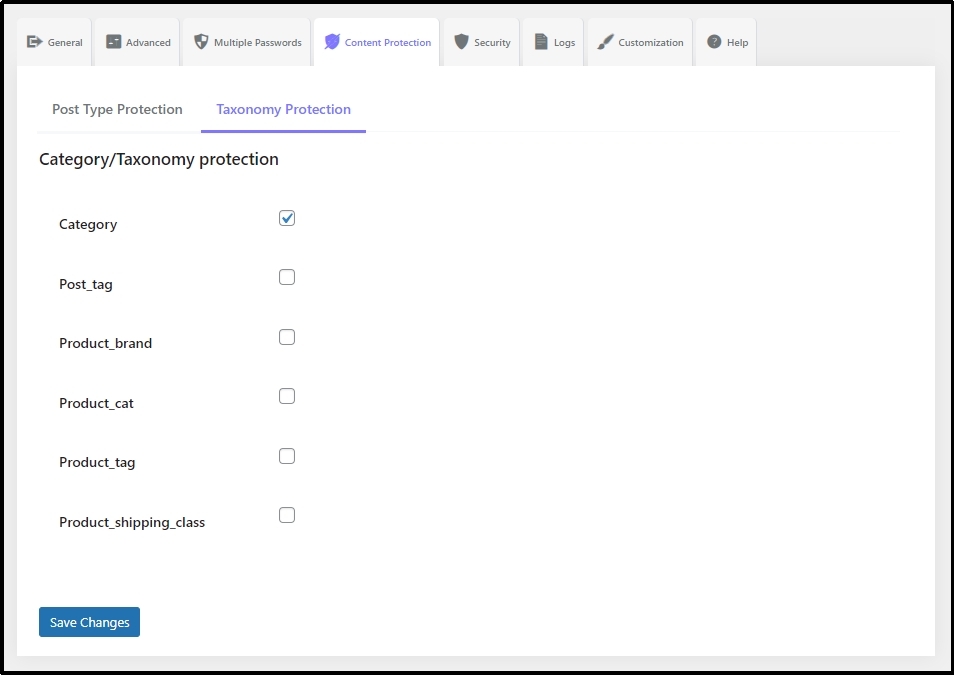
Save progress using the Save Changes button.
Afterward, navigate to Posts >> Categories.
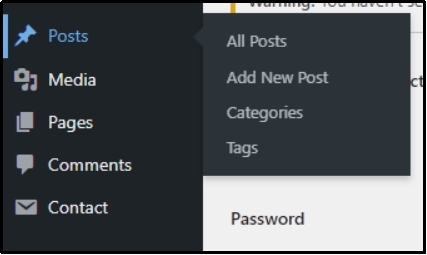
Scroll down and select the category you want to protect.
You will see the following options: set a unique password, usage limit, expiry date, and status.
Save changes using the Save Password button.
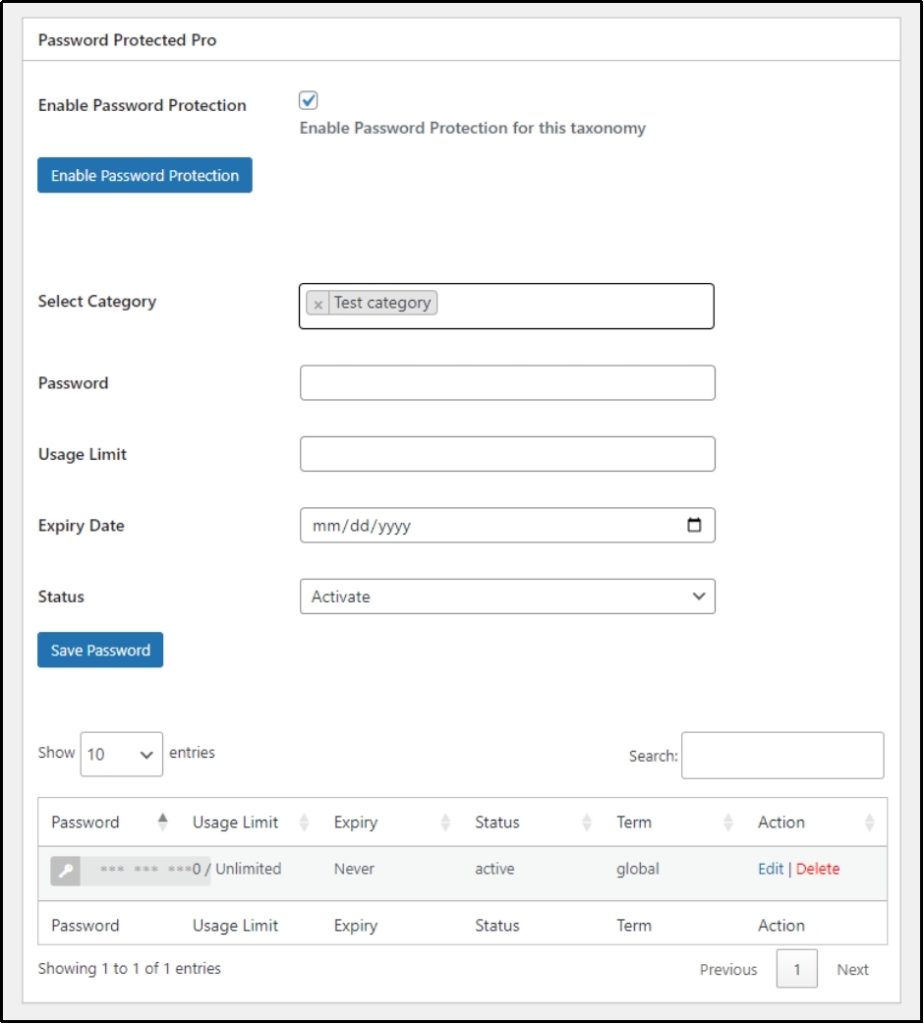
Now, categories can only be accessed with the unique password you just set.
Feature #2: Multi-site network protection
We are excited to introduce another fantastic feature in this latest update: multi-site network protection.
Previously, if you had a WordPress multisite network, you had to manually password-protect each site individually. This process was time-consuming and inefficient. But now, it’s easier than ever!
You can now password-protect the entire main site, which will automatically incorporate a password screen on all the children’s sites. No more repeating the same steps over and over!
Why is this feature essential?
- One-click password protection. Instead of manually setting passwords for every subsite, simply password-protect the parent site, and all the subsites will inherit the same protection automatically.
- Time-saving. Whether you manage a multisite network for an agency, business, or educational institution, this feature will save you valuable time, preventing repeating the steps again and again to protect all the sites in the network.
- Consistent security across your network. By applying a uniform password policy across your multisite network, you ensure that all your sites remain equally protected, reducing security gaps.
- Reducing potential vulnerabilities. Previously there was a chance that you may miss or forget to add a password-protected screen as a subsite, given it was a tedious manual task before, which could become a gateway for potential cyberattacks. Now, you can protect all the sites in one go, ensuring no gateways are being opened for the hackers, helping enhance your site’s security.
- Ideal for testing. If you’re testing something on a multisite setup and want to restrict access during development or testing, this feature makes it incredibly easy to keep everything under wraps until you’re ready to go live.
How to use bulk protection?
Go to your network site and install the Password Protected Pro.
After installation, use the Bulk Protection button.
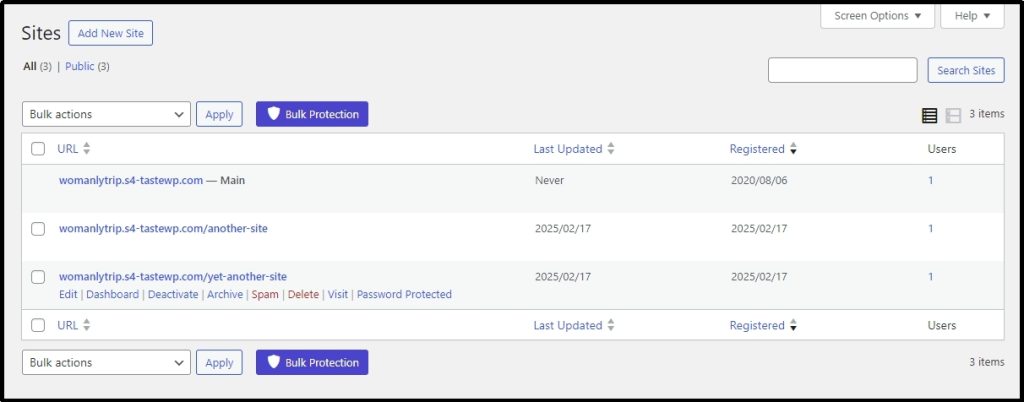
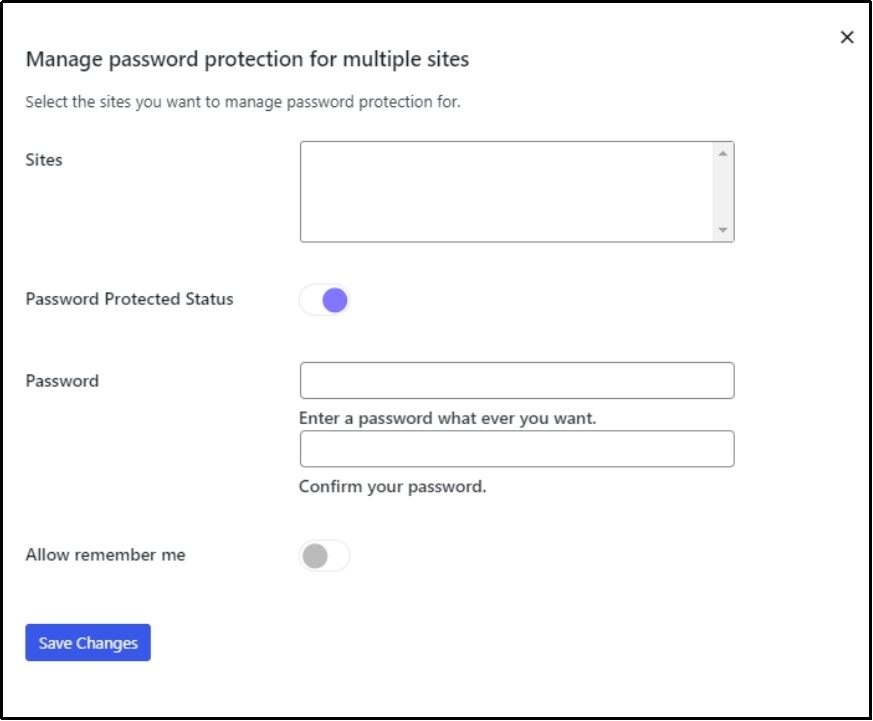
The following screen will appear.
Select all the sites that you want to protect. Toggle the status button and set a password. Finally, save changes.
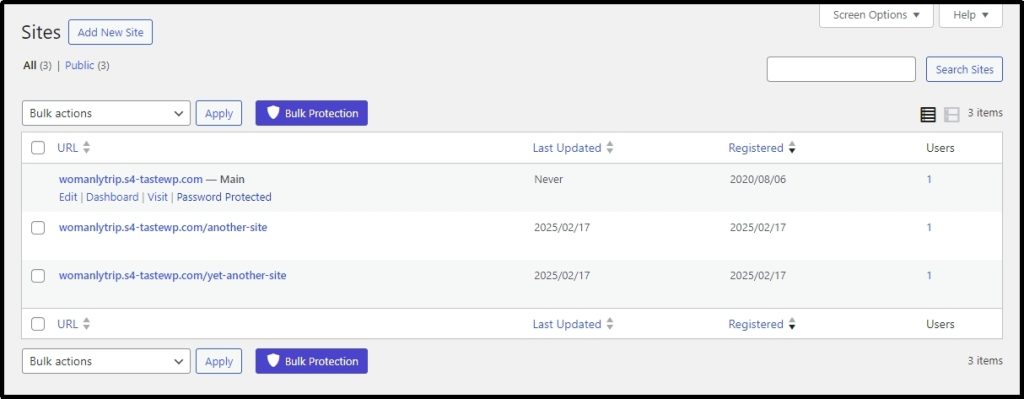
Alternatively, you can also do it individually. Just hover over the main site, and it should reveal settings, including the option to Password Protect your network.
Once you click on it, the following screen will appear, allowing you to toggle the feature and set the password.
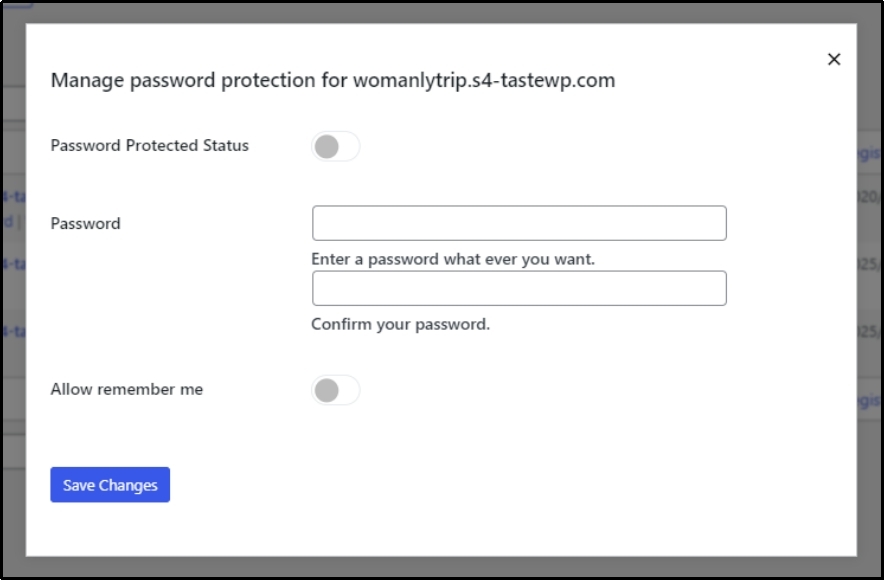
Save changes, and that’s how you can password-protect an individual site within the network.
Ready to Unlock These Features? – Update the plugin
If you are already a Password Protected Pro user, you can start using these powerful new features by updating to the latest version. Otherwise, install the plugin from the WordPress plugin directory.
Once installed, go to the plugin’s settings, navigate to the Get Pro tab, and click the Get Password Protected Pro button.
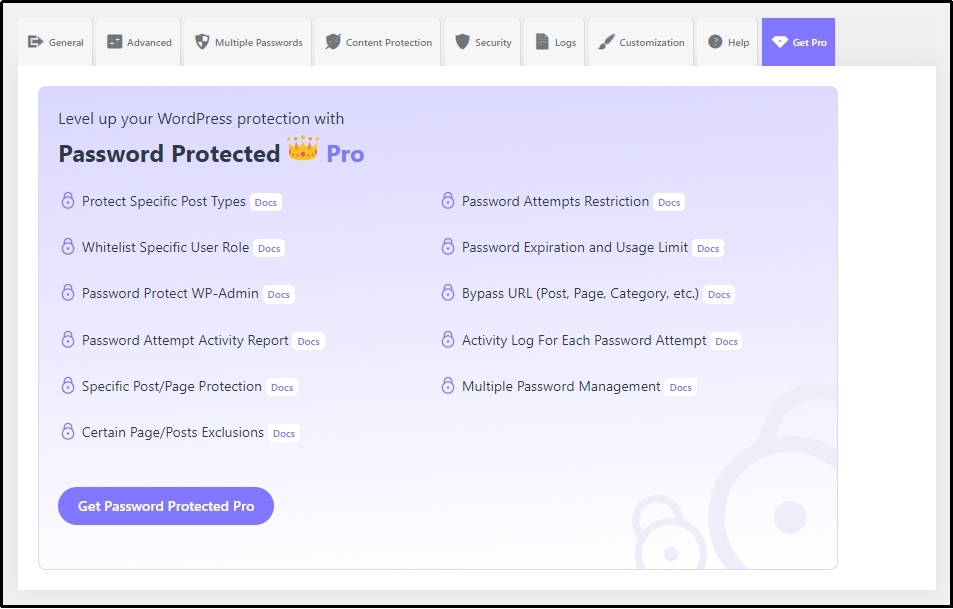
Choose a plan and get all the premium features, including multi-site protection and category-specific password protection.
If you need further clarification, our detailed technical documentation can help!
Thank you for choosing Password Protected. We are determined to bring more exciting features with future updates.