Are you looking for an easy way to password protect WordPress sites for added privacy and security? If so, you have landed on the right page.
WordPress offers several methods to restrict access to your content, whether it’s the entire site, specific pages, posts, categories, or even WooCommerce products. With the right tools, such as the Password Protected plugin, you can quickly implement these changes and safeguard your site.
In this guide, we’ll walk you through five effective methods to password protect your WordPress site. These techniques are straightforward and help you take control of who can access your content.
Ready to secure your WordPress site? Let’s dive in!
Why Should You Password Protect WordPress Site?
To protect your WordPress site, you can use password protection to safeguard your content, files, and other areas that require restricted access. Password protection is an effective way to maintain privacy and limit access to specific users. Here are five easy methods to password protect your WordPress site:
- Restrict File Downloads: Use password protection for downloadable resources like eBooks, software, or reports to ensure only authorized users can access them.
- Secure Development and Staging: Lock your site with a password while it’s under development or testing to prevent visitors from accessing unfinished content.
- Protect Content: Restrict access to posts, pages, and categories by requiring a password to view or interact with them. This helps secure information meant only for a specific audience.
- Manage Event Pages: Create password-protected pages for webinars, conferences, or other events to provide registered attendees with exclusive resources or information.
- Restrict WooCommerce Products: Protect your WooCommerce store’s products by making them accessible only through a password for select customers.
These methods provide practical ways to control access and keep your WordPress site secure. By using these techniques, you can maintain privacy and tailor access to meet your specific needs.
5 Easy Ways to Password Protect WordPress Site
Now, you understand the importance of password protection for a WordPress site. Let’s check out how you can password protect a WordPress site in five different ways.
To begin password protecting your WordPress site, start by installing and activating the Password Protected plugin. Follow these steps:
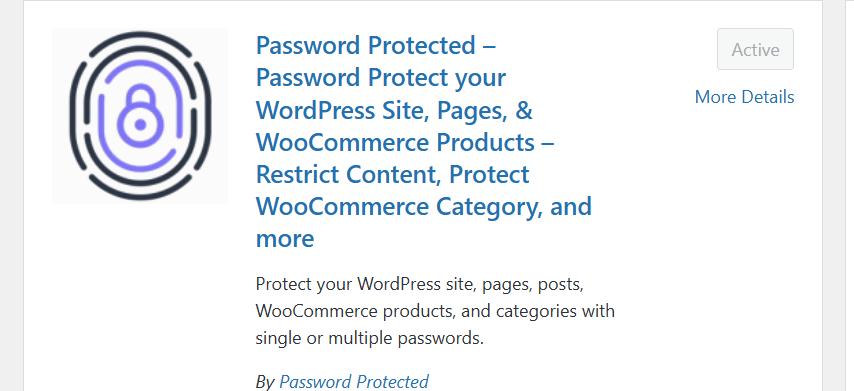
- Log in to your WordPress dashboard and navigate to Plugins → Add New Plugin.
- In the search bar, type Password Protected and look for the plugin named “Password Protected – Password Protect your WordPress Site, Pages, &…and more.”
- Click on Install Now, then select Activate to enable the plugin on your site.
NOTE: Advanced features like password protection for specific posts, pages, and categories are available in the Password Protected Pro version. To upgrade:
- Open the plugin’s settings and go to the Get Pro tab.
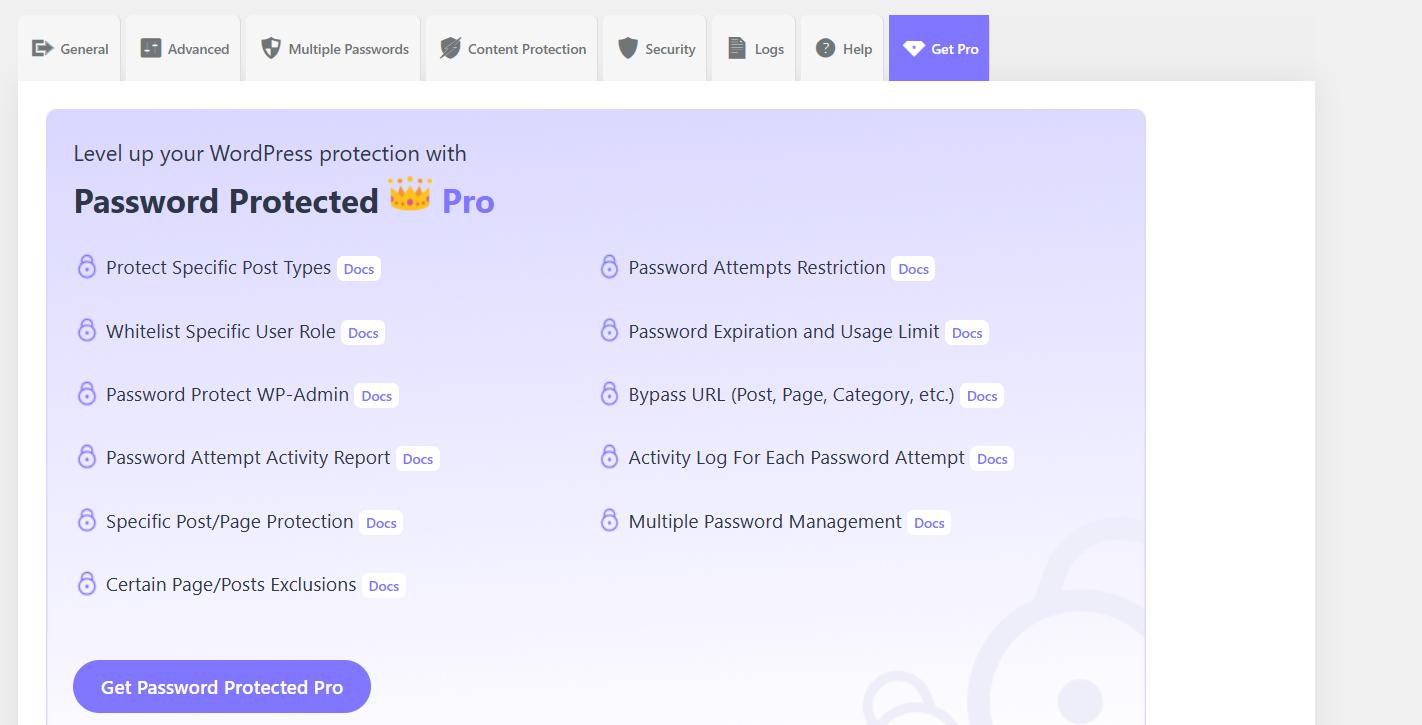
- Click on Get Password Protected Pro to view pricing and subscription options.
- Choose your preferred plan, complete the purchase, and check your email for the Pro version’s zip file and license key.
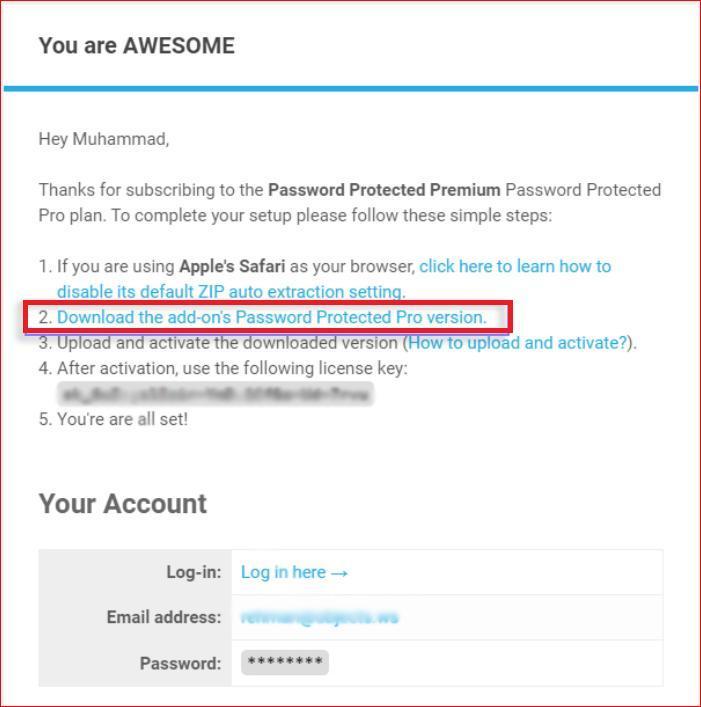
Install Password Protected Pro:
- Return to your WordPress dashboard and navigate to Plugins → Add New Plugin → Upload Plugin.
- Upload the Password-Protected-pro.zip file you received.
- Click Install Now, then activate the Pro plugin.
- During activation, enter the license key to unlock advanced features.
With the plugin installed, you’re ready to configure password protection settings for your WordPress site. We will explain the five different ways of password protection for WordPress in the following section.
#1: Password Protect Entire WordPress Site
If you want to restrict access to your WordPress site to specific users, password protecting the entire site is an excellent option. This feature ensures that only visitors with a password can access your site’s content. Here’s how you can password protect your entire WordPress site using the Password Protected plugin:
- Navigate to the Password Protected plugin settings from the menu on the right-hand side of your WordPress dashboard.
- Open the General tab and activate password protection by toggling the button.
- Adjust the Protected Permissions settings to define the level of access you want to provide.
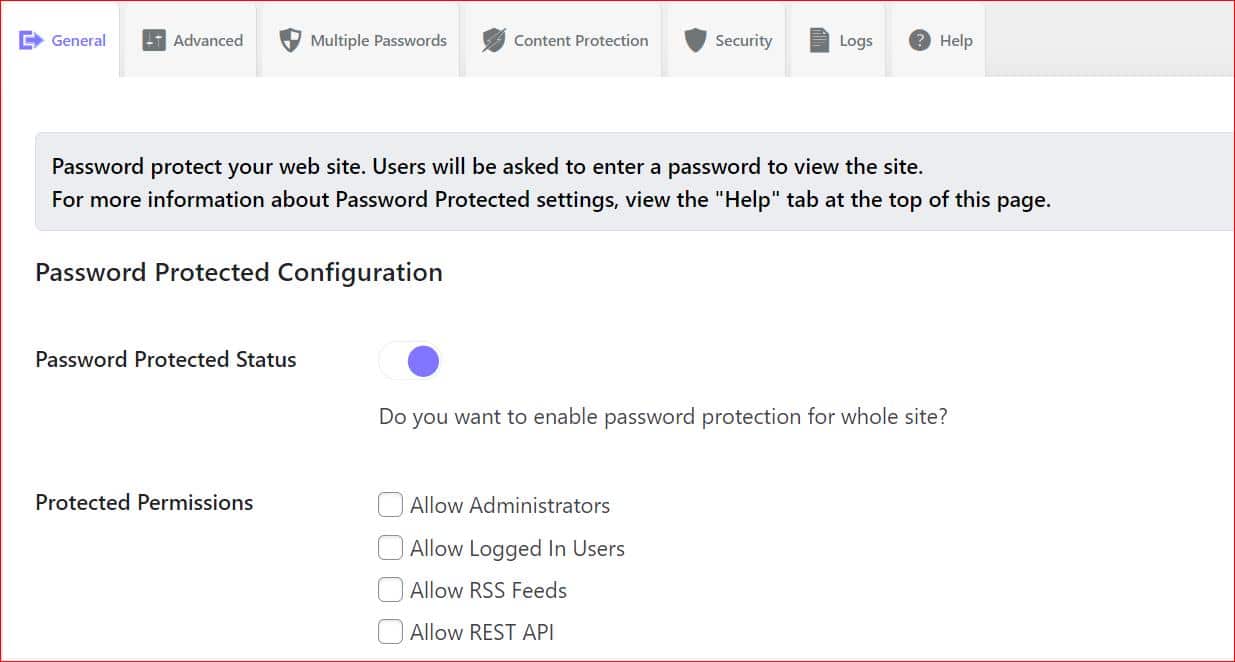
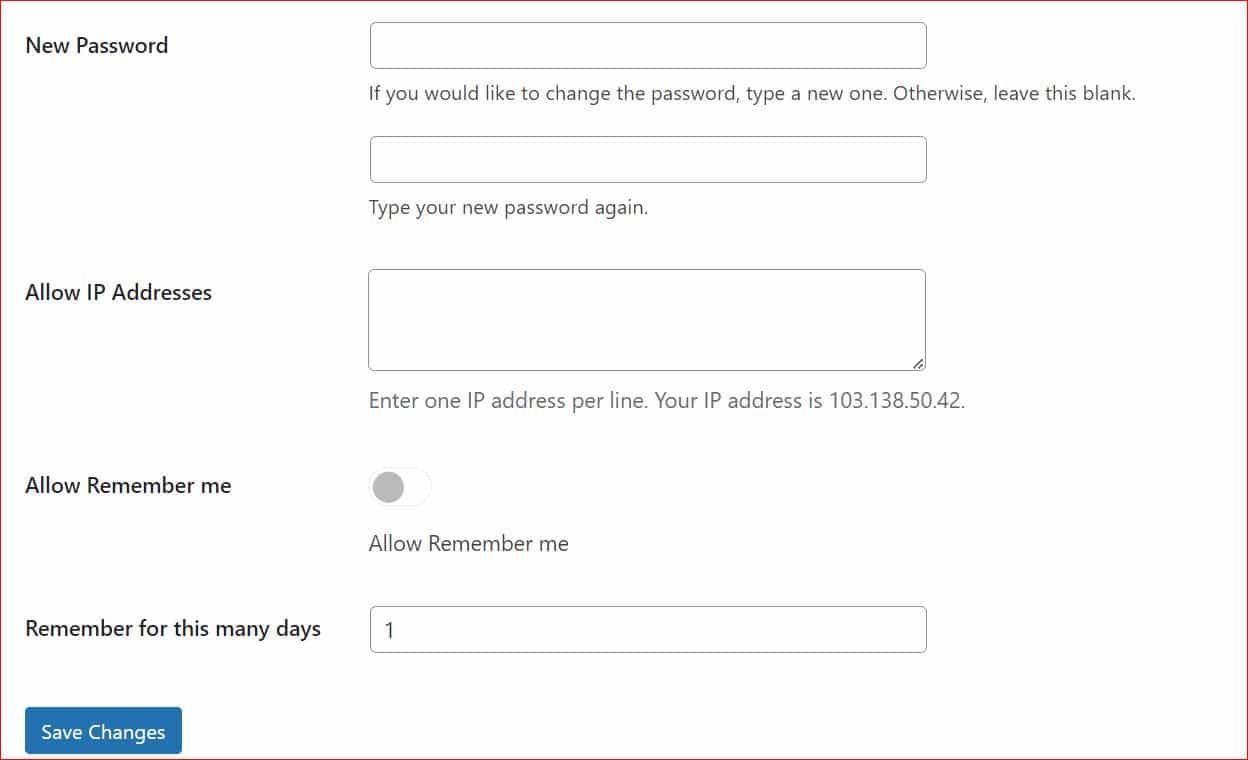
- Create a password for your site and specify how long the protection should remain active.
- Click Save Changes to apply the settings.
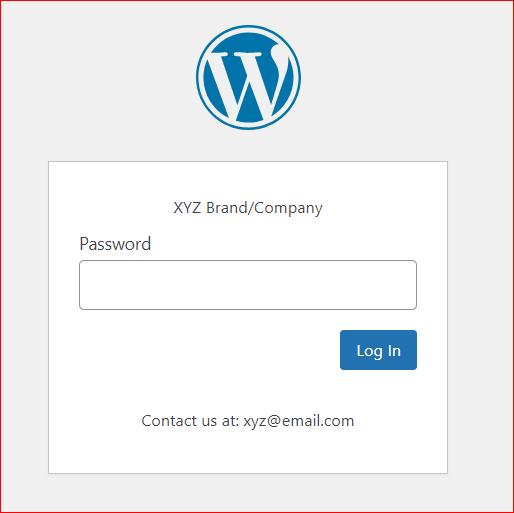
Now, visitors to your website will see a password-protected login screen. Only users with a password will be able to access your site.
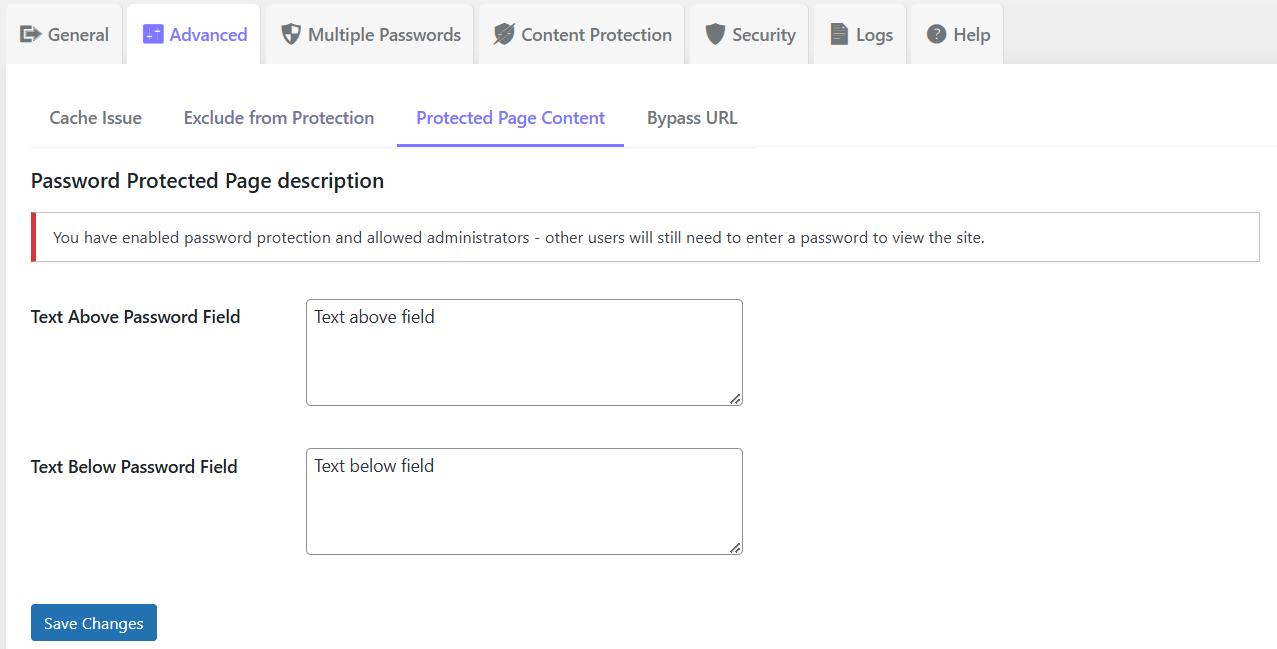
Pro Tip: If you want to customize the password-protected screen with a unique message, consider upgrading to Password Protected Pro. You can modify this in the Protected Page Content section under the Advanced tab.
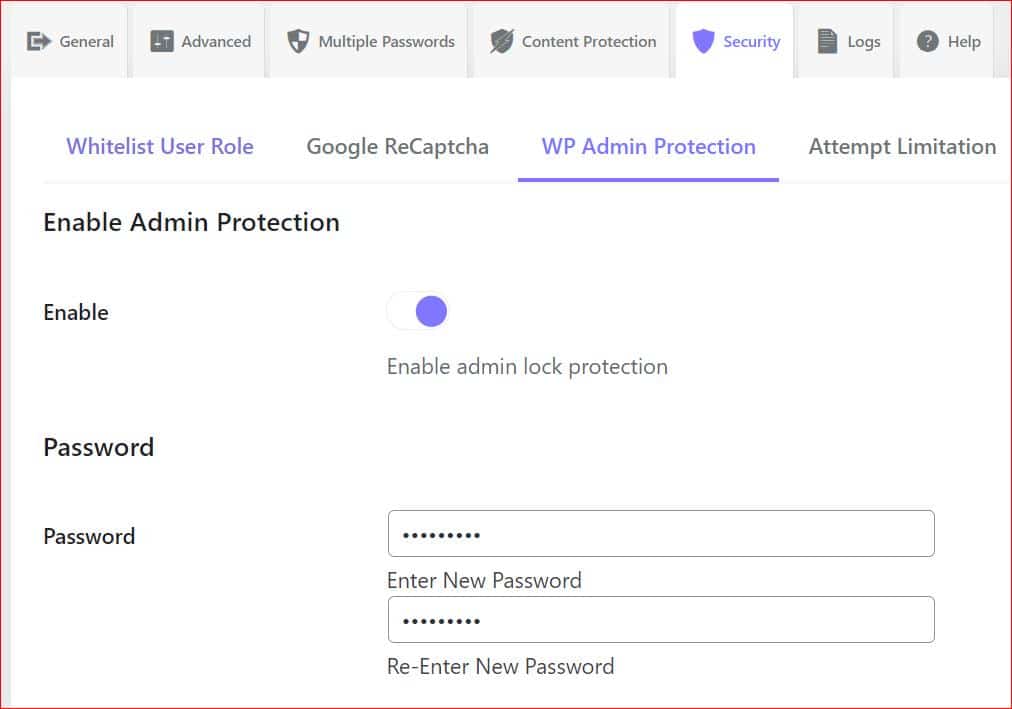
Want to go a step further and password protect your WordPress admin page? Go to the Security settings in the plugin, enable WP Admin Protection, set a password, and save the changes.
This method is perfect for controlling access to your entire site. If you’re interested in learning how to protect specific pages, posts, or categories, keep reading!
#2: Password Protect WordPress Post/Page
You can add password protection to individual content if you want to restrict access to specific WordPress posts or pages. This feature is ideal for offering exclusive content or protecting sensitive information on your site. Follow these steps to password protect WordPress posts, pages, or categories:
- Go to your WordPress dashboard and click on the Password Protected option in the menu.
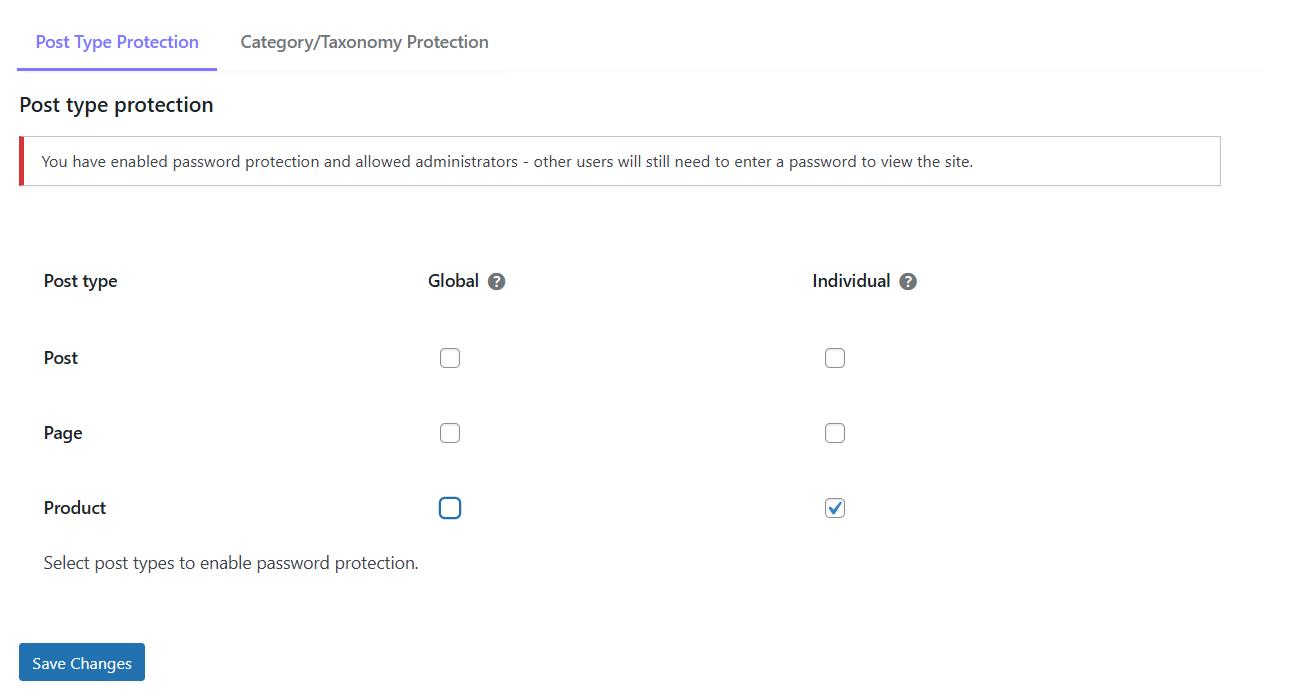
- In the plugin settings, navigate to Content Protection >> Post Type Protection tab.
- Check the box for individual page or post protection for the desired content types or categories.
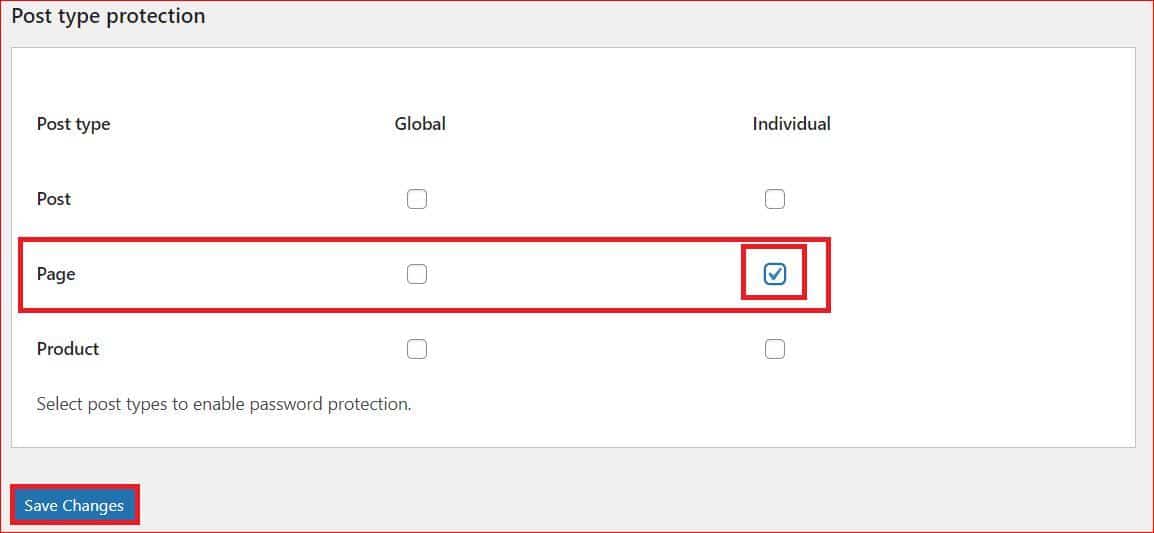
- Click on Save Changes to apply the settings.
NOTE: The ‘Global’ column allows you to password-protect all pages.
To add a password to a specific WordPress page:
- Navigate to Pages → All Pages from the dashboard.
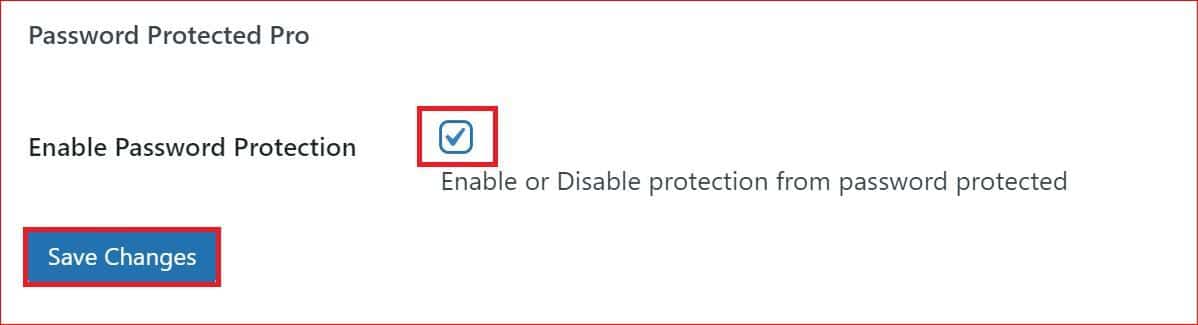
- Hover over the page you want to protect and select Edit.

- Scroll down and enable the Password Protection option, then save your changes.
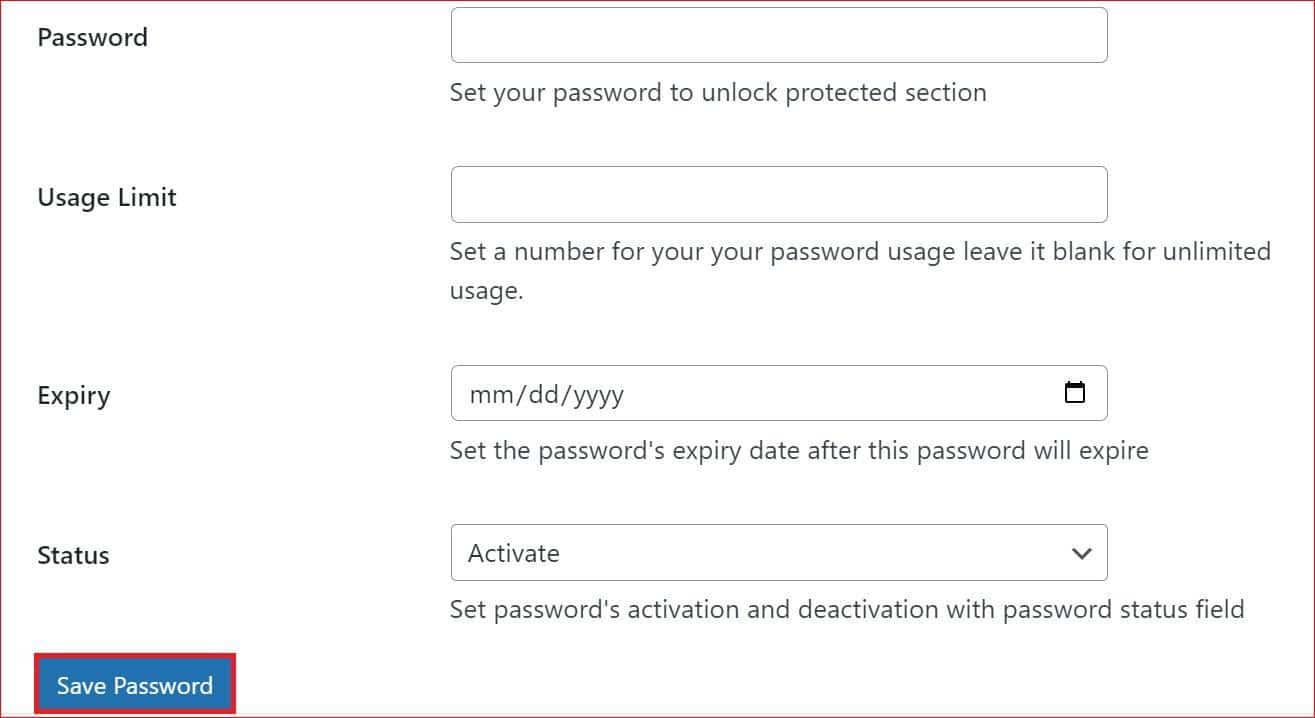
Next, configure the password settings:
- Password: Create a strong password (at least 8 characters).
- Usage Limit: Set how many times the password can be used before it expires.
- Expiry: Define an expiration date for the password.
- Status: Leave it as Active for the protection to take effect.
- Click on Save Password to finalize the setup.
By following these steps, you can password protect posts, pages, and even custom post types, keeping your content accessible only to those with permission.
#3: Password Protect WordPress Categories
If you want to restrict access to specific WordPress categories, you can use password protection to secure them. This method is particularly useful for organizing exclusive content that only certain users can view. Follow these steps to password protect WordPress categories:
- Go to the WordPress dashboard and open the Password Protected plugin settings.
- Navigate to the Category/Taxonomy Protection tab under Content Protection.
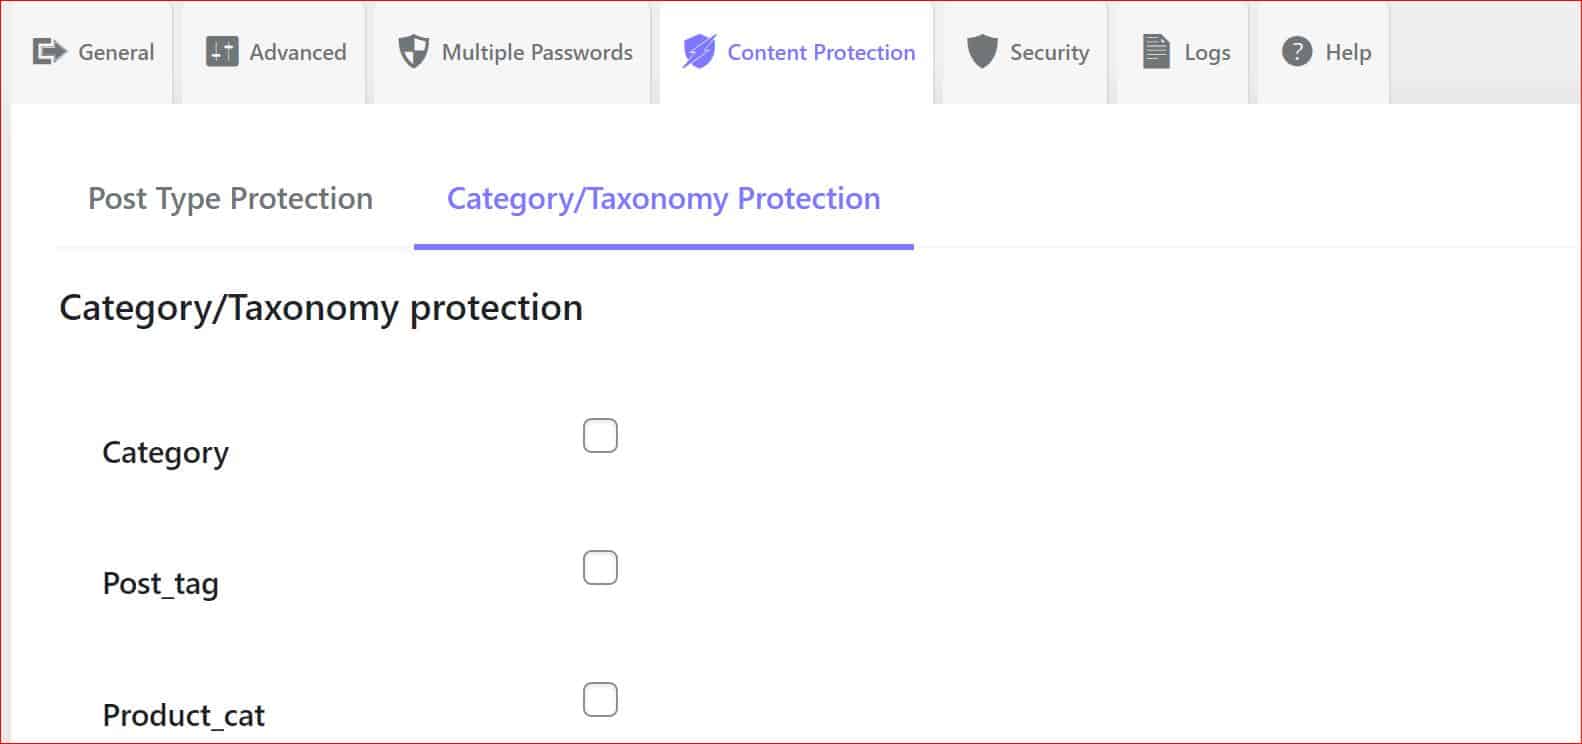
- Select the category you want to protect from the list. If needed, you can also apply password protection to other taxonomies like Post_tag.
- Configure the password settings for the selected category, just as you would for individual pages or posts.
Pro Tip: Use the All In One Login plugin to customize the appearance of your password-protected screen. This helps you create a branded and cohesive experience for your users.
With this setup, only users with the correct password can access content within the protected category. This feature is great for managing premium content or member-only sections of your WordPress site.
#4: Password Protect WooCommerce Products
If you want to secure specific WooCommerce products or your entire product catalog, password protection is an excellent solution. This method allows you to restrict access to your WooCommerce products, making them available only to customers with the correct password. Here’s how to password protect WooCommerce products using the Password Protected plugin:
Step #1: Enable Password Protection for WooCommerce Products
- Log in to your WordPress dashboard and go to the Password Protected settings from the menu.
- Navigate to the Post Type Protection tab.
- To password protect specific products, check the box for Individual product protection.
- If you want to protect all WooCommerce products, check the box under the Global column instead.
- Click Save Changes to activate your settings.
Step #2: Add a Password to Individual WooCommerce Products
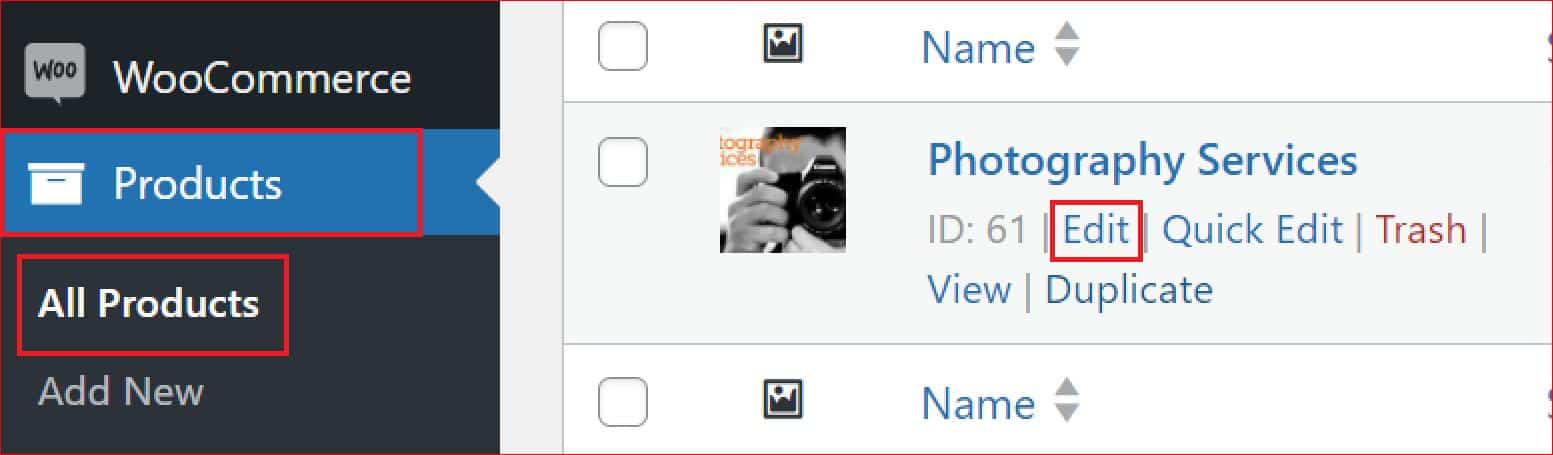
- Go to Products → All Products from the WordPress dashboard.
- Locate the product you want to protect and click on Edit.
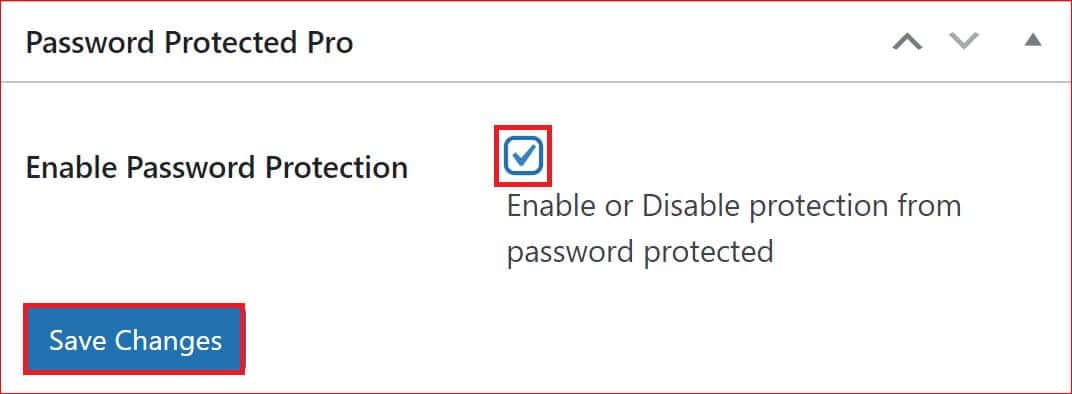
- On the product editor page, scroll down to find the Enable Password Protection option. Check the box and click Save Changes to proceed.
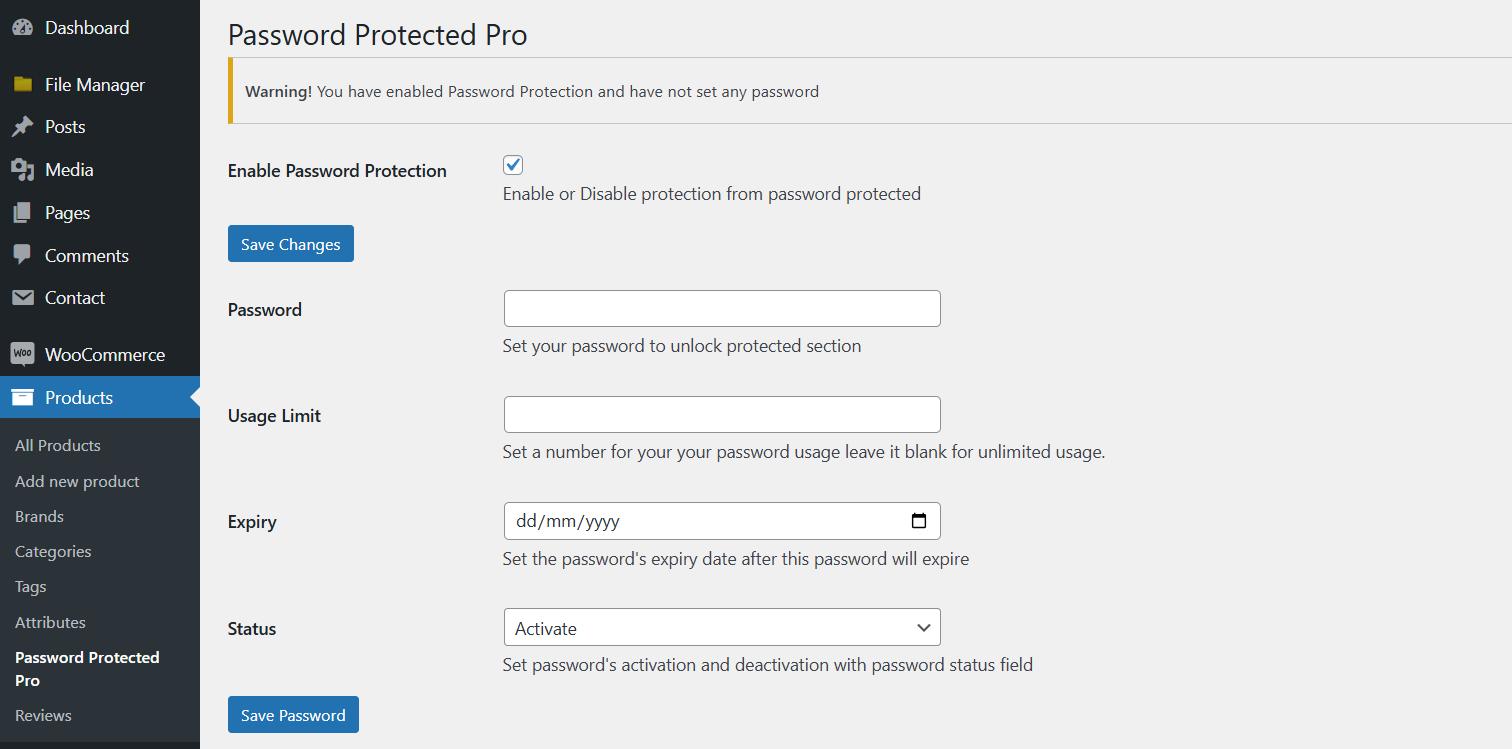
Step #3: Configure Password Settings
Once you enable password protection, additional fields will appear to customize your settings:
- Password: Create a strong password with at least eight characters for added security.
- Usage Limit: Specify how many times the password can be used before it becomes invalid.
- Expiry: Set a date for the password to expire automatically.
- Status: Keep it Active to start password protection. You can change it to Deactivate or Expired later.
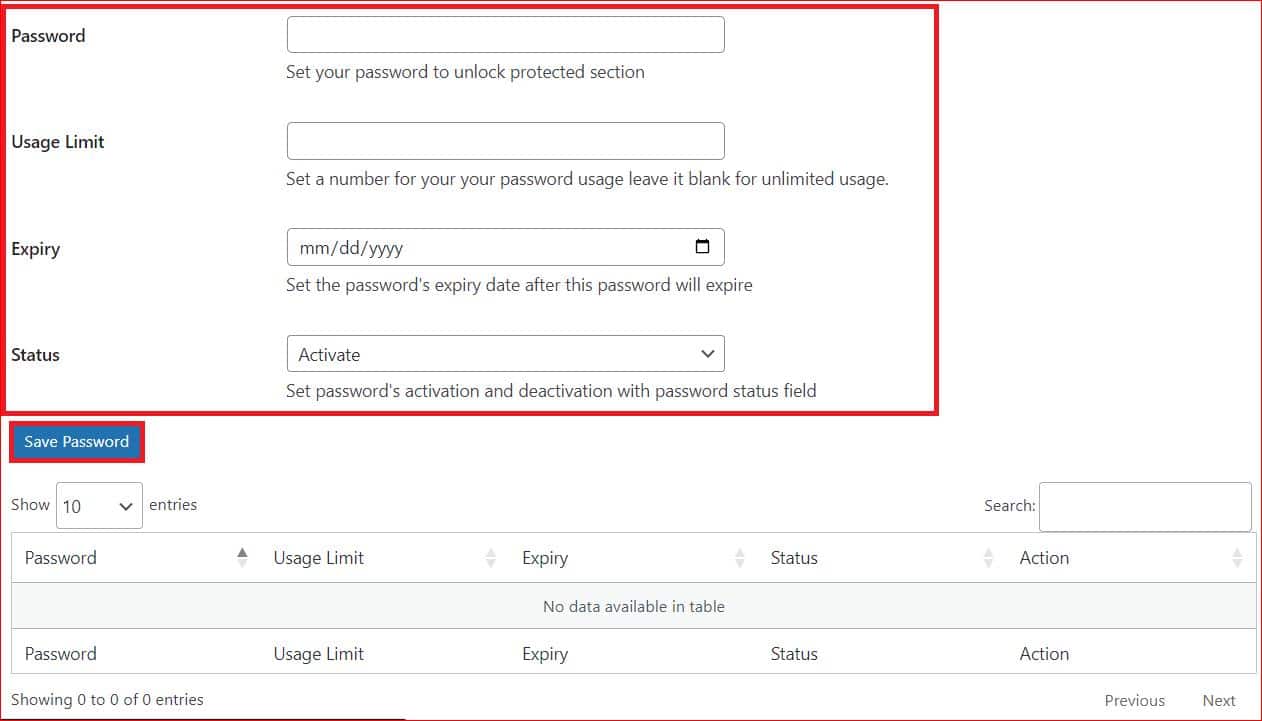
Click Save Changes again to finalize your settings. Now, when users try to access the protected product, they will encounter a password-protected screen.
Step 4: Protect All WooCommerce Products
If you want to password protect all WooCommerce products:
- After selecting the Global option under the Post Type Protection tab, go to Products → All Products → Password Protected Pro
- Scroll down to enable password protection and configure the password parameters (password, usage limit, and expiry) as described above.
By following these steps, you can efficiently manage access to your WooCommerce products, whether it’s a single product or your entire catalog. This approach is perfect for private product launches, members-only items, or exclusive deals.
#5: Password Protect WordPress Directory
Adding password protection to your WordPress directory using HTTP Basic Authentication is a simple yet effective way to restrict access to specific sections of your site. This method requires users to enter a username and password before accessing the protected directory, enhancing security for sensitive files or during site development. Follow these steps to password protect a WordPress directory:
Step #1: Log in to Your Server
Open a terminal or SSH client and log in to your server using the following command:
ssh username@server-ip-address
You will be prompted to enter your password to access the server.
Step #2: Create the .htpasswd File
Check if a .htpasswd file already exists by listing all files using this command:
ls -a
If the file does not exist, create it with this command:
htpasswd -c .htpasswd username
Replace “username” with the desired username. If the file already exists, remove the -c flag and run:
htpasswd .htpasswd username
The command will prompt you to set a password for the user. The credentials will be stored in an encrypted format in the .htpasswd file.
Step #3: Get the Directory Path
Find the full directory path of the .htpasswd file using this command:
pwd
Copy this path for the next step.
Step 4: Create the .htaccess File
Navigate to the directory you want to protect and create a .htaccess file with the following code:
AuthType Basic
AuthName “Protected Directory”
AuthUserFile /full_path_to/.htpasswd
Require valid-user
Replace /full_path_to/ with the full path where the .htpasswd file is stored.
Step 5: Protect Specific Files (Optional)
To protect individual files within the directory, add this code to the .htaccess file:
<Files “filename”>
AuthType Basic
AuthName “Protected File”
AuthUserFile /full_path_to/.htpasswd
Require valid-user
</Files>
Replace “filename” with the name of the file you want to protect. You can add multiple filenames separated by a pipe (|) character.
By completing these steps, you can successfully password protect your WordPress directory or specific files. This approach is particularly useful during development or when managing private resources. However, it is imperative to remember that HTTP Basic Authentication provides a quick security layer, yet it is not a long-term solution for advanced security needs.
Final Remarks on Password Protect WordPress
Password protecting your WordPress site is a practical way to enhance security, maintain privacy, and control access to your content. Whether you want to secure your entire site, specific posts, categories, WooCommerce products, or directories, the methods outlined above offer flexible options for safeguarding your site.
Here’s a quick recap of what you can do:
- Password protect your entire WordPress site for complete access control.
- Secure individual posts, pages, or categories to manage exclusive content.
- Restrict access to WooCommerce products for private sales or members-only deals.
- Add password protection to directories or files for enhanced privacy.
Are you ready to secure your WordPress site? Download the Password Protected plugin today to get started!