Sometimes, you want to give visitors access to only part of your content, rather than locking down an entire post or page.
Protecting only part of your post or page allows you to display a section of your content publicly while restricting access to another section. It could be for anything; you may have exclusive content for members, special promotions for a specific group, or other benefits. We will discuss the use cases in more detail later.
The good news is that setting it up is not complicated. In this guide, we will walk you through the steps needed to apply partial protection to any WordPress post or page without affecting your site’s overall visibility.
However, before that, let’s thoroughly understand the partial protection in WordPress.
What is Partial Protection in WordPress?
Partial protection in WordPress allows you to make certain parts of a post or page private, while keeping the rest of the content visible to everyone.
Please note: WordPress doesn’t have partial protection by default. You have to install a password protection plugin for that.
Instead of locking down your entire site, this feature lets you choose specific sections to hide behind a password. Visitors can read a portion of your content before being prompted to enter a password to access the full content. It’s an effective strategy for showcasing just enough of your exclusive part of the page/post to intrigue the visitor, without revealing the entire post or page.
This approach is highly valuable for content marketing. In fact, a study reveals that 80% of B2B content marketing assets are “gated” in some way.
Gating, or partial protection, helps you create exclusive content for members, offer special resources, or build a subscriber list. By providing a preview of your content, you can attract readers and encourage them to take action to get full access. It is a smart way to get more value from your content.
Use Cases For Partial Protection
Partial protection on your website has many practical uses beyond just hiding content. It can be a powerful tool for growing your business and connecting with your audience.
- Lead Generation and Email Lists. Utilizing partial protection is an effective way to expand your email marketing list. You can offer a valuable resource, like an exclusive guide, a free e-book, or a special checklist, in exchange for a visitor’s email address.
- Members-Only Content. If you run a membership site or offer a subscription-based service, partial protection allows you to create exclusive content for your paying customers. You can lock specific articles, video tutorials, or online courses behind a password to ensure that only your members can access them.
- Client-Specific Information. Businesses can also use partial protection to share confidential information with specific clients. For instance, you could create a private page to share project updates, financial reports, or a custom-built gallery of a client’s work.
- Digital Products and Downloads. The digital products market is expanding rapidly, with analysts projecting that the global market will reach over $1.9 billion by 2030. If you sell digital goods, you can use partial protection to deliver your product on your website after a purchase. The customer can be given a password or a unique link to access their download.
- Exclusive Event and Webinar Content. Partial protection is a perfect solution for sharing exclusive event materials, such as presentation slides, video recordings, or supplementary guides. It allows you to make these resources available only to those who attended or registered for the event.
How to Apply Partial Protection on a WordPress Post or Page in 3 Easy Steps
There are two ways to hide part of a page: write custom PHP or use a plugin. For a production site, a password protection plugin is the safer and more practical choice. It handles edge cases, scales with traffic, and reduces long-term risk.
Custom code can be effective for simple cases, but it has its limitations. Typical DIY solutions rely on a form that checks a posted password. Those forms rarely use hashing, session management, or secure cookies. That makes it easy to bypass or unintentionally leak information. A developer must also maintain the code whenever WordPress, themes, or hosting change.
A well-built plugin handles all that automatically and securely. It manages sessions with cookies, stores secrets correctly, and integrates with WordPress user and capability systems. Plugins are patched and updated by their creators, which closes security holes that might be missed in hand-rolled code.
Additionally, you gain other valuable features, including multiple passwords, automatic expiration, limit login attempts, granular visibility rules, and activity logs.
For this guide, we will use the Password Protected plugin’s premium version because it provides a secure and user-friendly way to implement partial protection. Not only that, Password Protected Premium offers additional amazing perks that we will discuss later in this article.
Let’s walk through the exact step-by-step setup.
Step 1. Install and Activate Password Protected Pro
To install the best content protection plugin. Follow the steps below:
- Navigate to your admin dashboard.
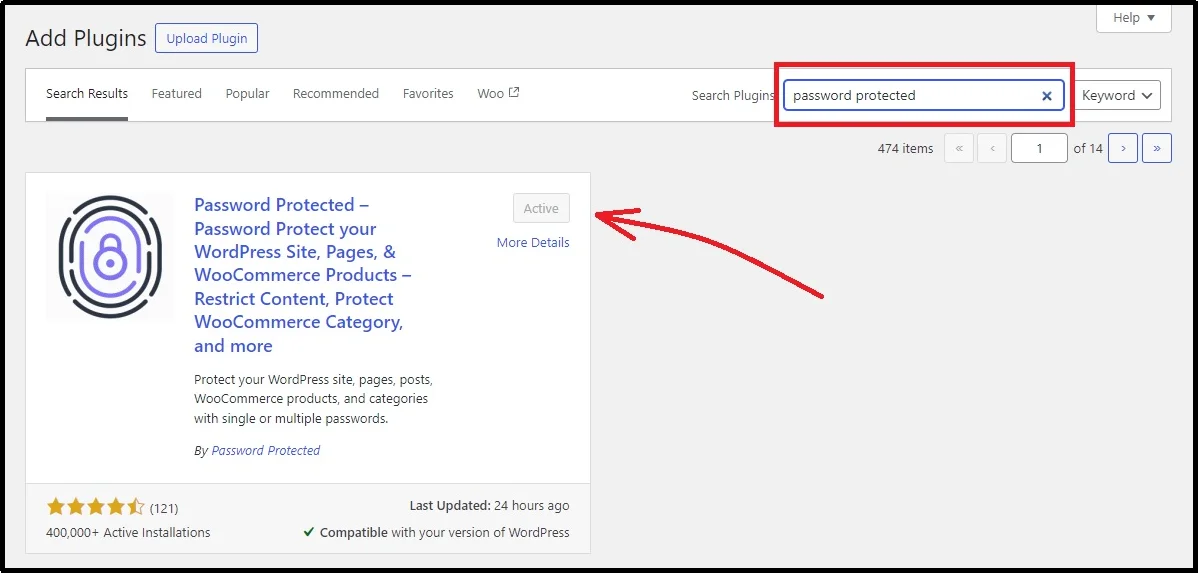
- Go to Plugins ⇒ Add Plugin.
- Using the Search plugin bar, search for “Password Protected.”
- Install and activate the plugin.
- Navigate to the Password Protected and purchase a plan of your choice.
- Once the purchase is successful, you will get a welcome email with the ZIP file of the premium plugin and a license key, which is a string of special characters, letters, and numbers.
- Download the ZIP file on your device and store the license key for later use.
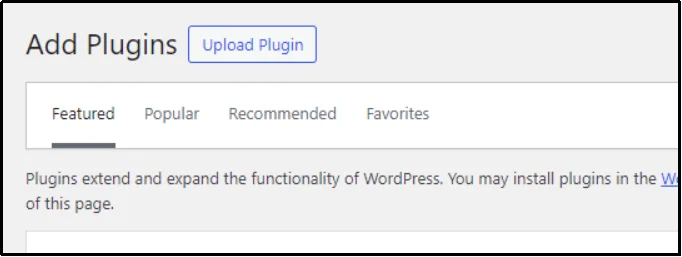
- Return to your admin dashboard ⇒ Plugins
- Add Plugin ⇒ Upload Plugin
- Click “Choose File” and browse to the file where you installed it.
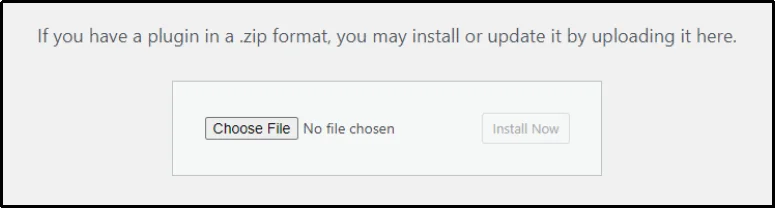
- Click Install Now.
- Activate the plugin with your unique license key, and you’re good to enjoy the perks of Password Protected premium.
That takes us to the second step.
Step 2. Configure Partial Content Protection Feature
- Navigate to Password Protected.
- Content Protection tab ⇒ Partial Content Protection subtab.
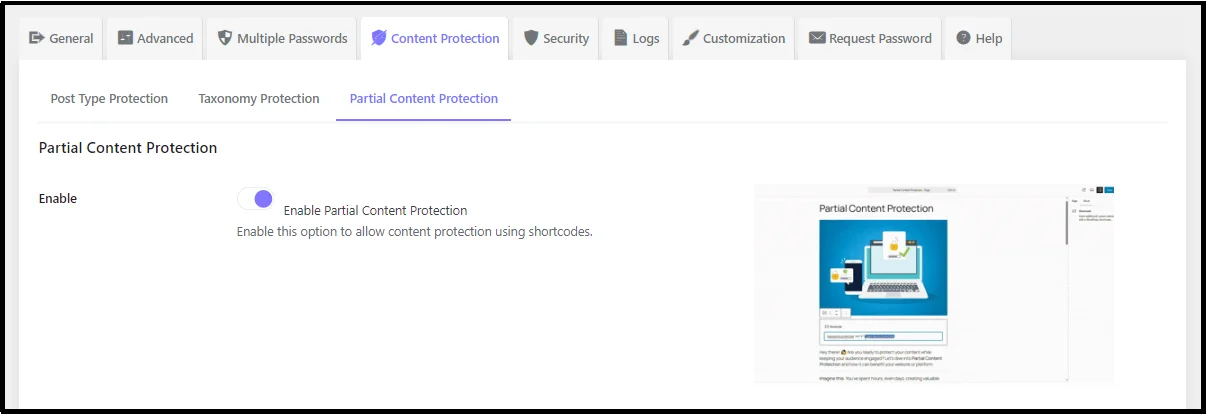
- Enable Partial Content Protection using the toggle button.
- Click Save Changes.
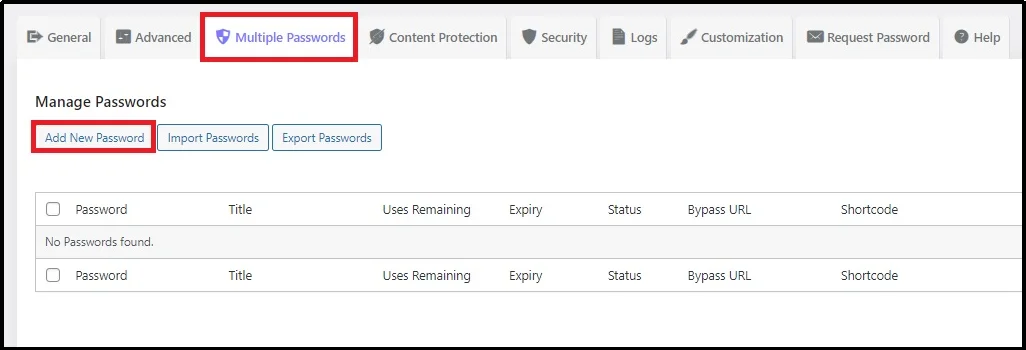
- Switch to the Multiple Passwords tab.
- Click Add New Password
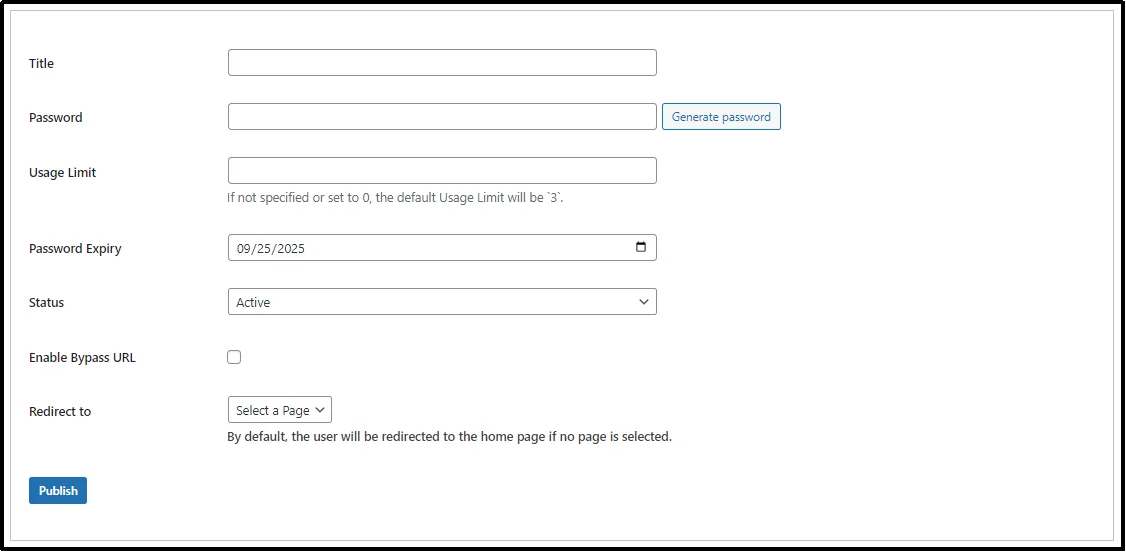
- Create a new password:
- Give the entry a title.
- Set a unique password that will be used for accessing protected content.
- Set up a usage limit. For example, if set to 3, the password will stop working after three uses.
- You can also set a password expiry date to a specific date.
- Allows it to bypass passwords.
- For partial content protection, do not select any redirect page.
- Click Publish.
The partial content protection is now set and ready to use. You can assign the password to the one you want to allow access to the partially protected content. Let’s add the shortcode on the post or the page that you want to protect partially.
Step 3. Add Partial Protection To The Post/Page
We have two methods for applying partial content protection. We can either use the Gutenberg block or the shortcode. Let’s begin with the shortcode.
You can see the shortcode on the right-hand side that appeared when we created a new password on the Manage Password tab in the last step. Follow the steps below:
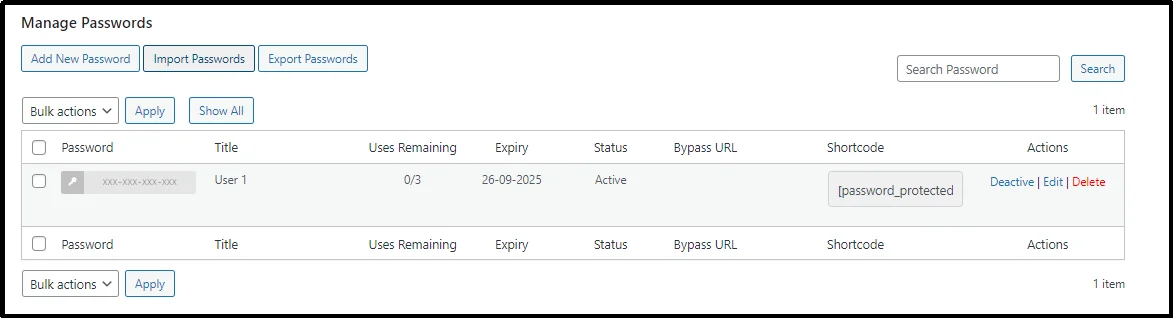
- Copy this shortcode by clicking on it.
- Go to any page or post that you want to protect partially.
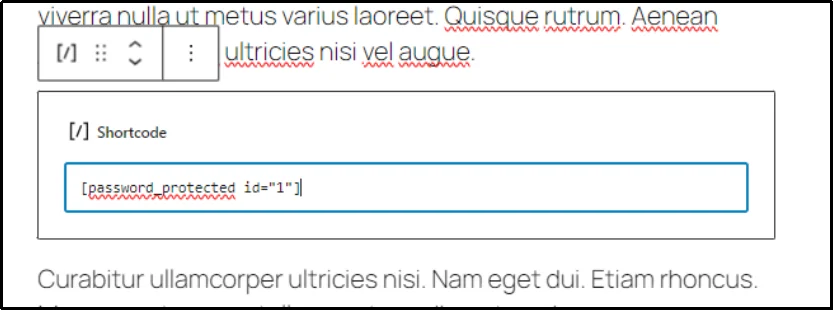
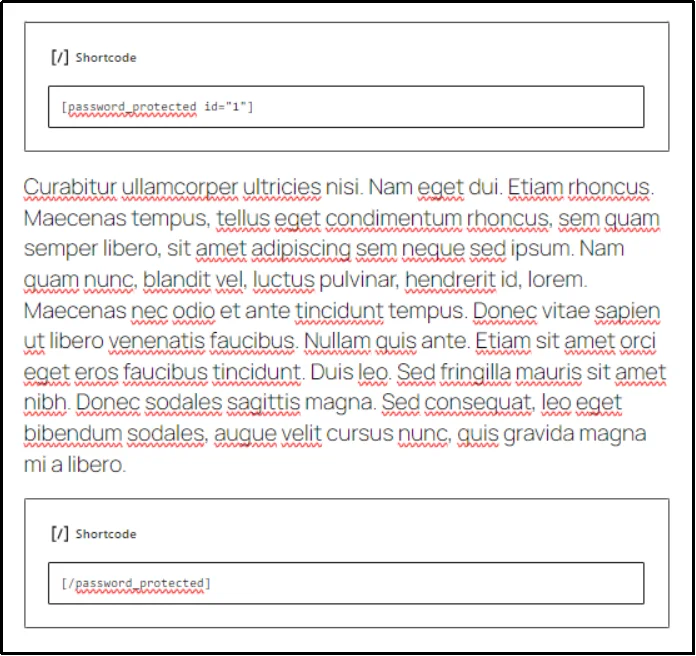
- Place a shortcode block at the top and at the end of the part of the page or the post you want to protect with a password. The block at the top must be
- Add a shortcode block at the end and write [/password_protected] in it. Here is how the content should look.
- Save the post, and there you go!
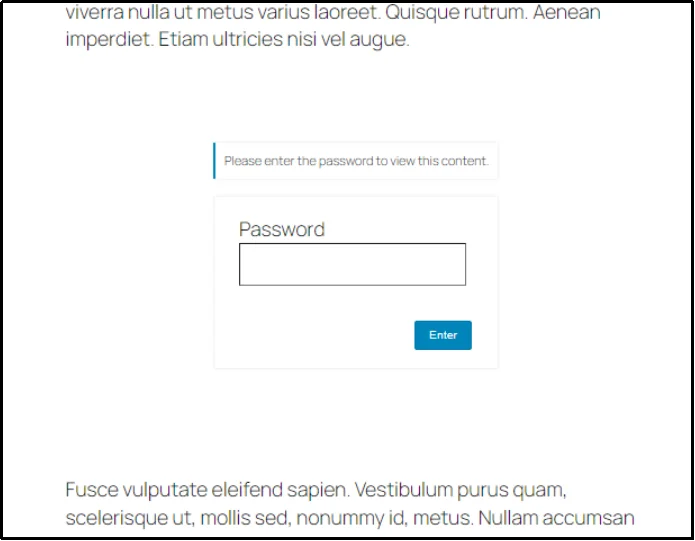
Now you can see the post requires a password for the specific part we protected.
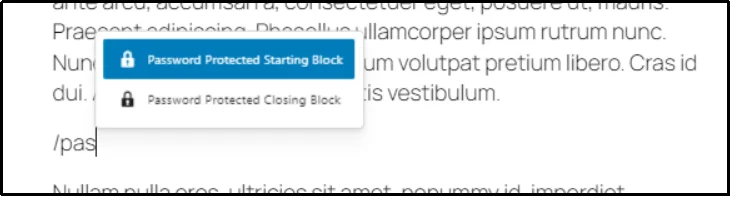
Alternatively, you can use the Gutenberg blocks.
We have two password-protected sections, one for starting and one for closing. Similarly, just place them before and after the section you want to protect, and it should work just fine.
The feature also supports other commonly used page builders, such as Elementor and Beaver Builder. Learn to do it using your favorite page builder in our documentation.
There you have it!
Password Protected Premium: There’s More To It
Now that we’ve covered the basics of partial protection and why using a plugin is the best solution, as promised, let’s explore some of the powerful features that come with the premium version of Password Protected. Here’s what to expect:
- WP-Admin Protection: For an extra layer of security, the plugin allows you to password protect your WordPress login page.
- Detailed Activity Logs: Get access to detailed reports of all password attempts. This includes information on successful and failed logins, the IP addresses used, and recent activity logs. This is a vital feature for monitoring security and identifying any suspicious behaviour on your site.
- Bypass Links: Create unique, shareable links that grant access to protected content without a password. You can also set these links to expire after a certain number of uses or a specific date, making them perfect for one-time access or temporary promotions.
- User Role Whitelisting: If you have specific users, such as administrators or editors, who should always have access, you can whitelist their user roles, allowing them to bypass the password protection and view content without a password.
- Category/Taxonomy Protection: You can extend your protection beyond individual posts and pages to secure entire categories or taxonomies. This is ideal for protecting a whole series of blog posts or a collection of products with a single password.
- Lock Screen Styling: Customize the password-protected screen to match your website’s design. You can add your own logo, change the background colour, and adjust the overall look and feel.
- Security Integrations: Integrate with services like Google reCAPTCHA, hCaptcha, and Cloudflare Turnstile to add an extra layer of security and prevent bots from accessing your site.
Ready to take control of your content and create a professional, secure experience for your visitors? Explore all the powerful features of the Password Protected plugin today to get started.
Final Words
Partial protection provides you with the flexibility to control how much of your content is public and how much remains private. While WordPress does not support this feature on its own, a dedicated plugin like Password Protected makes it practical and secure.
With the premium version, you can take advantage of premium features, including activity logs, bypass links, role-based access, and complete design control over the lock screen. These tools transform content gating from a simple barrier into a strategic advantage for marketing, memberships, and client work.
If you want to protect sensitive material, grow your audience, or deliver exclusive resources, Password Protected provides a reliable solution that custom code cannot match. Try Password Protected today! The world’s best content protection plugin.