
Not every WordPress page needs to be front and center. Hiding a page can be helpful for several reasons, such as keeping unfinished drafts away from public view, restricting access to client-specific content, or there are multiple reasons this can be handy.
In some cases, it’s also a smart way to reduce cyberattack exposure by keeping sensitive pages out of sight.
This article explores four practical methods you can use today to hide a page in WordPress. Whether you’re looking for a quick fix or a more advanced solution, these techniques will help you take control of your site’s visibility effortlessly.
But before that, let’s understand why you may want to hide a page in the first place.
Why Hide a Page in WordPress?
There can be multiple reasons to hide a page, depending on how you use your site. Here are a few common scenarios where hiding a page makes perfect sense:
- Under maintenance. Sometimes, a page just isn’t ready for the world. Maybe it’s a work-in-progress draft, a layout you’re testing, or a placeholder for future content.
- Catering to a private audience. You might have pages only relevant to specific users, such as client portals, internal resources, or private event details.
- Preventing search engines from indexing. There are times when you want a page to be live but not necessarily searchable. Thank-you pages, login screens, or limited-time offers are a few examples.
- You’re using it for backend functionality. Some pages, like redirect targets, form handlers, or plugin-specific pages, serve a technical purpose. These don’t need to be visible to visitors and can be hidden to reduce confusion.
- Security measures. Pages like login screens, admin tools, or sensitive information pages can be targets for bots or malicious users. Hiding them can minimize risk and keep your site safer.
In short, hiding a page is about control. How and why you may want a page to be locked depends completely on your site’s functionality and personal preferences.
Luckily, WordPress allows several ways to do just that.
Hide a Page in WordPress: 04 Easy Ways
As mentioned earlier, there are several ways to effortlessly hide a page in WordPress. Here are the four most effective ones.
Method #1: Use WordPress’s Default Visibility Feature
WordPress is a feature-rich content management system (CMS). One of the features can do precisely what you are looking for. However, certain constraints exist that we will discuss later.
Let’s get back to WordPress and implement this first method to hide a page in WordPress.
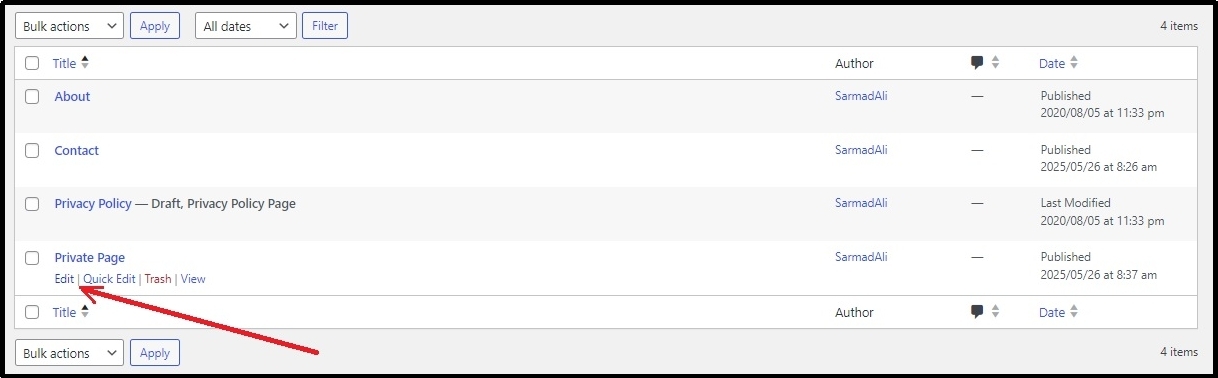
Navigate to Pages ⇒ All Pages ⇒ Hover over the page you wish to hide, and click edit.
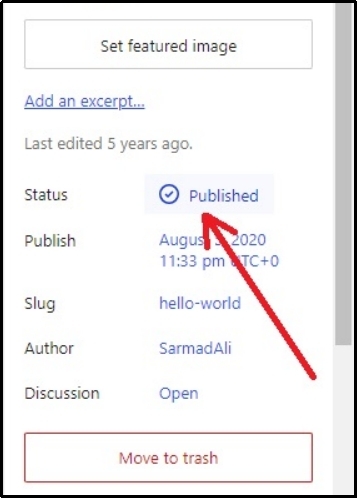
You should land on the editor.
On the right-hand side, you should be able to see the Status of the public. Click the Publish to change the status.
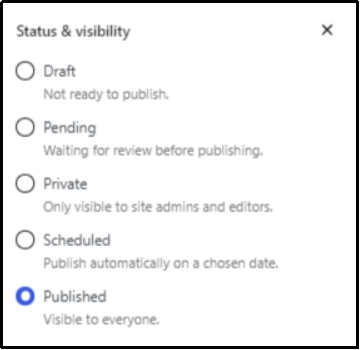
Here you can see multiple options to make a post Private. Although all serve different purposes, a couple can make the page private. Here’s what to choose:
- Draft. You can revert it to draft.
- Pending. Allows hiding the page until administrators or editors approve it.
- Private. This is what you are looking for. This option hides the page from public view and makes it visible to site admins and editors.
- Schedule. Publishes the page automatically on the scheduled date.
Choose the status you want and save the changes.
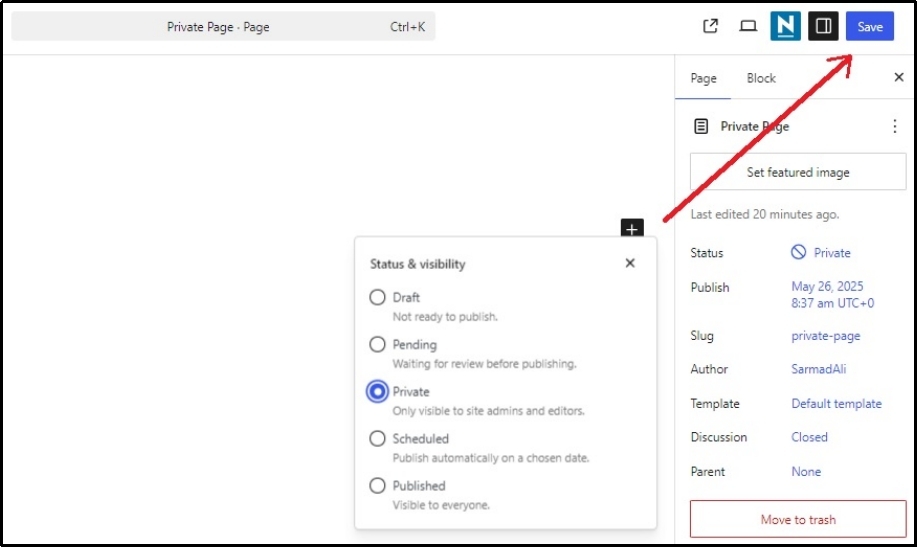
There you go! The page is nowhere to be seen.

Method #2: WordPress Default Password Protection
Next, you can hide a page from public view, using an exciting WordPress feature, Password Protection.
Password protection enables you to hide a page and share the password with only those you wish to grant access to. For example, you can create a personalized discounted offer for customers based on their needs or rewards.
You can also do that without downloading an external plugin. However, this is limited to hiding a page or a post. If you want to hide an entire category or a specific tag, you can skip this step and jump to the next step, which is a better alternative.
Before that, let’s learn to password protect a page without a plugin. The process is identical to the last method.
Spot the page that you want to hide and edit it.
Click on the visibility status, but this time, you have to scroll down to reveal two additional options: password protected—which makes the page only visible to those who know the password, and Sticky—which makes the post stick to the top of the blog.
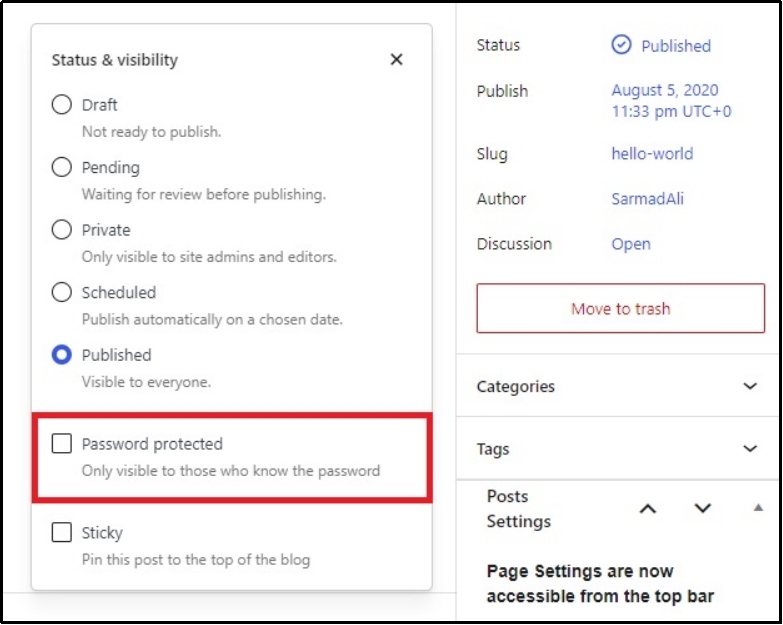
Of course, since we have to set a unique password for the page, you will select Password Protected and set a password in the input box that appears after checking the password protected box.
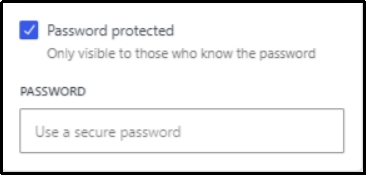
Once done, save the changes.
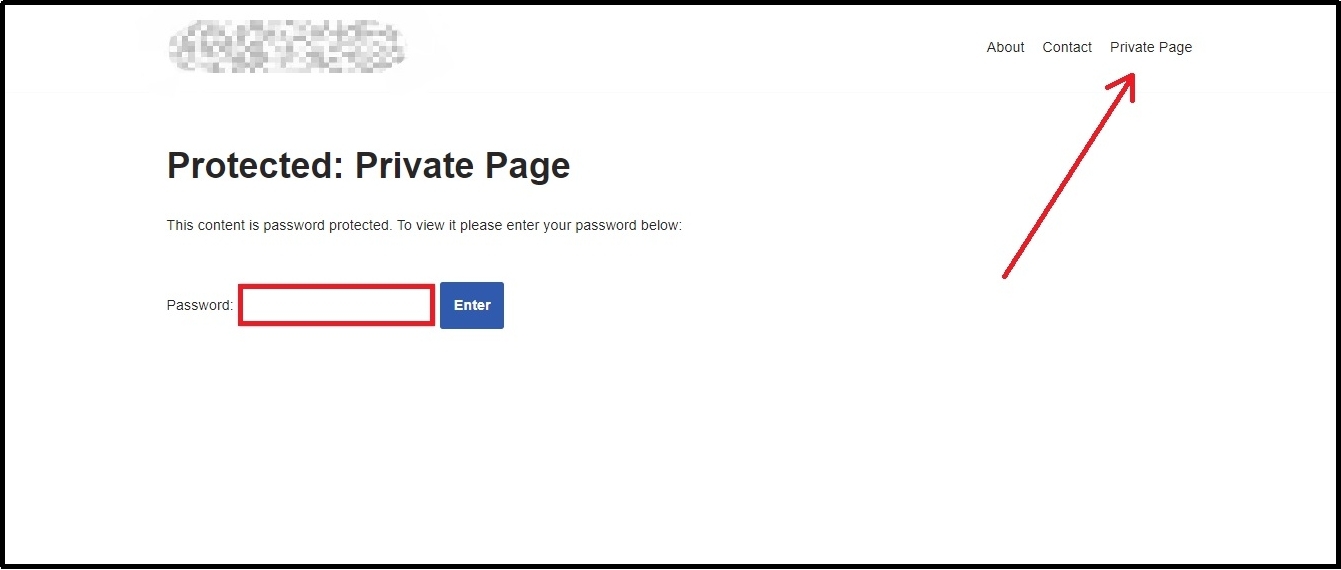
Now go to your WordPress and select the page that was just protected with a password. You will be required to enter the password in the input field, enabling you to hide the page from those who do not know the password.
Method #3: Use The Password Protected WordPress Plugin
The most effective one is using the Password Protected WordPress plugin. With this plugin, you can restrict content in WordPress with a password using a page or a post.
Before learning more about the plugin, let’s quickly understand how it can help protect the page.
First, download the plugin. To do so, navigate to Plugins ⇒ Add New ⇒ Using the Search Plugins bar, search for Password Protected.
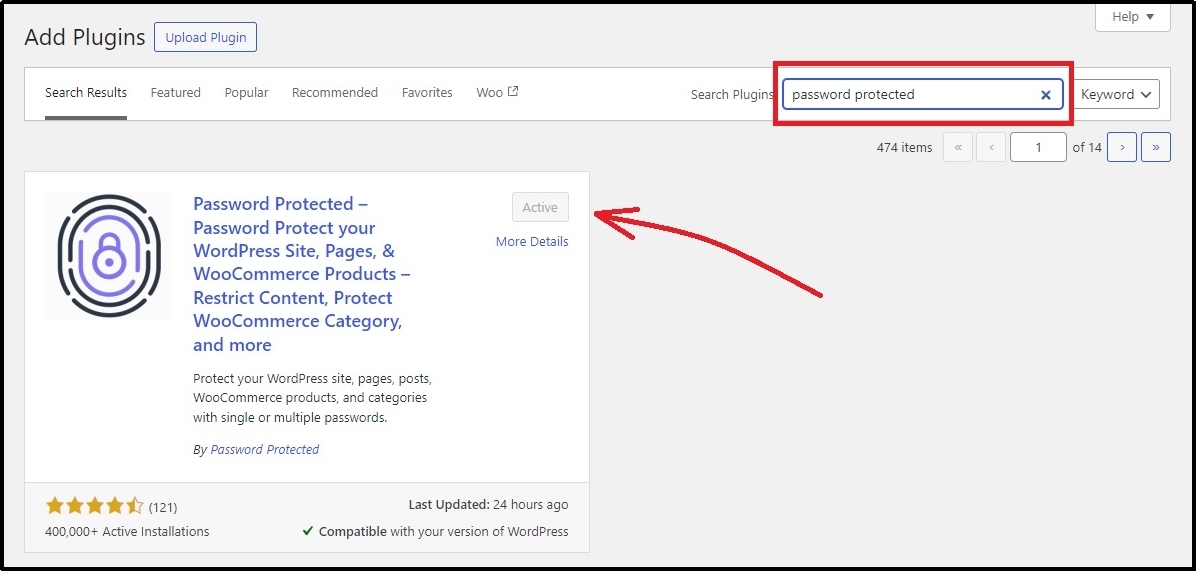
Install and activate the plugin.
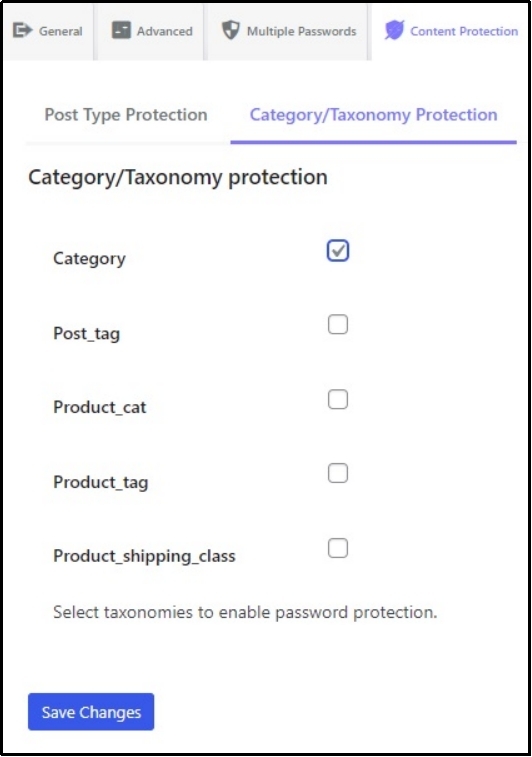
Secondly, go to the Password Protected ⇒ Content Protection tab ⇒ Post Type Protection subtab.
Here, you can control whether to password protect an entire page or post. We have four options here:
In the post type row, you can specify whether to protect a page or a post. In the Global row, check the box next to the post type you want to protect entirely.
Simply put, checking the Global box in the Post section adds a password to all the existing posts and the ones to be created.
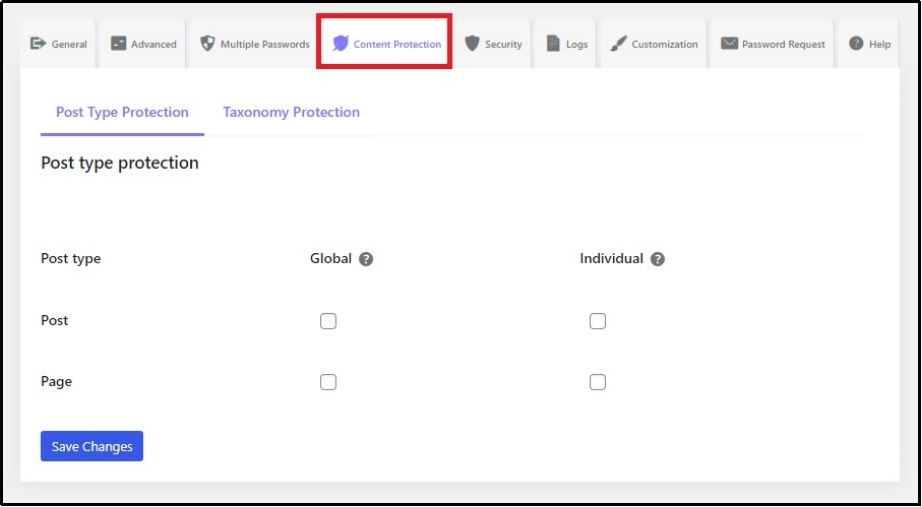
The individual column, as its name suggests, allows individual password protection of a specific page or post.
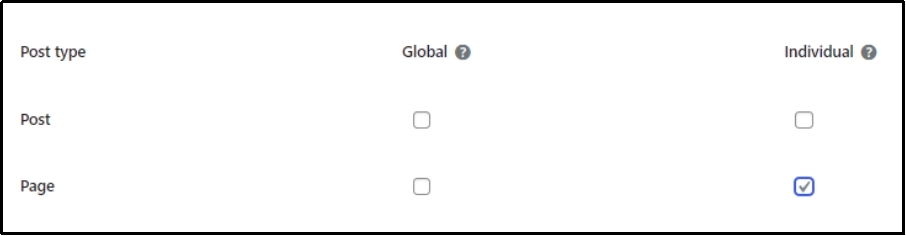
The same is true for Pages. Since we are learning about hiding a page, let’s check the second box in the Individual row and the Page column.
Save the changes and go to the page you wish to hide and edit it.
At the bottom, you can see the Enable Password Protection checkbox.

Checking it and saving the changes should reveal a further set of options.
Now set the Password, usage limit, and the expiry date for the password. This feature is super useful for password protecting a page until a seasonal discount or a temporary page that you don’t want the general public to access for a certain time.
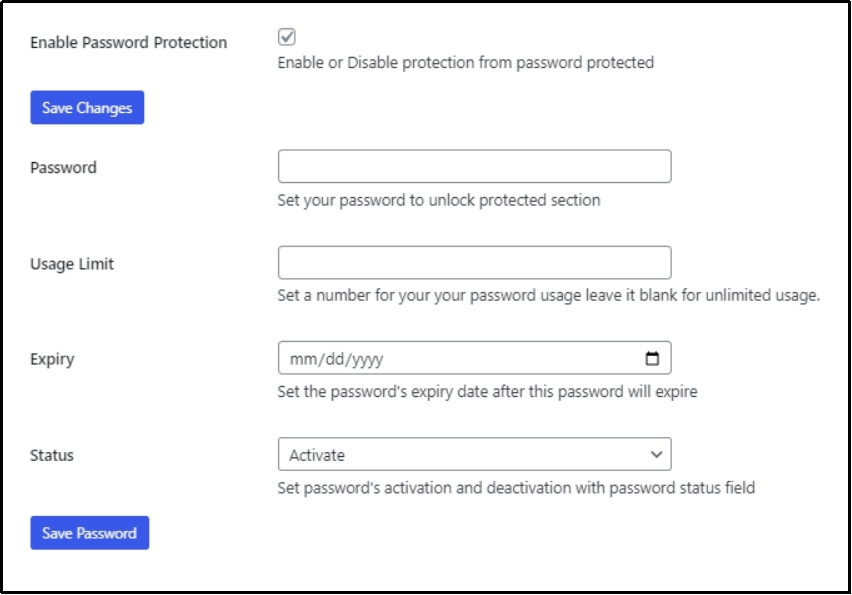
Once you’ve completed the changes, you can save them using the Save Password button and the Page using the Save button in the top right corner.
Now, head back to the website. You will see a default input password screen for accessing the page.
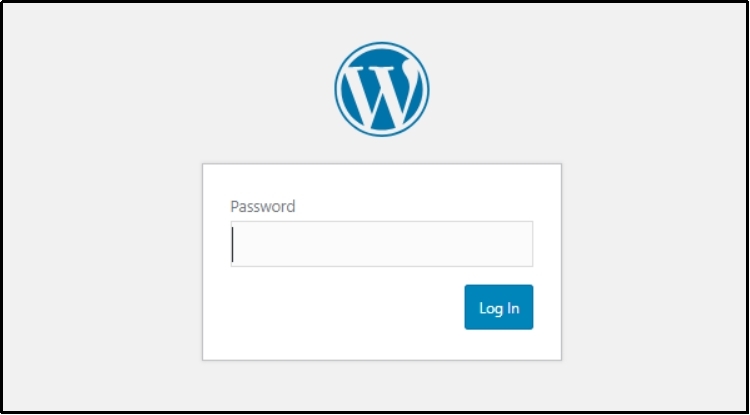
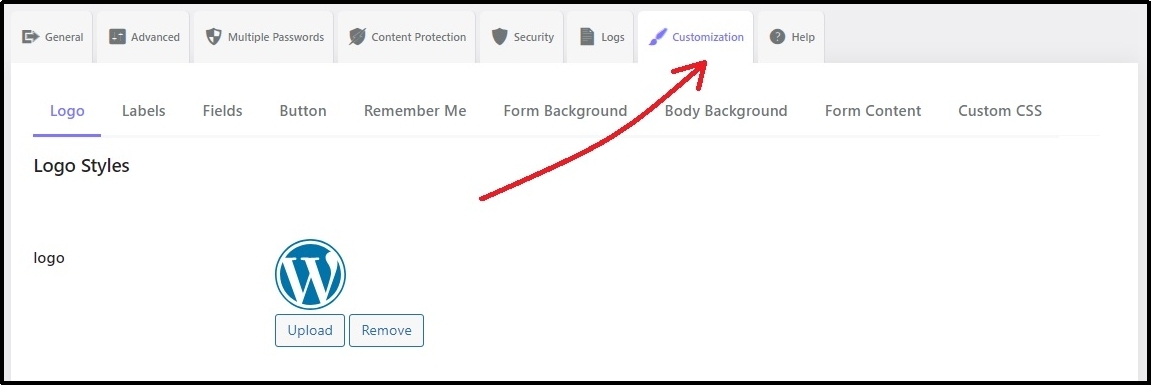
This screen looks very dull and basic. To make sure it matches your brand’s aesthetics and doesn’t bore your customers away, you can try using Password Protected, one of the most requested features in the last update: Password Screen Customization.
By switching to the customization tab, you can add logos, labels, customize buttons, add colors, change background, and transform the dull screen into a vibrant screen that matches your brand’s soul.
You might think this method is fairly similar to the previous one, but it has its perks.
For example, password protecting an entire category is not possible with WordPress unless you manually protect each post within a category, which is unrealistic for blogs with hundreds of posts within multiple categories.
Moreover, Password protection enables you to add password protection screens for post tags, product catalogues, product tags, categories and more. The plugin also offers tons of features for WooCommerce.
Not to mention the fantastic security options, such as whitelisting specific IPs, adding Google reCAPTCHA, WordPress admin protection, attempt limitation, and much more.
Enough with the plugin, let’s move on to the last way to hide the page in WordPress.
Method #4: Use No Index
Lastly, to exclude a page from search engines, or to hide a page from indexing, you can add a no-index tag to the page, which would disable search engines from indexing the page on the SERPS or search engine result pages.
Adding a no-index tag tells search engines like Google not to list the page in search results. This method is useful for thank-you pages, temporary promotions, login screens, or internal documentation you don’t want to appear on Google.
Now, the easiest way to do this is with the help of a WordPress SEO plugin. If you already use an SEO plugin, like Yoast SEO, All in One SEO, or Rank Math, you’re just a few clicks away.
Here’s how to do it with Yoast SEO (the process is relatively similar in other plugins):
- Head over to Pages ⇒ All Pages and edit the page you want to hide.
- Scroll down to the Yoast SEO section in the editor.
- Click on the Advanced tab with the gear icon.
- Under Allow search engines to show this Page in search results?, choose No from the dropdown.
- Update the page to save your changes.
That’s it. You’ve just told Google to skip this page while crawling your site.
Alternatively, if you don’t actively use an SEO plugin and don’t want to for some reason, you can also disable indexing using the robots.txt file. This file tells search engine bots which parts of your site they can crawl or not.
ℹ️ Note: While this method doesn’t guarantee that it won’t appear in search results especially if the page is linked elsewhere publicly. For better control, use this in combination with a no-index tag.
To access the robots.txt file, you would need to use an FTP client or a file manager plugin like Advanced File Manager. The plugin is a better alternative to FTP clients.
Here’s how to hide the page using robots.txt file.
Add a rule like this to hide a specific page:
User-agent: *
Disallow: /your-page-slug/
Replace /your-page-slug/ with the actual slug of the page you want to hide.
For example, if your URL is example.com/thank-you, the rule should be:
Disallow: /thank-you/
Save the changes and you’re done.
Sounds easy, right? Wait until you hear that misconfigurations with the robots.txt file can lead to unintended blocking of essential pages or resources, negatively impacting SEO. Thus, it’s necessary only to do it if you are a developer or have complete know-how of how these files work.
If you’re just looking for quick results, stick to the no-index tag via an SEO plugin.
Final Words
Whether you’re working on something behind the scenes, protecting client-only content, or simply trying to keep a thank-you page out of Google’s index, knowing how to hide a page in WordPress allows you to effortlessly manage your site.
We’ve covered four easy and effective methods, from WordPress’s built-in visibility settings to advanced options like password protection plugins and no-index tags. Each method has its place, and the best one depends on your specific use case.
If you’re after simplicity, WordPress’s default tools may be enough. But if you need flexibility, customization, or tighter security, plugins like Password Protected offer fantastic additional benefits.
Enhance your website’s security, Get Password Protected today!