Do you want to customize your password-protected screen? We have got you covered!
With great excitement, we are here with a fantastic update featuring the Customization tab in Password Protected Pro, which allows you to completely transform your password-protected screen.
Excited, right? So are we.
Keep reading to learn everything you need to know about this feature, including how it works and how to make the most of it. In the end, we will also show you how you can easily unlock this feature.
Without further ado, let’s dive right in!
Why Customize the Password-Protected Screen?
If you are using the Password Protected plugin, you know that you can use the plugin for many purposes. The new customization feature is a cherry on top. Here are some additional positives you can get with password-protected screen customization:
- Enables consistent branding. Customizing the password-protected screen allows you to create a screen that matches the aesthetics of your overall brand. With our new update, you can change the logo, background, colors, shadows, and much more.
- Enhances user experience. Customizing the protection page allows you to adjust the webpage to better suit your store’s unique requirements. This enables you to provide helpful instructions that guide users through your store or website.
- Increases customer trust. A personalized and branded webpage assures your customers that they are on the intended site rather than a phishing page seeking to compromise their sensitive information.
- Allows brand promotion. Personalizing the password screen allows you to highlight exciting deals right where your customers will see them! It’s a great way to ensure they notice those special promotions and discounts as they enter your store.
Now that you understand the importance of customizing the password-protected screen. The following section explains how to do so, using a Password Protected’s Customization feature.
How to Customize a Password-Protected Screen?
The customization feature includes logo settings, label styles, field settings, text styles, button settings, label settings, background settings, and much more.
Let’s learn more about each one.
PLEASE NOTE: This is a premium feature and is not available in the free version. If you are using the free version, keep reading to learn how to upgrade your plan.
If you haven’t installed the Password Protected plugin, then check out our detailed documentation for installing the free and pro versions.
Once you have installed and activated the pro version of the plugin, follow the steps below.
First and foremost, from your WordPress dashboard, navigate to Password Protected settings.
Afterward, navigate to the Customization tab.
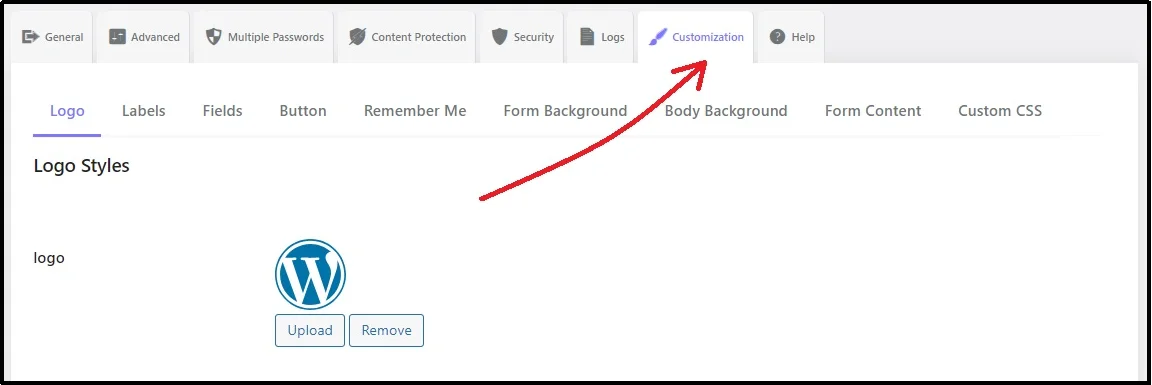
There, you can see a respective subtab for every customization option. Here’s what and how you can customize everything.
Logo
The first subtab allows users to customize the WordPress logo with their brand logo. You can easily replace the logo using the Upload button and change the logo’s width and height using the sliders.
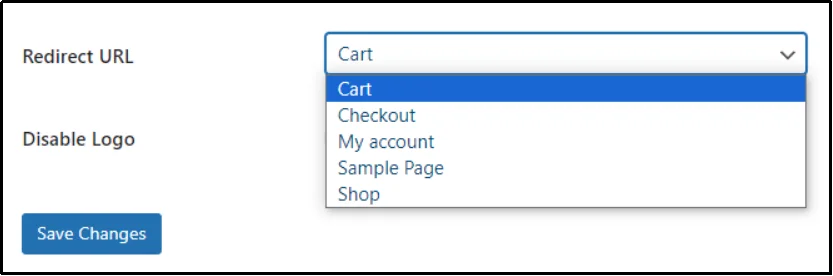
Furthermore, Password Protected also enables you to choose where the visitor or customer lands in case they click the logo. Choose the page you want the user to land on in such a case using the Redirect URL dropdown.
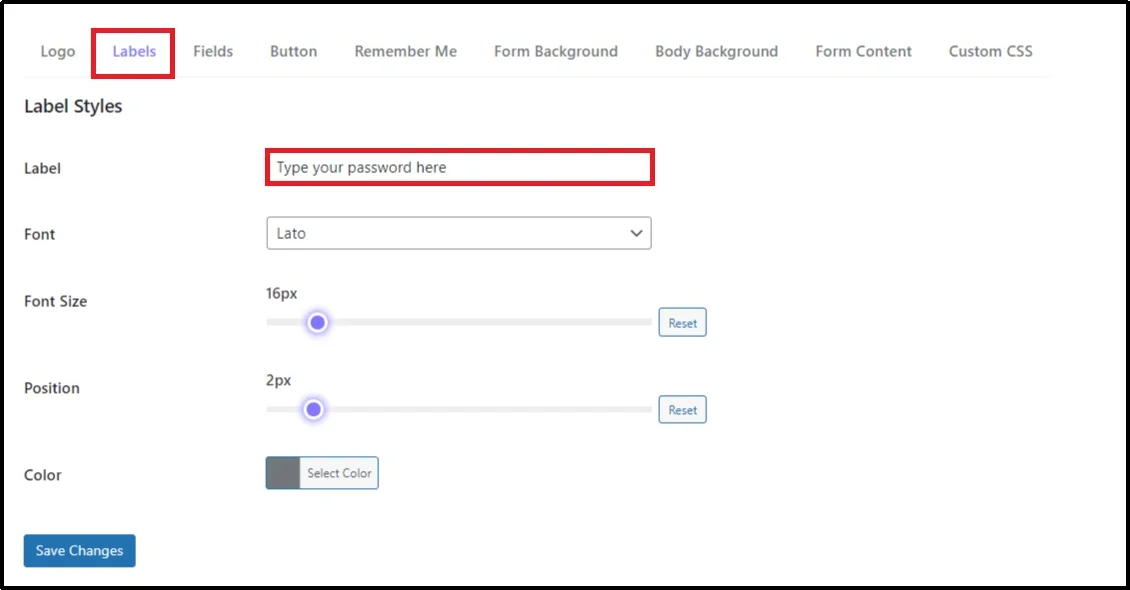
Labels
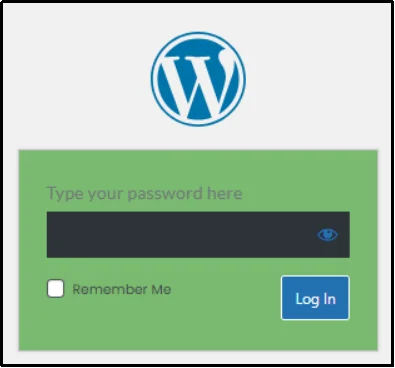
Talk about tiny little details! With Password Protected, you can even customize the labels above the password’s input box. In the image above, we changed the password field to “Type your password here,” and this label will appear on the password screen.
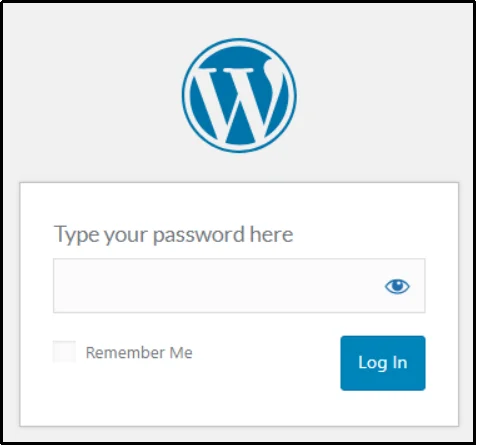
Here’s how it looks on the screen.
You can also change its font, font size, position, and color.
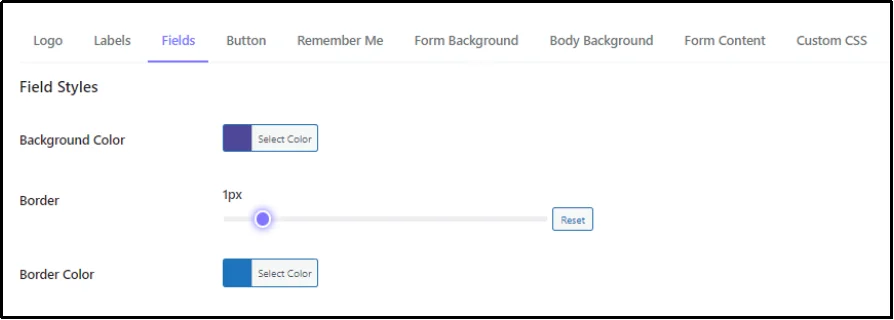
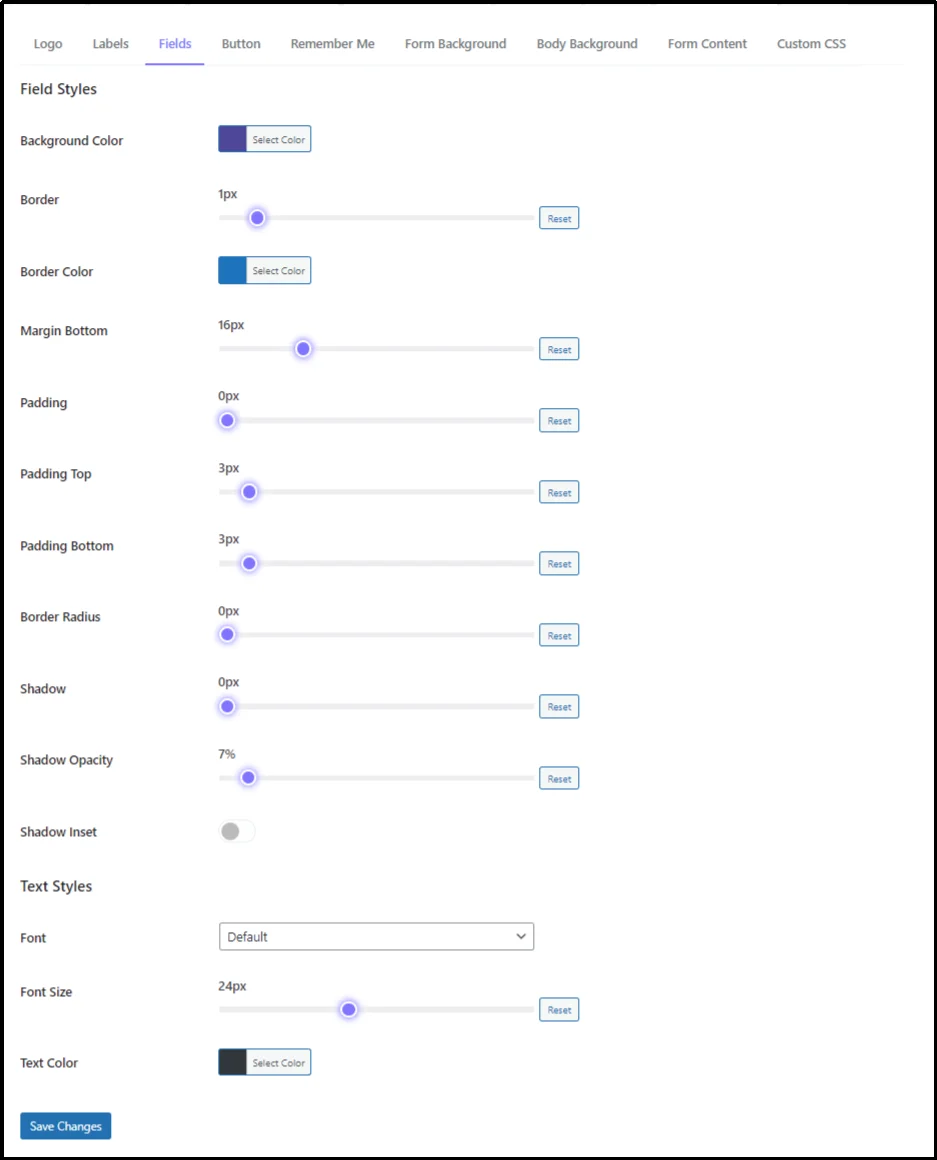
Fields
Next, we have fields.
It allows for changing the input field on the password screen. Let’s test it by changing the colors.
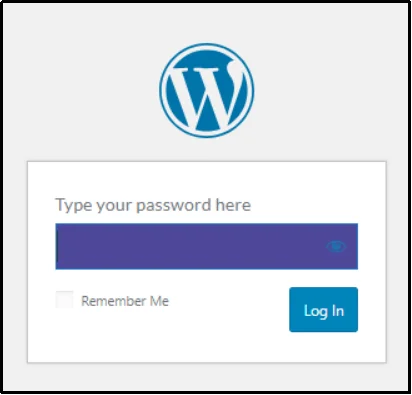
Here is how it looks. Pretty, right?
You can make it even more appealing by solidifying the borders, changing the alignment, font, font size, text color, or adding a shadow.
Button
The security plugin also allows you to change the appearance of the button.
You can change the background color, border size, border color, add a shadow, change font, font size, or text color.

Here’s how the button looks on the password-protected screen.

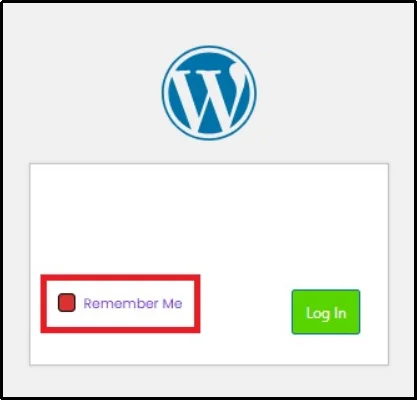
Remember Me
Given the precision, Password Protected even allows you to customize the Remember Me check button. You can use the sliders to change the button’s size, border radius, font size, and position. Also, change the checkbox colors, text color, or background color.
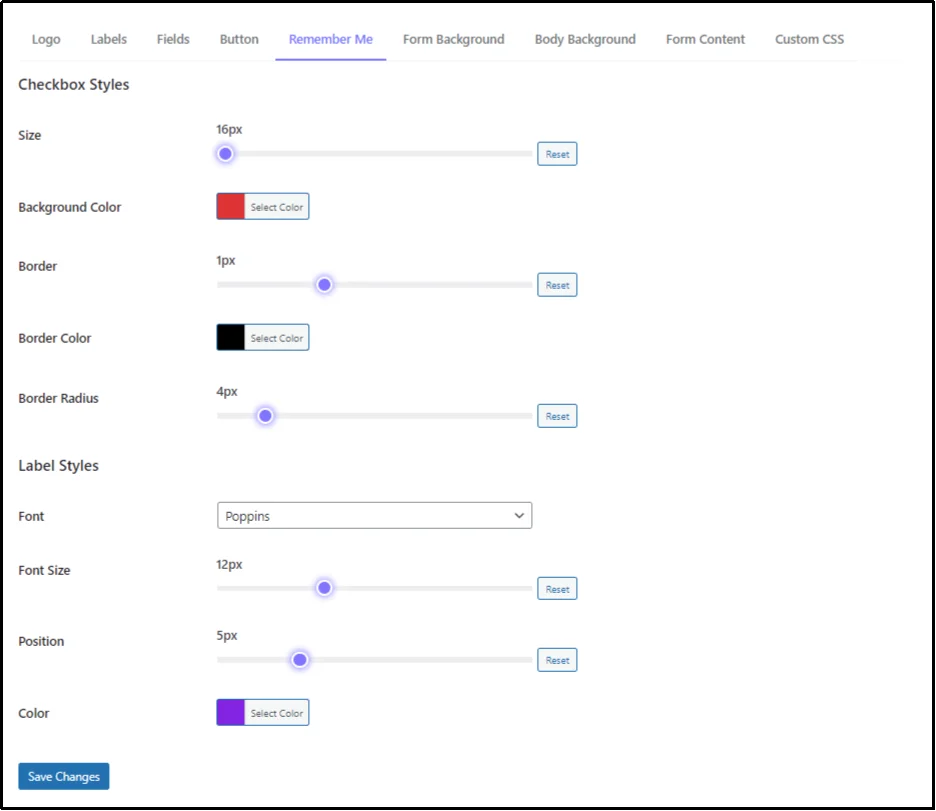
Here’s how a customized checkbox would look.
Form Background
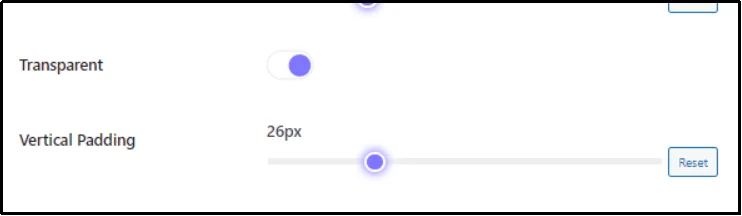
You can also change the form background. Change the background color and make adjustments such as border-radius, shadow, shadow opacity, and alignment using the slider.
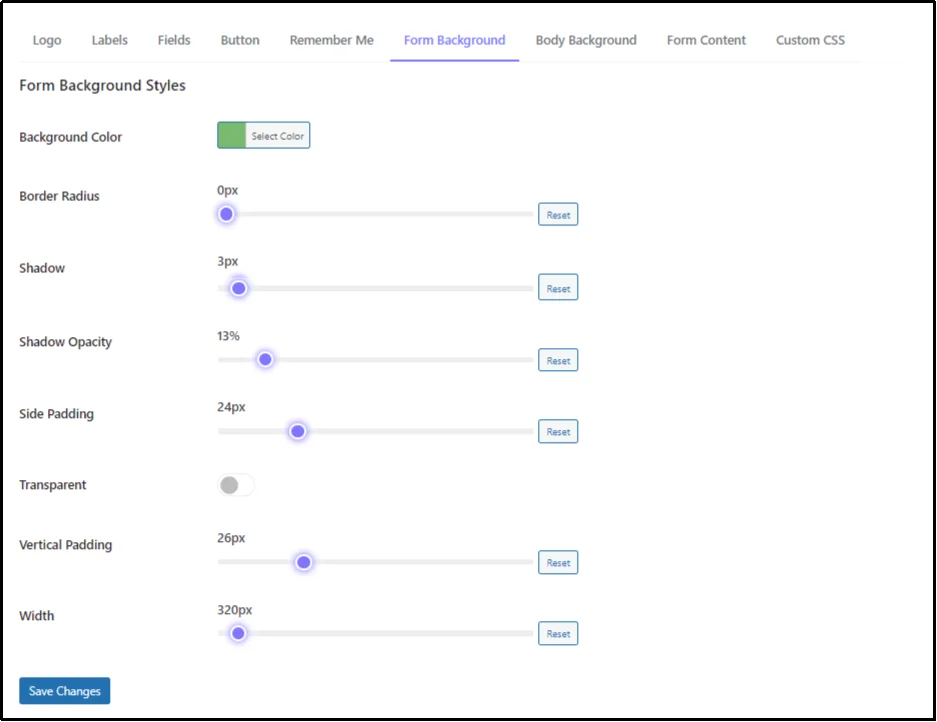
Once done, the form should look like this.
Want to make it transparent?
Just toggle on this button and click Save Changes.
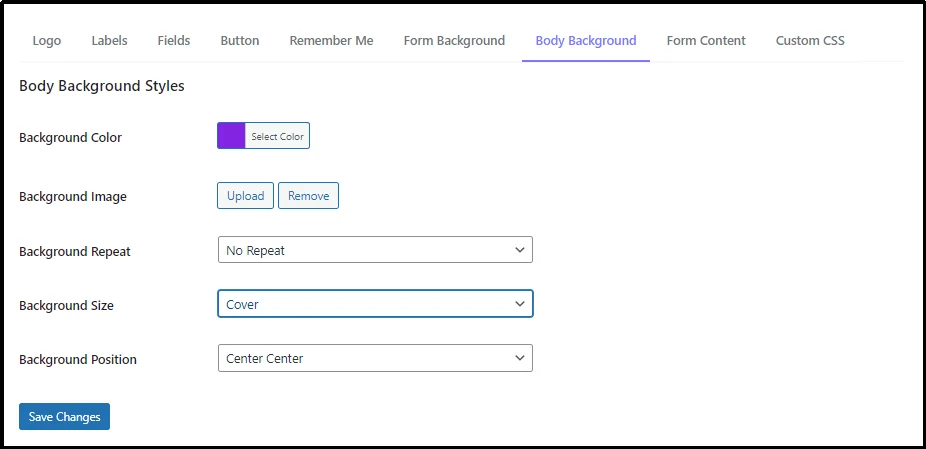
Body Background
This subtab possesses the option to customize the background behind the form. You can choose a solid color or add an aesthetic image that matches your brand’s aesthetics.
Simply select the color from the Background Color color picker or upload an image using the Upload button against the Background Image.
If you want the image to repeat, select repeat horizontally or vertically from the Background Repeat drop-down; similarly, choose the size from cover, auto, or contain.
Custom CSS
Last but not least, a very exciting feature that allows you to add anything you want. Unveiling the Custom CSS.
Let the customization begin. With custom CSS, the sky is your limit. Get creative and create a password-protected screen that you have always wanted!
Unlock These Features by Updating Your Plugin!
If you’re already enjoying the benefits of being a Password Protected Pro user, you can easily access these fantastic new features by updating to the latest version. If you haven’t joined us yet, no worries! You can quickly install the plugin from the WordPress directory and get started immediately.
After you install it, simply head over to the plugin’s settings, find the Get Pro tab, and click the Get Password Protected Pro button. You’ll be on your way in no time!
For further help, use our detailed technical documentation.
Thank you for choosing Password Protected. We respect your choice and work hard to bring exciting new features with every update!