Sometimes, you don’t want to open your entire WordPress site to the public, but you also don’t want the hassle of sending out a password every time someone needs access. That’s where bypass links come in.
A bypass link allows selected users to skip the password screen and land directly on the protected page. This is extremely useful for client projects, private resources, staff-only content, or any situation where quick access matters.
In this guide, we’ll walk through exactly how to create bypass links for the WordPress password protected pages. You’ll learn how to set them up, how they work, and how to manage different protection levels so you can keep your site private while still sharing specific content.
NOTE: In this guide, we will use the Password Protected plugin to create bypass links.
What is a Bypass Link in WordPress?
A Bypass Link is a special access link that lets users view a password-protected page in WordPress without having to type in the password. Instead of sharing the password itself, you simply send them the unique link, and it takes them straight to the content.
Think of it as a digital key; you control who gets it, how long it works, and how many times it can be used. This makes it perfect for situations like:
- Giving clients quick access to project updates.
- Sharing event details with a select group of people.
- Providing employees with private internal resources.
The main difference between a bypass link and standard password protection is convenience.
Normally, visitors need a password to access your site. With bypass links, only the people you choose get direct access, while the rest of your site stays private.
3 Easy Steps to Create Bypass Links for WordPress Password Protected Pages
As discussed, we will be using the Password Protected plugin. And the Bypass Links Creation feature is only available in the premium version of the plugin.
In the following steps, we will show you how to install and activate both (free + pro) versions of the plugin.
Let’s get started!
Step 1: Install the Password Protected Plugin (Free + Pro)
To create bypass links, you’ll need the free version of the Password Protected plugin, which provides site-wide password protection, and the pro version requires the free version.
Also, remember that the pro version unlocks more advanced features, including Bypass Links, password request forms, import/export options, detailed activity tracking, etc.
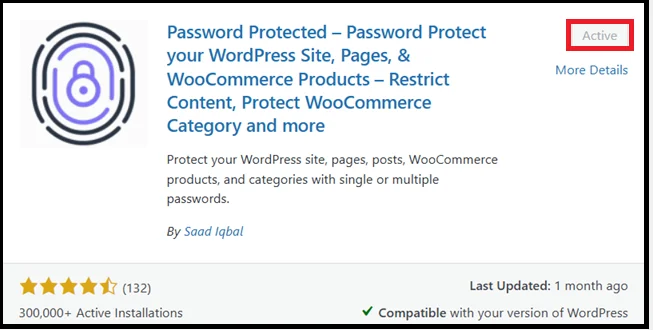
First, Install the Free Version
- Log in to your WordPress admin dashboard.
- Go to Plugins → Add Plugin.
- Search for Password Protected.
- Click Install Now, then Activate.
At this point, your site can be locked with a single password. However, the bypass links (and many other advanced features) are only available in Password Protected Pro.
Let’s Upgrade to Password Protected Pro
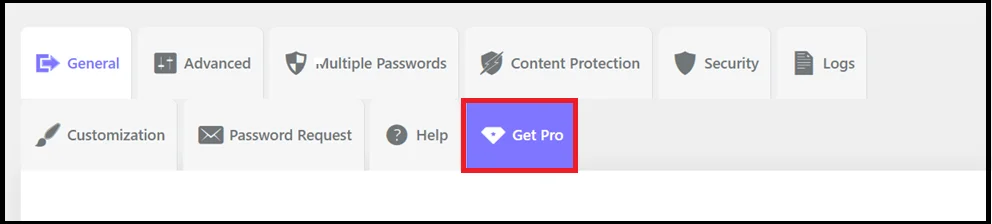
- From the plugin’s dashboard, click the Get Pro tab or visit the official Password Protected website.
- Purchase the Pro version. You’ll receive a .zip file of the plugin and a license key via welcome email.
- Back in WordPress, go to Plugins → Add Plugin → Upload Plugin.
- Upload the Pro .zip file, click Install Now, and then Activate.

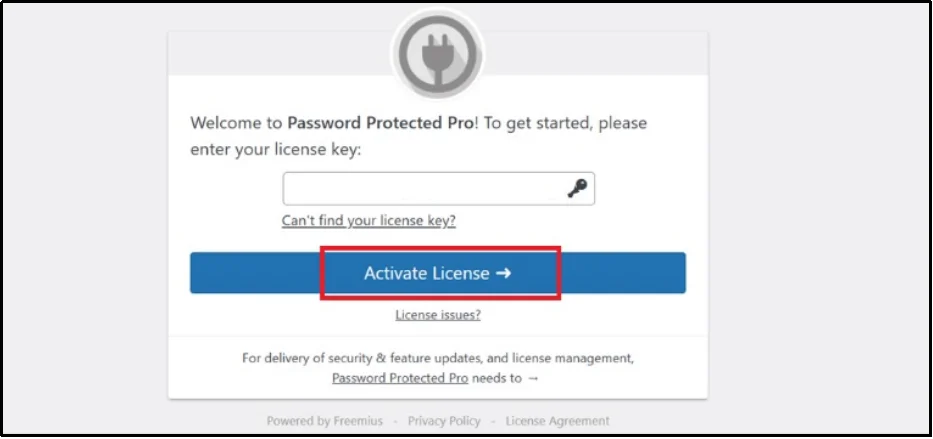
- Enter your license key under the plugin settings and click Activate License.
Once the license is active, you’ll see new Pro-only features in your dashboard, including the Bypass Link Creation option.
Step 2: Enable Protection for Individual Pages
Before you can create a bypass link, you first need to protect the specific page you want to share. This way, the page remains private for everyone else, but you’ll still have the option to generate a bypass link for that specific page.
Here’s how to enable page-level protection in Password Protected Pro:
- From your WordPress dashboard, go to Password Protected → Content Protection.
- In the top navigation, click on Post Type Protection.
- Enable protection for individual Pages (or Posts, if you prefer) and click Save Changes.

- Now go to Pages → All Pages and edit the page you want to protect.
- Scroll down to the Password Protected settings box.
- Enable Password Protection for that page and save your changes.

Once enabled, you will be able to set a password and generate a bypass link, which we will cover in the next step.
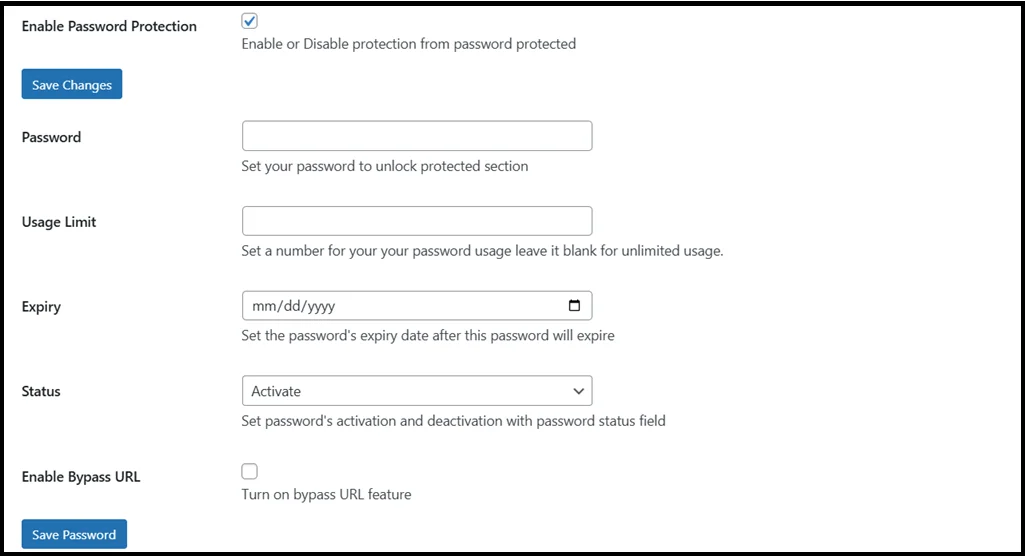
Step 3: Create a Bypass Link for a Page
After enabling password protection, new fields will appear on the page, which will allow you to create a bypass link for that page.
To create the bypass link, follow the steps below:
- In the Password field, type in your password.
- Next, configure the following options:
- Usage Limit – Restrict how many times the password can be used. Leave it blank for unlimited.
- Expiry Date – Add an expiration date so the password and bypass link automatically stop working after a certain time.
- Password Status – Choose whether it’s Active, Inactive, or Expired.
- Check the Enable Bypass URL option. The plugin will automatically generate a direct-access link.
- Click Save Password to confirm your settings.
After saving, you’ll see a table listing the password details along with the Bypass Link.

Now you have two ways to access the page:
- Normal Access – Users type the password on the page.
- Bypass Access – Users click the generated link and go straight to the content without entering a password.
This is especially handy when you want to share a private page with a client, team member, or event participant without giving them the main password.
How to Use a Bypass Link
Once you’ve created a bypass link, using it is straightforward. Simply copy the generated link from your dashboard and share it with the people who need access. When they click it, they’ll be taken straight to the protected page without seeing the password screen.
Here are some common ways to use bypass links effectively:
- Client Work: Share project files or status updates with clients privately.
- Events & Webinars: Send event details or registration confirmations to attendees without asking them to enter a password.
- Team Collaboration: Give employees or contractors access to internal resources or training materials.
- Private Downloads: Offer selected users exclusive access to downloadable content without publishing it publicly.
The best part is that you stay in control. Since you can set usage limits and expiry dates, you decide how long the link stays active. This makes bypass links both secure and convenient for sharing sensitive content.
Understanding Protection Levels in Password Protected Pro
The Password Protected Pro plugin gives you flexible control over how much of your site is protected. To use bypass links effectively, you need to understand how different protection levels work together.
Password Protected offers four levels of password protection, which are as follows:
- Site-Wide Protection: This is the broadest level. It locks your entire website behind a single password. Anyone who visits your site must enter the password before they can see anything.
- Global Protection: You can apply protection across all posts or all pages at once. For example, every blog post on your site can require a password, while leaving other parts of the site open.
- Category-Level Protection: Instead of locking everything, you can protect specific categories. This is useful if you only want to hide certain sections, like “Premium Content” or “Members-Only Articles.”
- Individual Page/Post Protection: This is the most precise level. You can lock a single page or post with its own password and create a bypass link for it.
How These Levels Work Together
When you have multiple levels of protection enabled, the plugin applies the highest level of protection first. For example:
- If your site is locked site-wide, users won’t need to re-enter passwords for individual pages.
- If you use global protection plus individual page protection, users only need to enter the password for the global level.
This layered approach gives you flexibility while keeping content secure. And with bypass links, you can selectively open access without weakening overall protection.
Pro Tips for Managing Bypass Links
Bypass links are powerful, but using them wisely keeps your site secure while still making access easy for the right people. Here are some best practices:
- Use Expiry Dates for Temporary Access: If you’re sharing a page for a limited time—like an event page or a client preview—set an expiry date. The link will automatically stop working after that date, so you don’t have to worry about old links floating around.
- Limit the Number of Uses: When you only want a bypass link to be used once or a handful of times, add a usage limit. This is ideal for single-client access or exclusive downloads.
- Keep Track of Active Links: The Pro plugin provides a clear status for every password and bypass link (Active, Inactive, or Expired). Regularly review these to ensure older links are no longer active than they should be.
- Combine with Site-Wide Protection for Extra Security: Even if your entire site is locked down, you can still use bypass links to give selected people instant access to individual pages without sharing the main site password.
- Update Links When Needed: If a link has been widely shared or you suspect it may no longer be private, deactivate it and create a new one. This keeps your protected content restricted to the right audience.
Start Creating Bypass Links with Password Protected Pro Today
Bypass links are the easiest way to share private content without handing out passwords over and over. With Password Protected Pro, you can protect your entire site or individual pages, then generate secure links that let trusted users skip the password screen.
Whether you’re working with clients, sharing event details, or offering members-only content, bypass links save time while keeping control in your hands. You decide who gets access, how long the link stays valid, and how many times it can be used.👉 If you’re ready to protect your WordPress site and share content smarter, get Password Protected Pro and start creating bypass links today.